There are many many many things I’ve learned about food photography over the past two years of blogging and if you’ve been following Green Healthy Cooking for that long you have most likely seen the food photography evolution yourself. Everything I learned so far I learned online by reading every food photography tips article I could find or watching videos with all sorts of food photography tips on Youtube and Food Blogger Pro.
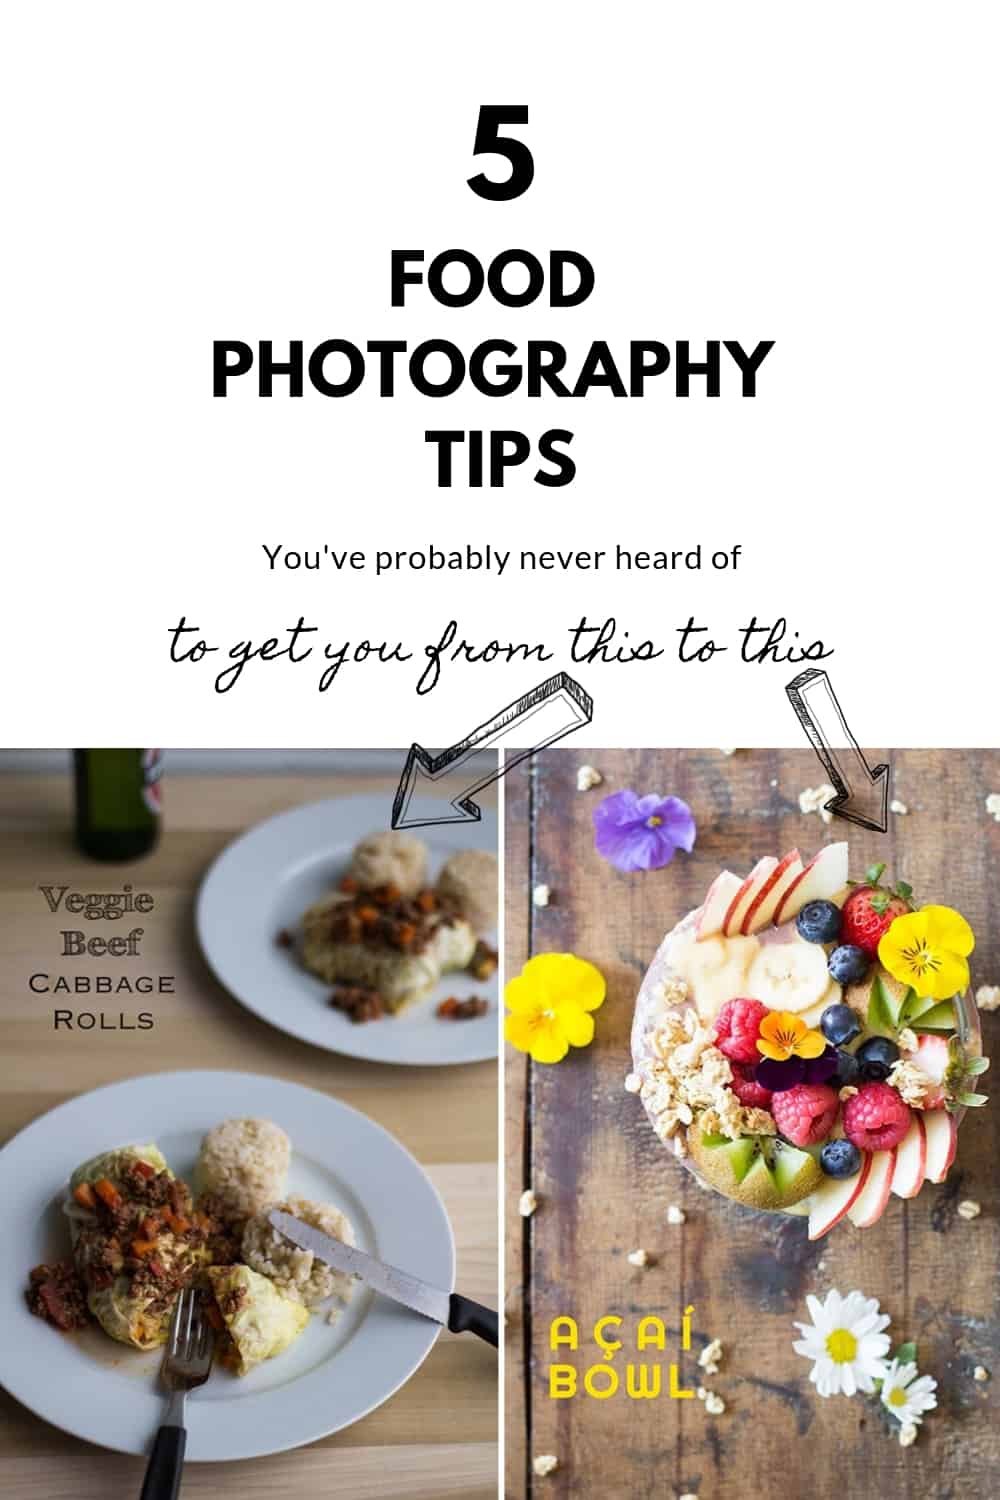
After all the reading and watching I kind of hit a wall. According to me, I was following all those tips and tricks I had read and seen on videos and my photos still looked….totally different than how I wanted them to look. I still posted my recipes thinking that in the end, it’s all about the recipe, not the photo. Now, even though yes, it IS all about the recipe….nobody will click over to your post and scroll all the way down to the recipe if the photo with which you are trying to attract readers does not look appealing!
There are a couple of things I had to kind of find out for myself through practice and comparison and I wish someone would have told me the 5 Food Photography Tips I’m about to give you. It would most likely have accelerated evolution.
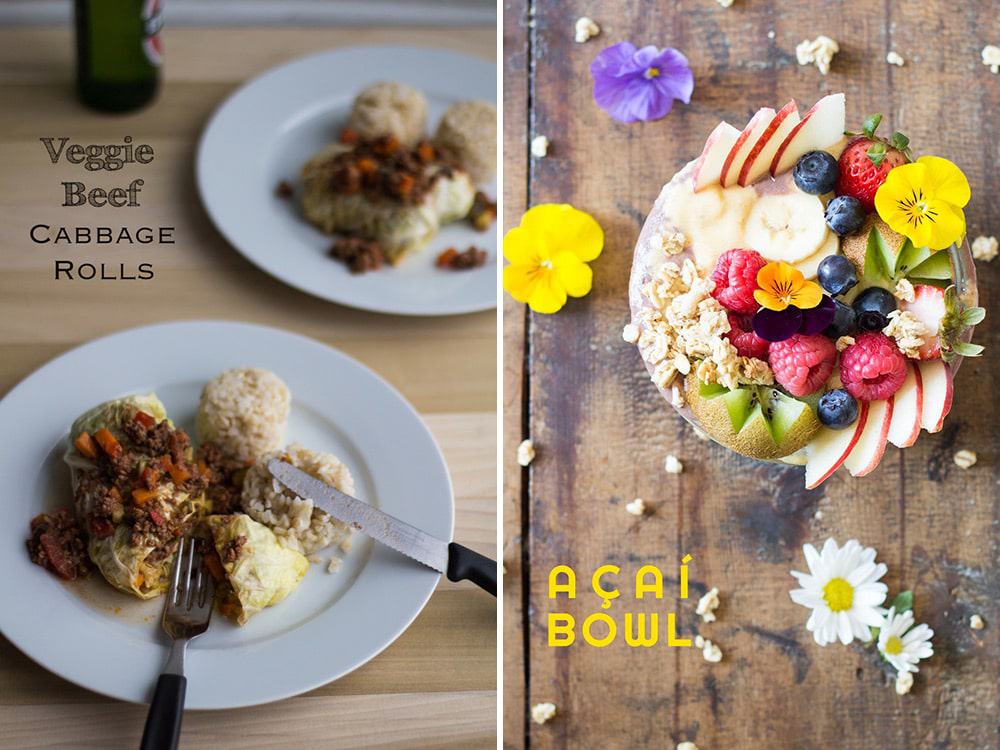
Here is a comparison of my first and one of my most recent photos and there is a world of a difference, don’t you think? The photo on the left is a perfect example of all the things you shouldn’t do! I didn’t apply any of the 5 tips I’m about to give you. Ok, so let’s get right down to it.
5 New Food Photography Tips
1. Get a White Balance Card Set for Color Balance
Every expert explains that the “white balance” in your food photo has to be perfect for the food to look natural and delicious. Many even explain how you can change the white balance in Lightroom or Photoshop but nobody seems to be able to really tell you what the white balance has to look like exactly.
For an untrained eye, it’s close to impossible to get it right in my honest opinion. It took me years to train my eyes to see that the white balance is off and it took me equally long to learn to move the Temp and Tint sliders in Lightroom in the right direction to get that perfect white balance. Even though this has become easier and easier for me over time, I still sometimes struggle, especially when it’s late at night and my eyes are simply tired.
Why spend hours upon hours trying to get the white balance correct if you can do one simple step while shooting to help you later when editing your photos? Use a white balance card set, shoot your first picture with the card set in the frame of the photo and then again another one without the card set in it. Move your camera angle, shoot a photo with card set and another without and you’re good. Afterward, you can use the 18% grey card as your “neutral” in Lightroom to automatically adjust to the correct white balance. Because it’ll be damn difficult to find a neutral grey tone in your food to place your dropper on and it won’t work on any other color.
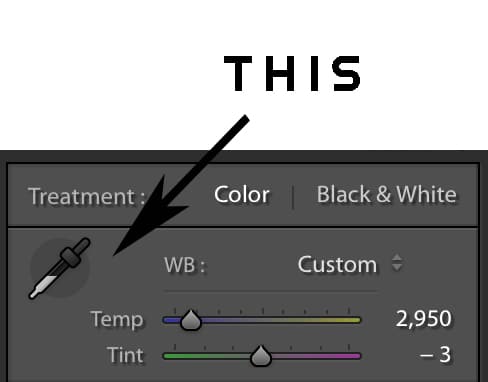
How do you ask? Simply click the White Balance Dropper and a dropper should appear instead of your mouse’s arrow and then click with that dropper on a focused part of the grey card and your white balance will instantly be corrected.
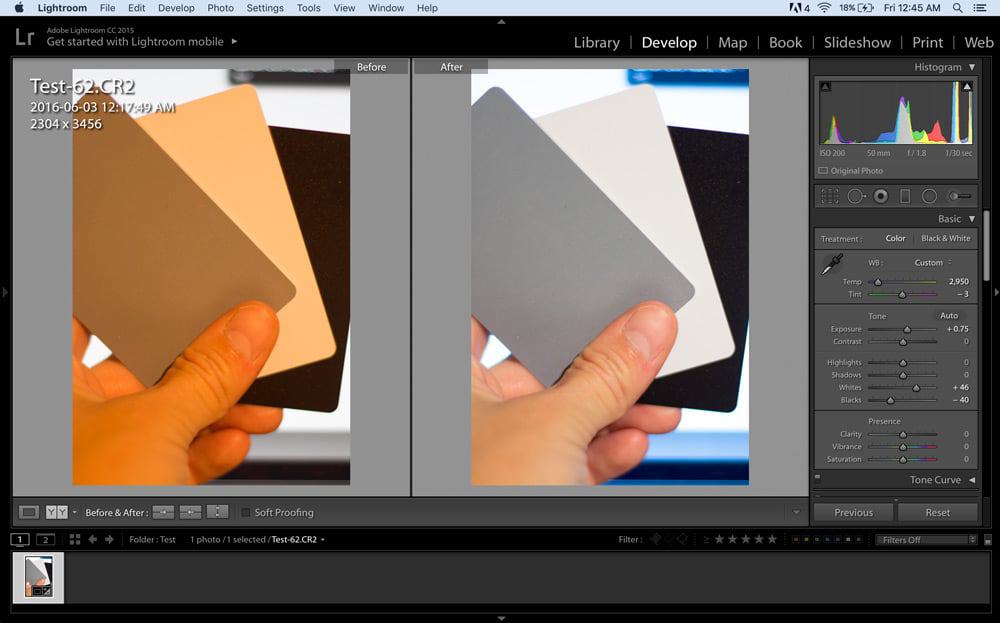
Here is an extreme example. I took a photo under terrible lighting conditions. The cards are lit from the back by my computer screen’s light and from the front from my candescent bulb living room lights on the ceiling. I took the photo with ISO 200, f/1.8 at 1/30 sec and did not adjust the white balance on my camera. I simply stayed in Auto White Balance Mode. Left original, right white balance and exposure corrected in Lightroom.
I have East facing windows only in my apartment so I shoot my food exclusively in the morning because that’s when I have the most light. The problem though is that morning light is very blue. My eyes are so used to the blue now that it looks normal to me. A grey card helps to put white balance into perspective. Here is an example of the before and after photo when you put that little dropper in the grey card:
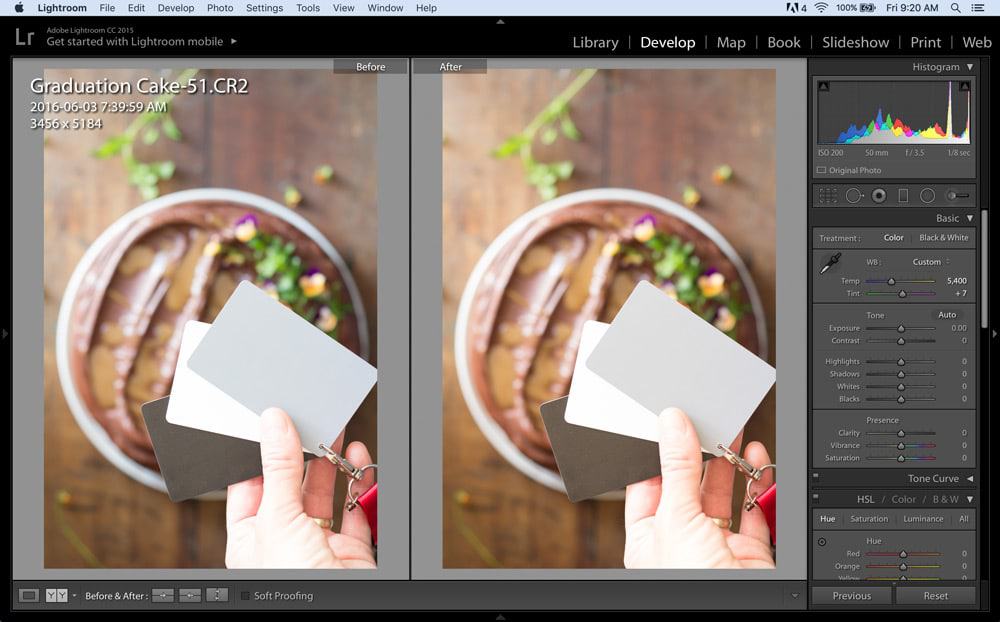
The original photos Temp was 4,850 and the Tint +3. The white balance adjusted one after clicking on the grey card with the dropper 5,400 and +7. Now I did one little mistake here, which you should avoid. My arm wasn’t long enough so I had the cards too high up in my photo. Place them closer to the subject you will photograph. The lighting is different further down. And in addition, my grey card is not completely in focus. Try to use a remote to release the shutter while your camera is on a tripod. That way you can hold the cards closer to the subject and they will most likely be much more in focus because you move less. Reasons to shoot with a tripod further down in the post.
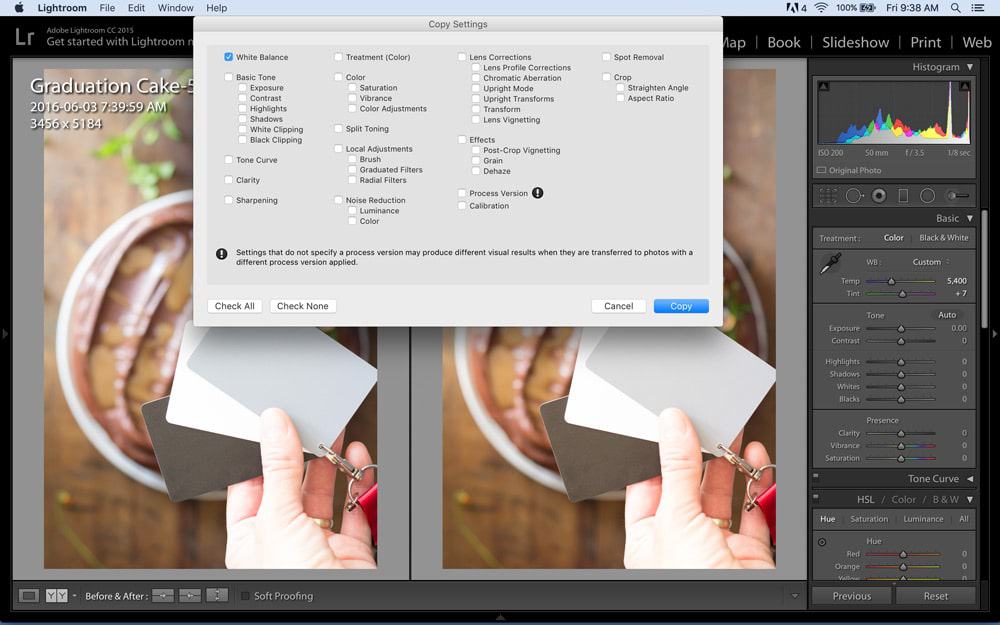
Not a big deal my mistakes though. The white balance corrected photo still gives me a good base to start my editing. First, I copy the white balance correction of this photo by clicking ⌘+C on a Mac or ctrl+C on a PC and then checking only “White Balance” to copy.
Go to the photo without the cards that you want to edit and press ⌘+V or ctrl+V to paste what you copied into your foto and tadaaa:
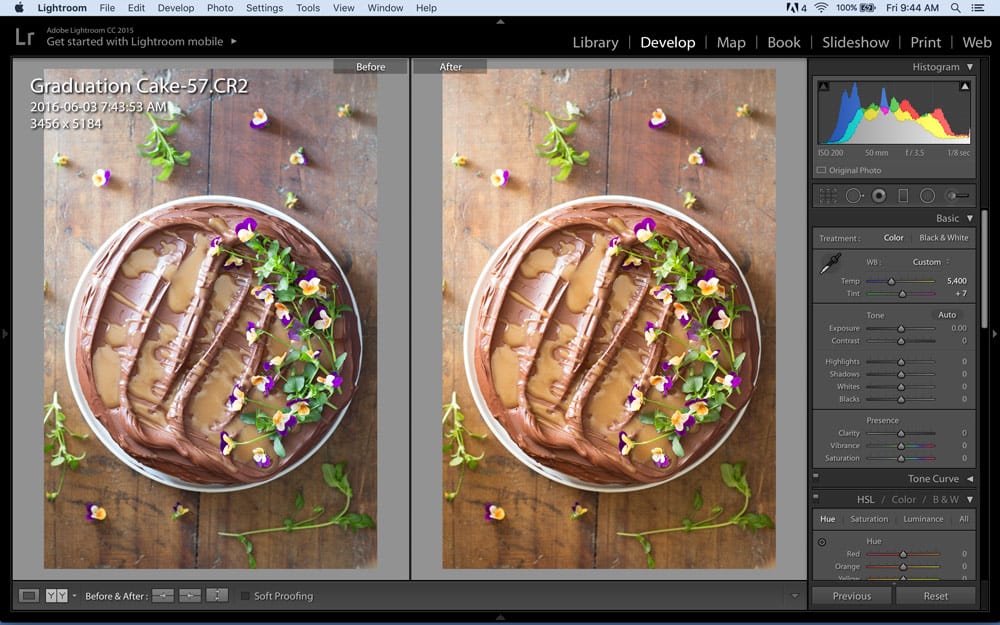
The original at first looked great to me but after the white balance adjustment now looks SUPER blue. Woah!!
Now, the adjusted one looks a bit too red and yellow for my liking and if I were to edit this photo for my blog I would reduce the Tint to a +5 and the Temp to a 5100 but I most likely would never have moved the Temp slider that far up in the first place if it wasn’t for my initial grey card white balance adjustment. And in a couple of months with even better-trained eyes, I would have felt my photo is waaay too blue ;)
Remember the “automatic” adjustment with the dropper simply gets you a more neutral base to start working. You don’t HAVE to leave it like this. Adjusting contrast and highlights and shadows will change the photo quite a bit and you may want to test around with those and then in the end fine tune to the white balance you like best. My photos are always more on the bluer side but because I like that. I think it’s pretty and in the end, photography is a little subjective. Not as subjective as many people think. A white balance that is completely off simply looks unprofessional. But a white balance slightly off is what defines your “style” I guess.
The best part about all of this? A Card Set is super cheap!! No need to buy anything expensive! Why not buy it right from the beginning and save yourself that headache of moving the Temp and Tint sliders up and down making your photo worse and worse instead of better! I wish I had known about those cards right from the beginning. This is the one I have and I love it!
2. Get a White Balance Card Set for Perfect Exposure
The same cards can help get the exposure right which I think is something most newbies (including me at first) struggle with a LOT! I remember thinking that if I want bight photos I just have to overexpose and if I want dark photos I have to underexpose. So wrong! You always have to “properly” expose your photos no matter if dark or light. The brightness in photos has to be achieved through light baseboards and backdrops and reflectors. The darkness in moody photos has to be achieved through dark baseboards and backdrops as well as dark cardboard all around creating shadows as desired. The exposure has to be “correct” none the less.
Ok, so I don’t know if this is the professional way to do it but this is how I do it. I take a photo with the 3 cards in the “scene” and then one without, just like for white balance. After adjusting white balance in Lightroom as explained above I adjust exposure to get a proper bright white card without getting too grey of a black card. I move the exposure slider and the white and black sliders and click on the little “Soft Proofing” box at the bottom to see if my white matches the white of the screen.
In the cake photo, the exposure was already quite good so the change would be minimal. We’re going to take the terrible lighting photo here because it’s an excellent example. Here is the terrible lighting foto adjusted for white balance with the white balance dropper in Lightroom as explained above (but without exposure correction):
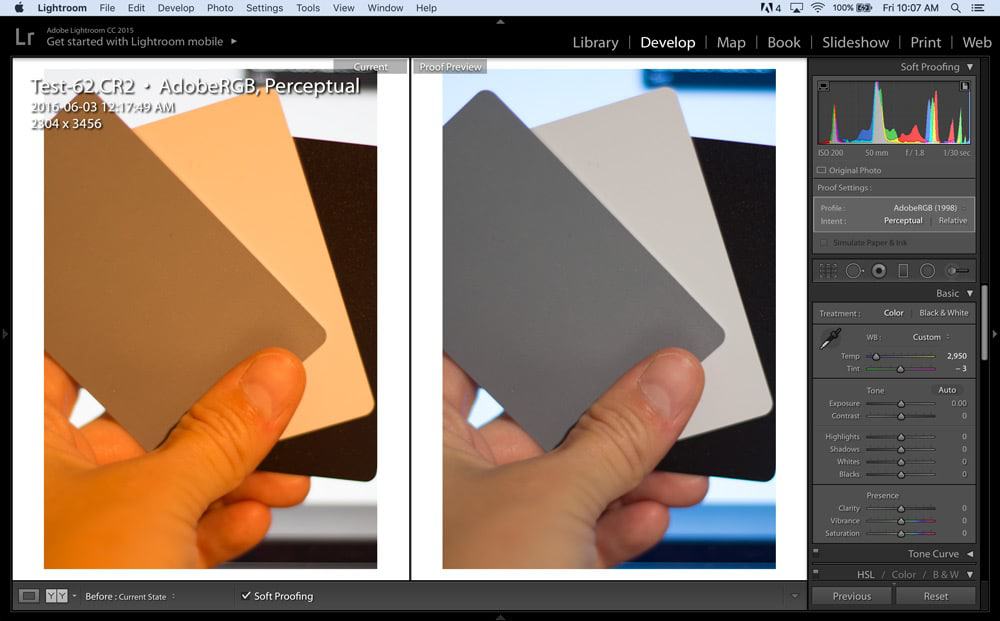
And here is the photo with adjusted exposure:
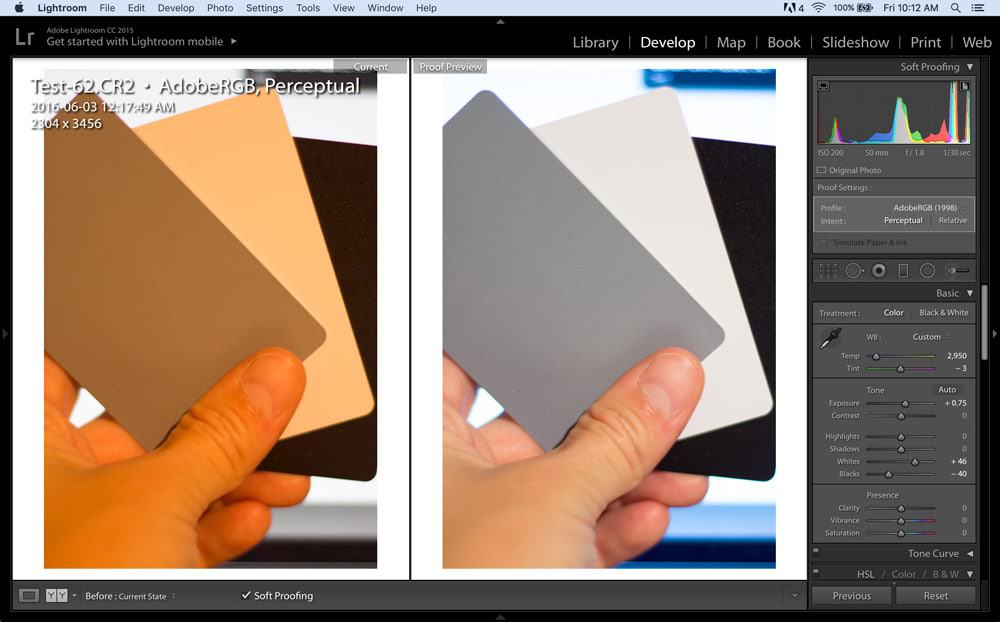
What I do is check that little “Soft Proofing” checkbox at the bottom in Lightroom to get a white background and then move the exposure, whites and blacks sliders up and down until the white looks like the white surrounding my photo. I take the white background of Lightroom as a reference to adjust the light in my photo to match that white.
Isn’t that amazing? It took me exactly 10 seconds to correct both the white balance and exposure. How’s that for an awesome little tool?
3. Avoid Awkward Angles
One other thing I used to do terribly wrong even though I had the theory lesson in the back of my mind was shoot from what Foodgawker loves to call “awkward angle”. I knew the theory as I said and you probably do, too. Shoot either top down, head on or at a 45 degree or less (never more) angle. Great but what exactly does that mean and how do I achieve that and why do I still get those “awkward angle” no-nos from Foodgawker when according to me I’m already doing all that? Well, to start with my top down photos weren’t really top down because since I wasn’t using a tripod I would tilt my camera a bit to the left or right and that would make my food look like it’ll fall off its surface to the left or right –>awkward. Or my 45-degree angle wasn’t really 45 degrees but rather 55 degrees and that made my food look like it’s going to slide down off the table right onto my lap or even onto my right thigh because I ALSO tilted my camera bit to the right as seen in this photo:
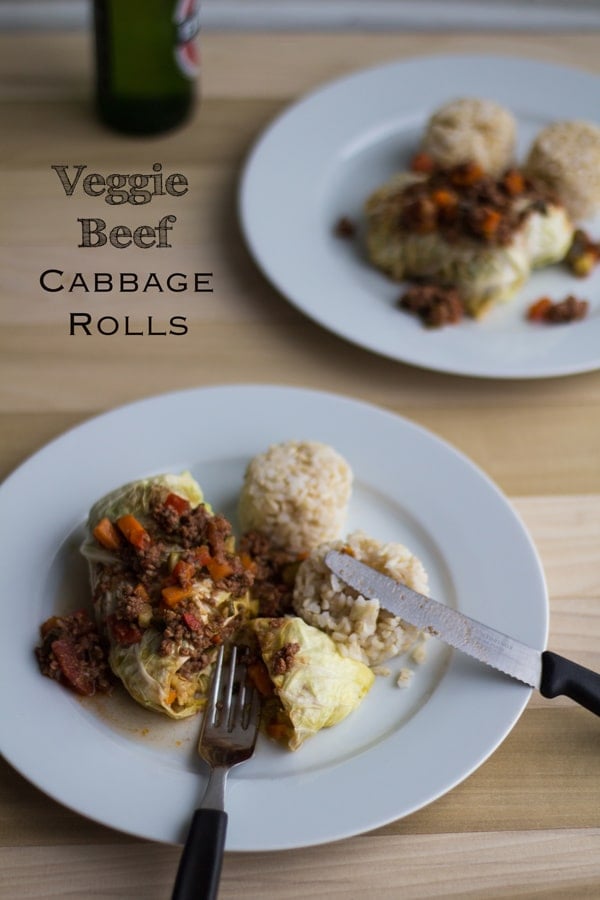
This is a way too high of an angle to shoot food. It’ll always look like it’s going to fall onto your lap. For the very first photos, I highly recommend to shoot top down and head on (if it’s a burger or stacked cookies or anything with hight). And shoot a couple at the supposed 45% angle and less to “practice” and “compare”. Shoot at what you believe is 45 degrees, 40 degrees, 35 degrees, and 30 degrees and then compare on the screen what looks best.
To avoid tilting your camera to the left or right you HAVE to use a tripod though. Using a tripod has not only that as an advantage but also that your photos will be IN FOCUS. Another very common mistake of newbies but that at least is covered in pretty much any food photography tips article out there. What I feel many don’t cover is that in order to get a photo that is in focus you have to have a very calm hand and the perfect camera settings to have a shutter speed that can compensate your hand’s movement. I feel this is so hard, especially at the beginning. With a tripod, you don’t have to worry about that and you don’t have to shoot 100 photos from the same angle praying for one to be in focus. 1 photo is more than enough. It will be in focus FOR SURE! This is the tripod I have. I’ve used it for 1.5 years now and I really like it but this
one is on my wish list together with a side arm
for when I have the money ;)
4. Use the color wheel to plan your recipes and style your dish
The same photo I’ve shown in point 3 gives an excellent example on which colors NOT to combine. Light brown with dark brown and brownish orange and brownish green don’t go well together. The food doesn’t look appealing at.all! Even after correcting white balance and exposure with my more trained eyes it still doesn’t look very appealing.
Combine complementary colors for better contrast in food photography. Complimentary colors are the colors that are opposite to one another. Red-Green, Orange-Blue, Yellow-Purple. Using complementary colors or at least colors far enough apart make your food pop!
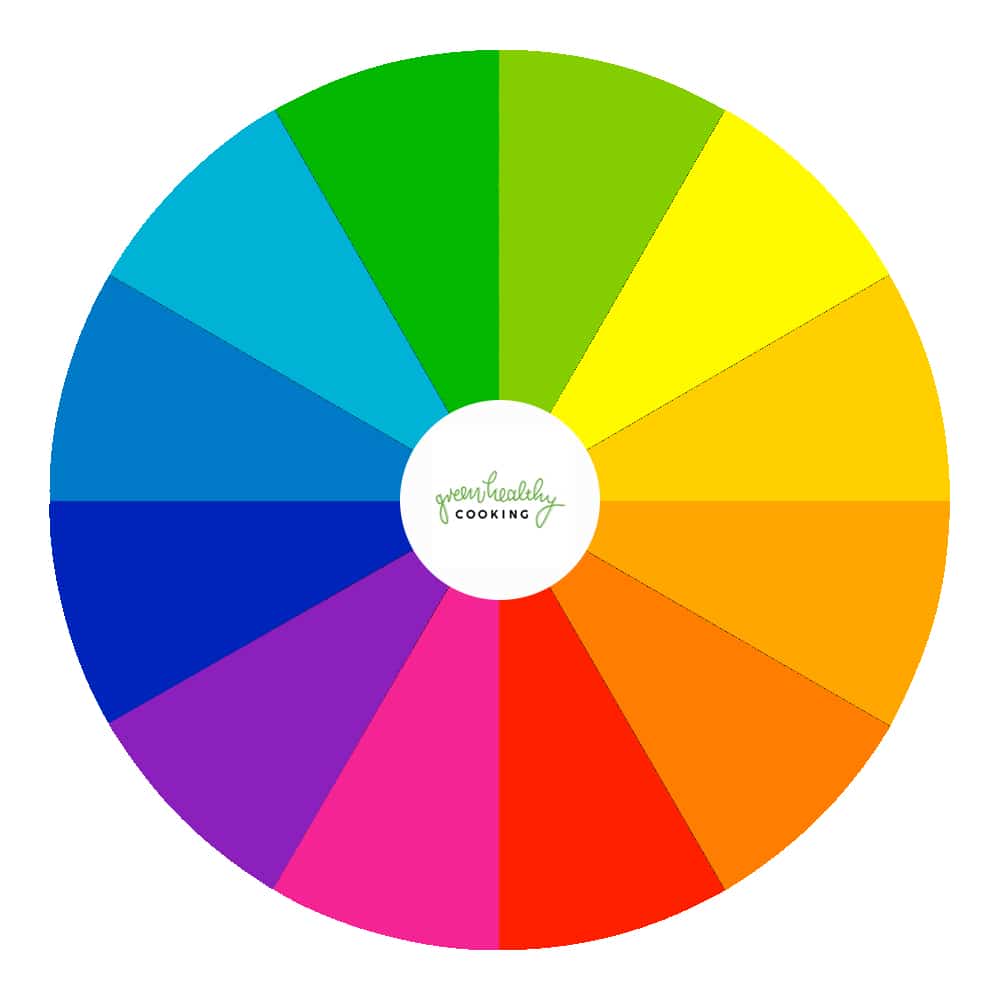
If I had considered the color wheel and color theory I wouldn’t have put some of the filling onto the cabbage roll. The cabbage once cooked looks yellowish/greenish and reddish/pinkish is the complementary color. I could have chosen some tomatoes on the side or top or some red chili. Besides, bright green garnishes pretty much ALWAYS look great on food. Fresh parsley or coriander chopped up and sprinkled on top would have looked great. The brown rice on the white table looks terrible. That served in a blue or turquoise little bowl on the side would have looked SO much nicer. Even just putting the rice on a salad leave to give it more contrast would have looked better than all I did up there.
Here is an example of when I used the color wheel before planning my recipe. I wanted to make a butternut squash soup. Soup doesn’t usually look very appealing. Orange soup is even worse. It looks like baby poop if you put it in a white bowl. After looking up what colors go with orange I learned that blue would give a great contrast and here you go:
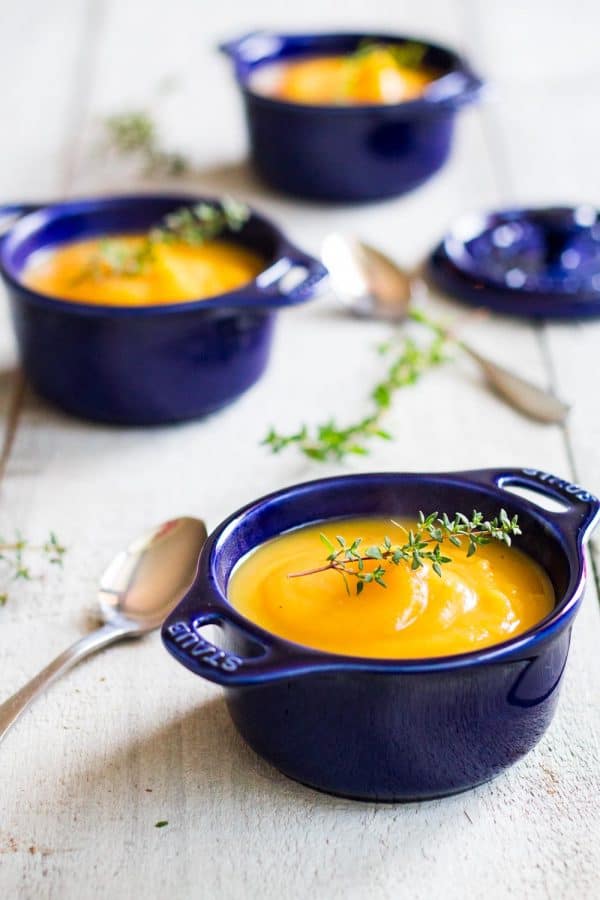
Doesn’t look like baby poop at all anymore, eh?
5. Practice Food Photography DAILY
Here is my simplest yet most important tip. Read a lot about food photography but most importantly PRACTICE DAILY! The more you practice and test around, the better you will get. Because you will remember all you read so much better. It won’t be just a theory at the back of your brain anymore but “experience“. If you post one recipe a week and only photograph food once a week it will take you 10 years to understand your camera and food photography.
You don’t have to post daily to improve your photography. You just have to photograph daily. Make it a routine. It could be the same dish such as your breakfast egg every morning or your afternoon apple snack every day. It doesn’t really matter. Practice, practice, practice.
Set up your scene, use boards to create shadows, soften your light by putting a thin curtain on your window, use reflectors to create highlights in all sorts of positions. Use different background boards. Practice your angles. Move around your ISO, Aperture and Shutter Speed into the most extreme directions. Purposefully overexpose and underexpose your photos to find a balance.
Learn which light needs which setting. Learn to shoot on cloudy days as well as super bright days. I used to think I had to plan my blogging around the weather forecast. However, how do daily bloggers that use only natural light do it? They learn to shoot on the darkest of days and brightest of days as if it made no difference because if you have a tripod it really doesn’t! You can still expose photos correctly. It’s all about practice!
Practice not only photography but also styling. Learn to cut vegetables in a beautiful way. Learn to arrange food in a beautiful way on your plate. This is one of the things we’re learning by doing applies. Get inspiration on Pinterest or Instagram but in the end, test and practice to find your own style.
Disclosure: This post may contain affiliate links, which means that if you click on one of the product links and end up buying it, I’ll receive a small commission. The price is the same for you, though! Thank you for your support.

 A gift from the universe
 The New Kitchen
 Ikea Tarva Bed Hack
tash mohring says
I just came across this article and YAY! I’m doing my 2nd ever solely food photography shoot this week to help out a community group who do wonderful things for our local community and this article has really helped me feel more confident about getting the results I want. So thank you! Now I’m off to go pack a few extra coloured dishes, herbs and tomatoes to help freshen up my scenes
.
Lorena says
I’m so glad it was helpful Tash!! Tag me in your photos so I can see :D