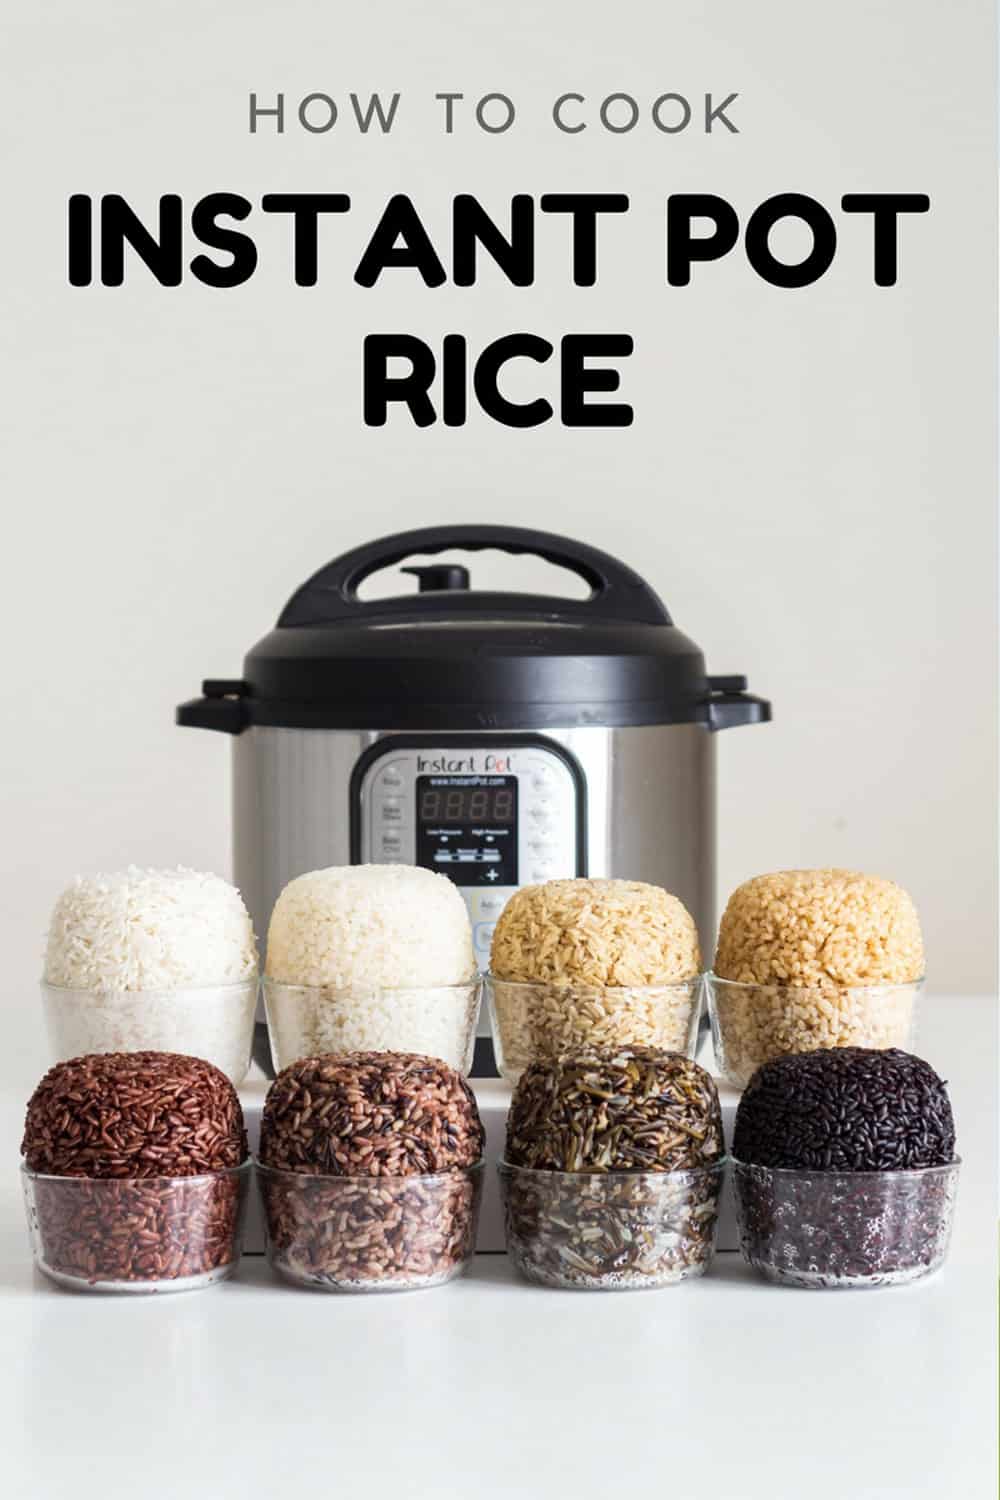
After weeks of experimenting, I got it right. Here is your fail-proof guide for Instant Pot Rice. White rice, brown rice, wild rice, and many more, basically an encyclopedia about cooking rice in a pressure cooker.
If you’ve followed along for a while, you know I’m a huuuuge fan of pressure cooking. My Instant Pot Chicken and Rice recipe is not only a hit at my house but thousands of others now, too. YAY!
What Is The Best Rice To Water Ratio?
You’ll be surprised but it is always and for ALL sorts 1:1. Yes, you read that right.
Instant Pot Rice calls for a 1:1 rice to water ratio
You wonder why on the stove different ratios are called for. Well, the secret to rice cooking is that the darker or wilder the rice the longer it needs to cook and the longer something needs to cook, the more water evaporates during the process.
This leads us to the conclusion, that different kinds of rice do not necessarily need different kinds of amounts of water to “cook” but rather more water to evaporate.
Since the Instant Pot gives a tight seal and high pressure, no water evaporates at all.
So yes, brown rice and even wild rice need the exact same amount of water as white rice in an evaporation-proof environment. *mind-blown*
What If My Rice Is Too Hard With a 1:1 Ratio?
If your rice is hard or uncooked that doesn’t mean next time it needs more water, that means, next time it needs more TIME. Did you wait for FULL natural pressure release?
Unfortunately, you cannot “save” undercooked rice in the Instant Pot as putting the lid back on and turning the pot back on just leads to the dreaded burn warning. I recommend adding the undercooked rice to a soup or stew maybe 5 minutes before it’s done simmering.
What If My Rice Is Too Mushy?
You most likely used too much water. 1:1 water to rice ratio is essential for all rice types.
Use the exact same container to measure both rice and water. Some cups are standard American (236ml), others are metric (250ml) and the little plastic cup that comes with the Instant Pot is neither (160ml). So do not use different measuring cups to measure rice and water.
Does 1:1 Apply For 1 Cup Just As It Does For 4 Cups?
YES! When making Instant Pot Rice you need 1 cup of water for every cup of rice, regardless of if you cook just 1 cup or 4 cups.
This is different when you cook rice on the stovetop where evaporation happens. The more rice you cook the less water you need when using a regular pot on the stove.
How Many Cups Of Rice Can You Cook In An Instant Pot?
In theory: 2.5 cups in a 3-quart Instant Pot. 5 cups in a 6 quart Instant Pot. 6.5 cups in an 8-quart Instant Pot.
This is US standard measuring cups and raw dry rice.
So the mathematical thought for the theory is the following:
- 1 cup of raw white rice gives on average 3 cups cooked rice.
- Instant Pots should not be filled more than 2/3 of its full capacity at any time. So we have to take the expanded rice into consideration.
- A 6-quart Instant Pot’s capacity is 24 cups and two-thirds of that are 16 cups.
- There should not be more than 16 cups cooked rice in the Instant Pot and since 1 cup raw makes 3 cups cooked we have to divide the 16 by 3. That makes 5.3 cups.
The calculation is only theory though. I have not tried that many cups in my own 6-quart. 4 cups raw dry rice are the maximum I have cooked myself without any issues and with perfect results.
Natural Pressure Release (NPR) vs. Quick Pressure Release (QR)
What’s better? Hands down, no doubt >> natural pressure release. If you cook rice longer so you can do quick pressure release, with the hope to have the rice cooked faster overall, it gets sticky and mushy.
If you want fluffy rice, I encourage you to be patient and wait for natural pressure release. I timed all rice and there doesn’t seem to be any rhyme or reason to the timing. Even the same kind of rice in the same amount has had different natural pressure release times.
What Is The Rice Button For?
The rice button was designed only for white rice (regular long-grain, Jasmine, or Basmati rice). It works fine with those types of rice. The shorter high-pressure cooking times with natural pressure release work better though in my opinion.
Also, the Rice Button does not work for any other type of rice but white rice.
Do I Have To Rinse Rice Before Cooking?
Opinions vary widely and there seems to be no right or wrong answer. It’s all up to personal preference. However, thankfully it is irrelevant for the cooking times presented.
Both rinsed and dry rice work with my cooking times and method. Nothing has to be adjusted or changed either way. Just make sure you drain your rice well in a fine mesh strainer if you rinse it. Then use 1:1 ratio.
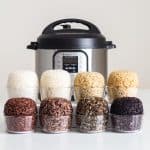
Instant Pot Rice Cooking Times
Now let’s get to the individual kinds of rice:
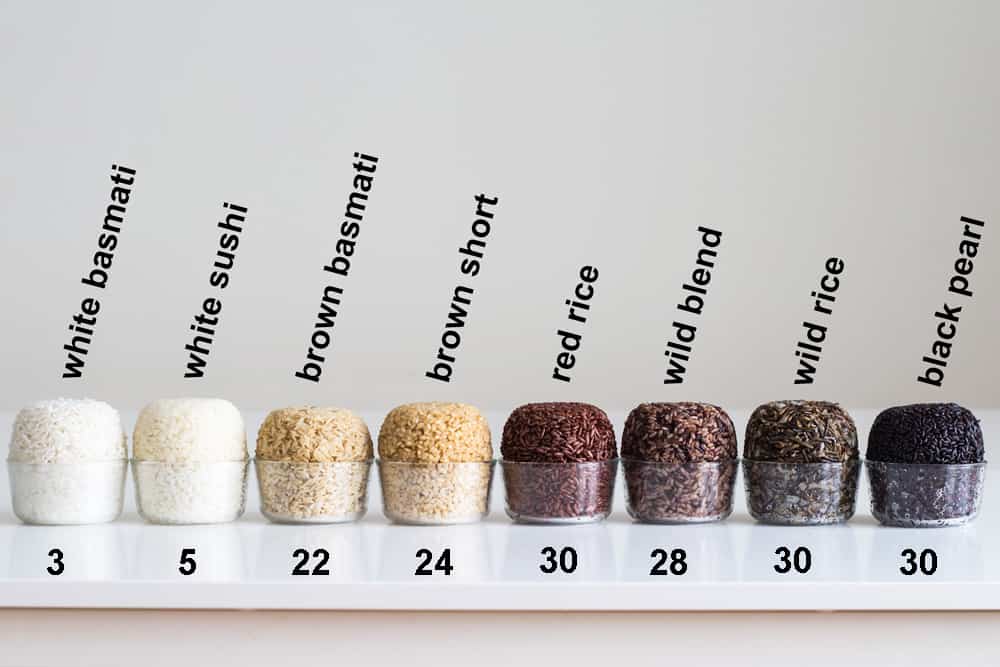
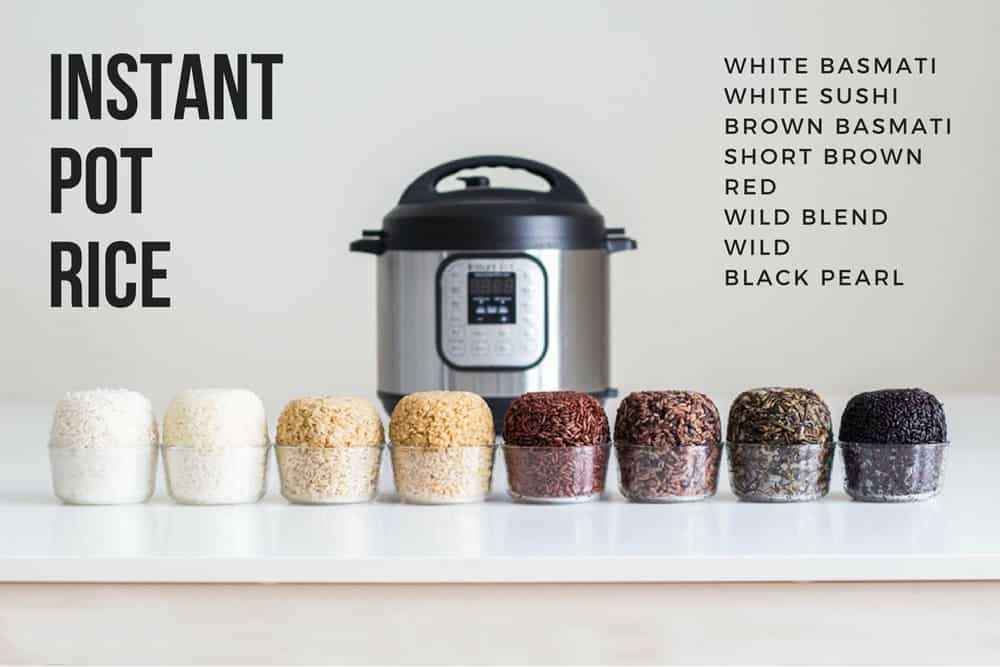
White Rice
I’ve tried both Basmati and Jasmin and both cook in the exact same time, 3 minutes high pressure + NPR. The thicker regular long-grain white rice cooks better with 4 minutes high pressure + NPR.
Brown Rice
I’ve experimented with Basmati brown rice and with short grain brown rice and the Basmati cooked faster than the short grain. From all my experiments it seems like the thicker the individual grains, the longer they need. With the exception of wild rice, that one needs long regardless of being a skinny dude. 22 minutes high pressure + NPR for the thin Basmati and 24 minutes for the thick short grain.
Wild Rice
Some people swear the grain HAS to burst open, others swear, it’s best when “just about to burst” and others like it completely unburst. Guess what, you can achieve any consistency you like when you cook Instant Pot Wild Rice. Here are the times for whole unbroken wild rice: 28 minutes (unburst), 30 minutes (some burst some unburst), 32 minutes (burst).
Red Rice and Black Rice
Red rice and black rice is pretty thick and needs quite some time to break down so give it tiiime. It’s round and thick and it takes quite a bit for it to absorb all the water. It’s like a new towel that needs time to get soaking wet ;) 30 minutes high pressure + NPR.
Sushi Rice
I was actually pretty sure this would take just as long as regular white rice but surprise surprise. It’s not as sticky if you cook it or only 3 minutes and this is the only rice you really want to be sticky, right? So increasing the cooking time actually made it stickier and better to work with for sushi. Cooke it 5 minutes on high pressure + NPR.
Wild Rice Blend
Soooo, this one is the trickiest because it has several different kinds of rice that individually cook in different times. I found it cooks best in an in-between time. The wild rice in the mix will be completely unburst but the brown rice won’t be all mushy. Usually, that’ll be 28 minutes high-pressure + NPR. Of course, it will depend widely on what grains exactly are in your blend.
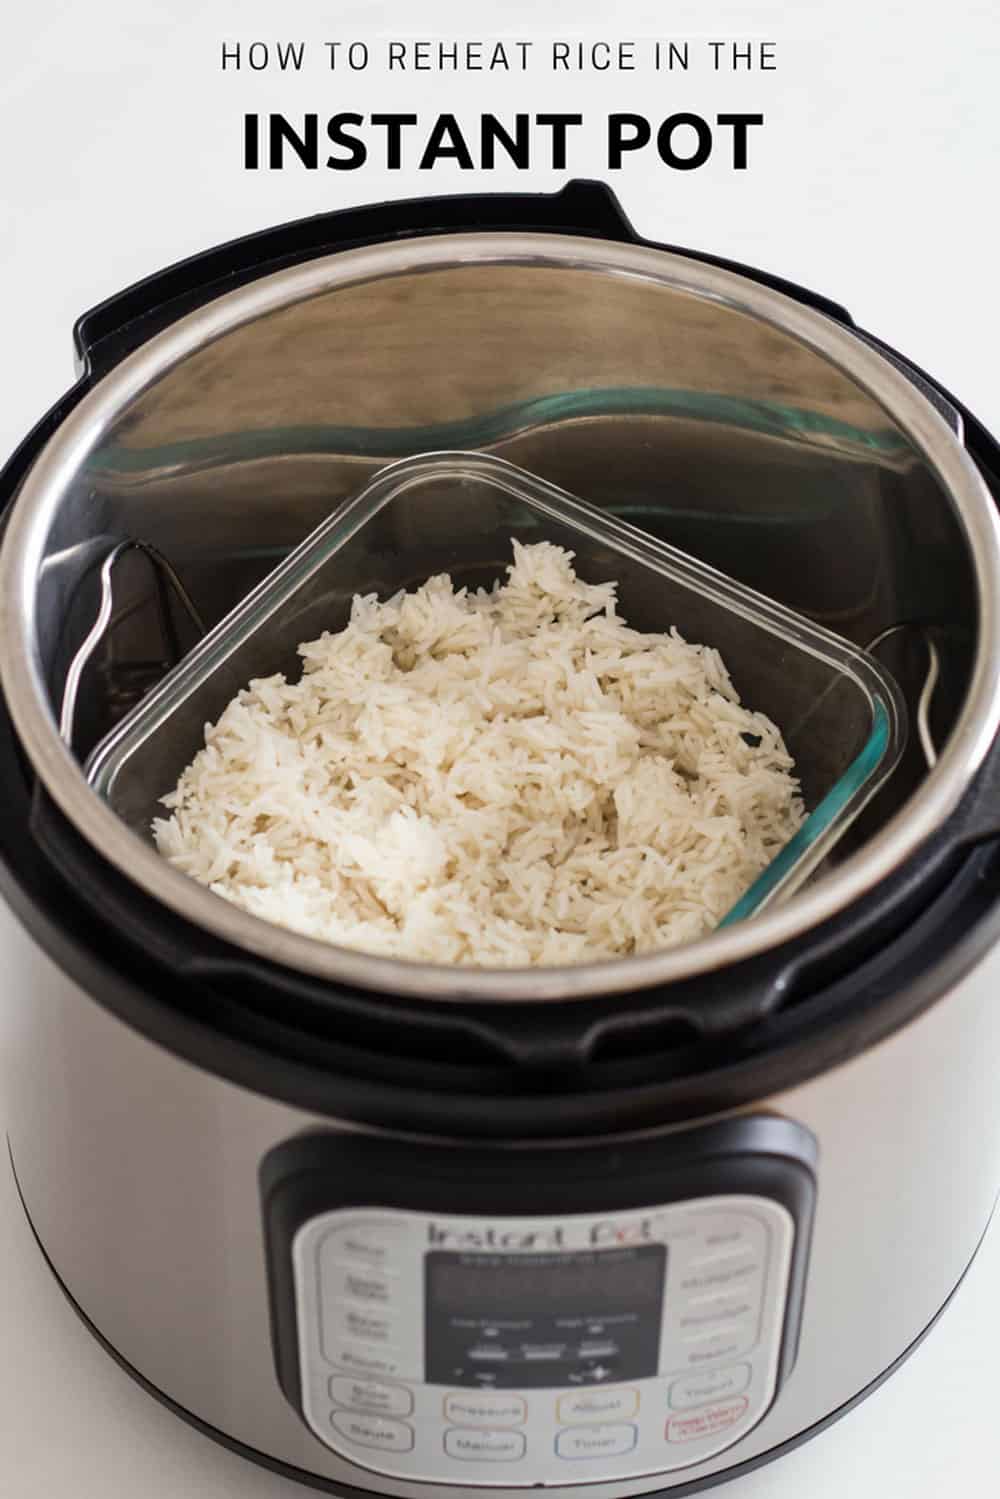
How to Reheat Rice in the Instant Pot
So, I’ve seen a couple of people recommend adding water or oil and stir it in the inner pot and pretty much making a mess, haha.
Um, not my favorite method.
I like things simple. I basically want the same convenience as a microwave but without the waves.
I store my leftover rice in a heat-proof glass container and then place the trivet in the Instant Pot, add a cup of water and place the rice uncovered on the trivet. Put the lid on, knob to sealing and press steam for 5 minutes. Quick pressure release, done!
So here you have it. The longest post in the history of Green Healthy Cooking.
Burn Warning Trouble Shooting
The wicked burn warning, it’s the Instant Pot user’s nemesis! For starters, some Instant Pots are a lot more temperamental than others. You most likely did nothing wrong, however, you are dealing with what we could compare with a toddler with a temper tantrum.
If your Instant Pot is generally one to scream “burn” easily and quickly I recommend you stay close in the beginning phase while it gets the water boiling and trying to get to pressure. When the pot is trying to push up the safety pin but seems to not be able to, that’s the critical moment. Push down on the handle of the lid a little to help it get to pressure.
If the pot tries and tries to get to pressure but can’t too much water evaporates through the valve and thus leaves too little inside the pot and the rice starts to burn.
If even with a little push on the lid, it cannot get to pressure, the sealing ring might not be positioned properly inside the lid. You will have to abort the mission and start over, making sure the sealing ring is still in great condition and placed correctly.
If the Instant Pot was able to pressure cook for most of the time and only showed the burn warning at the end of the cooking time, then just unplug it and wait for natural pressure release. Often times it still manages to cook the rice and just a tiny corner got burnt.
Instant Pot Rice
Equipment
- Pressure Cooker
Ingredients
- 1 cup rice - (Basmati white, Jasmin white, Basmati brown, short-grain brown, red, black, wild, wild blend, sushi)
- 1 cup water
- 1/2 tsp sea salt
Instructions
- Add all ingredients into the Instant Pot. You can double, triple or quadruple all ingredients in same amounts.
- Make sure sealing ring is placed properly in lid, add lid, turn shut and turn knob to sealing position.
- Cook on high pressure for the number of minutes instructed below depending on the type of rice:White Rice (Basmati or Jasmin): 3 minutesWhite Sushi Rice: 5 minutesBrown Rice (Basmati): 22 minutesShort Grain Brown Rice: 24 minutesRed Rice: 30 minutesWild Rice Blend: 28 minutesWild Rice: 30 minutesBlack Pearl Rice: 30 minutes
- Natural Pressure Release until pin drops. Takes on average 9-12 minutes (max. 18 minutes for 1 cup and max 30 mins for 4 cups).
- Remove all rice from pot immediately to avoid it sticking to the bottom. If needing to keep warm, leave rice in pot after natural pressure release without opening the lid to avoid steam being released and drying out the rice > making it stick to the bottom.
Notes
- I use a US standard cup. 236ml in volume.
- I, personally, do NOT rinse or wash my rice.
- Cooking time stays the same no matter how many cups you cook.
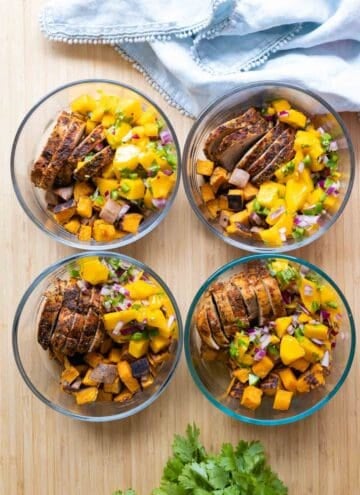 Pork Mango Meal Prep Bowls
 Stuffed Spaghetti Squash
 Winter Salad with Sage Vinaigrette
Lisa says
Do you have a jambalaya recipe for the IP?
Lorena says
No Lisa, I’m sorry. I didn’t even know what that is, haha. Had to google it. Looks really delicious.
Alice says
Well this was a 2-fer post for me! Rice & reheating tips. My wild rice came out beautifully per your instructions, and then I also tried using the steam function to re heat for the 1st time. Wow. Sometimes the microwave over does when I use it to reheat, nice to have another option on hand. Thank you so much for all the information!
Lorena says
You are very very welcome Alice and I’m so so happy both worked so well for you :D
Joni Anderson says
This is WONDERFUL! Thank you for all this labor. I have copied all this down and placed in a sheet protector and am keeping it in my kitchen drawer so I can fix rice in a moment without having to google cooking time. Thank you!
Lorena says
YAY!!! I’m so happy it was useful to you Joni :D
Barbara Schieving says
Lots of great info!
Lorena says
Thank you Barbara :)
Lara says
Awesome info. Generally cook long grain white rice, but have a love/hate relationship as sometimes it’s fabulous & sometimes it’s terrible. The video from Dan explained a lot, I’m going to give the instapot a try to get it right.
Lorena says
Awesome Lara, I’m confident you will be successful every time now :)
Dorothy and Bob Fletcher says
I am new at this.
Do you cook the rice on MANUAL for 8 minutes?
Lorena says
I’m confused. I didn’t cook any rice for 8 minutes but I cook all on Manual, yes.
Jeanne says
Do you leave the IP on or off during MR or does It matter?
Jeanne says
*NR
Lorena says
I leave it on. To be honest I never even thought of turning it off. I have no idea if it turns out differently with the pot off.
Alice Bryan says
Thank you for this! I just ruined a whole meal last week because my brown rice was crunchy but I didn’t realize it until we’d already mixed it. I used the rice button which obviously was NOT the right option.
Lorena says
You are very welcome :D I hope you like how the rice turns out with my method :)
Wendy says
Great photo, and awesome advice.
I love Uncle Ben’s Converted Rice. Is that a par=boiled rice? Anyway, I usually do it in the oven, adding butter and salt and baking for approximately 45 minutes at a 1:1.5 ratio. It comes out perfect after about 45 minutes. Just wondering how I can convert this to the IP?
Or is this on your list for an additional experiment?
TIA!
Lorena says
Unfortunately, I don’t seem to be able to get parboiled rice here in Montreal. I’ve heard so much about it. If I ever get my hands on it I’ll make sure to test. May I ask why I got a 4-star rating from you? Have you tried my method and it didn’t work the way you like it?
Leslie says
If you use par boiled rice you can use the rice button
Have discovered that that is the only rice that it cooks on rice buttons the rest is all manual and you have to manually time , par boiled rice is marked on the package.
I have not tried it myself.
Hope this helps.
Lorena says
Great! Thanks for the info :)
Laura says
If you have any luck with Uncle Ben’s please share. That is the only kind some of my picky eaters will eat
Lorena says
Sorry Laura, I’ve never cooked this brand of rice before. What does the packaging say? If it says to cook white rice for 15-20 minutes you should be able to cook it in the IP just like you do regular white Basmati or Jasmin rice. 3 minutes HP + NPR
Brittany says
Thank you!! I made white rice by your method and it turned out perfect! My pot (the ultra) has a rice button but when I used it and the amount of water specified in the instruction booklet, my rice all stuck to the bottom but was also crunchy on top. Your method turned out great. Thank you for sharing!
Lorena says
Yay!!! I’m so happy it worked for you and you like it :D :D :D
Donna C says
Wow!!! Looooove that photo!!! ;) (but seriously it’s suocool! :))
Thanks for this post, it’s so well done!
May I ask…when you say “cup”, does that mean a standard measuring cup, or the little one that comes with the IP?
Thanks again!
Lorena says
Thank you so much for your kind words and for appreciating my work Donna :D I refer to US Standard Cups of 236ml volume.
Maggie says
I’m very curious there are really two different kinds of measuring cups there is the liquid glass measuring cups or the plastic ones ( which I was always taught that this was for dry ingredients only )that most of us on which one did you use ?
Lorena says
Hey Maggie, it doesn’t matter. The only thing that matters is the volume. Use either US Standard with 236ml volume or Metric with 250ml volume. The important thing here is not the size of the cup but the 1:1 ratio and the minimum volume for your specific model of Instant Pot to come to pressure. Use a coffee cup if you like and just to make sure you have enough volume fill it twice with rice and then fill that same cup twice with water so you have the exact same volume of water to rice :)
Heidi says
I generally batch-cook brown basmati to use throughout the week, but have not been brave enough to make a big batch in the IP because I practice Rapid Fermentation (as presented by the Kitchen Stewardship blog), and wasn’t sure how much the cooking time would be affected by a long soak. It’s actually been a long time since I made rice in my (now-defunct) rice cooker. I think what I used to do for soaked brown rice was to cook it on the white rice setting, but I could be wrong about that. Has anyone else cooked soaked rice in the IP, and learned what adjustments (if any) to make to the timing?
Cheryl Norman says
I soak my brown rice and then cook it in the Instant Pot using the rice setting. Soaking an hour reduces cooking time.
Lorena says
Sorry, no help here. Have never experimented with soaked rice.
Suze says
Many sites say to rinse rice. This article distinguishes between imported and domestic.
http://www.washingtonpost.com/wp-dyn/content/article/2008/10/21/AR2008102102172.html
Lorena says
If you like your rice better rinsed don’t stop rinsing it. You have to do whatever you like better. I prefer the texture of unrinsed rice. I’m not concerned about any residue of anything even with imported rice. I live a risky life, hahaha
May I ask why I got a 4-star rating? Have you tried my method and it didn’t turn out as expected?
Helen says
I always saute my rice for a few minutes first before cooking. Never sticky.
Lorena says
YES!!! I love sautéeing mine with minced garlic in a little oil. It’s so yummy! But that’s all “extra” stuff to give extra flavor. The basic recipe doesn’t change (1:1, HP, NPR)
Debby says
I do this also. I was taught this method by a woman from Afganistan. Her rice is always amazing.
Sue says
This is just me sharing my experience: I have a rice cooker that I’ve used for years before I got an IP, so I rarely use the IP for rice lol! Habits…
In terms of time I think the rice cooker is equal
If not faster than IP for rice, but yes it’s another large gadget in the kitchen! Takes about 20-30 mins for any rice…
But I love this post and will prob start using IP to experiment!
Lorena says
If you love your rice cooker and the IP doesn’t give you the same results and you do have the space, keep both. For me that’s IP and slow cooker for example. I like my crockpot slow-cooker better than the slow-cook function on the IP. However I like IP rice just as much as rice cooker rice so for me there is no need for a rice cooker. I’ve heard from many others though that they gave their slow-cooker the bootie. It’s all about personal preference :)
Joel says
I use lundberg short grain brown rice. When cooking in my Instant pot, it always comes out very sticky. It doesn’t matter if I am usine 1 to 1 water ratio or 1 to 1.25 water ratio. I tried different cooking times and doesn’t seem to matter. I have tried rinsing and not rinsing. Any thoughts on this? Does letting the steam naturally release make a big difference. I love my instant pot, but one of the reasons I got it was to cook rice.
Lorena says
I use Lundberg short grain, too and get individual grains. Yes, the natural pressure release is what makes all the difference. Try it!!
Cat says
Hi,
I use Lundberg short grain brown rice as well. The first time I made it in my IP it was a sticky mess. Lady time I made it, I rinsed, used 1:1.25 cups rice to water and added about a Tbs of oil. I cooked for 18 minutes and used natural release for 8 minutes and QR afterwards. It was much better. Tiny bit sticky but acceptable. I’m going to try this posted method to see how it comes out.
Cat says
P.S. I cooked mine using the rice setting.