After weeks of experimenting, I got it right. Here is your fail-proof guide for Instant Pot Rice. White rice, brown rice, wild rice, and many more, basically an encyclopedia about cooking rice in a pressure cooker.
If you’ve followed along for a while, you know I’m a huuuuge fan of pressure cooking. My Instant Pot Chicken and Rice recipe is not only a hit at my house but thousands of others now, too. YAY!
What Is The Best Rice To Water Ratio?
You’ll be surprised but it is always and for ALL sorts 1:1. Yes, you read that right.
Instant Pot Rice calls for a 1:1 rice to water ratio
You wonder why on the stove different ratios are called for. Well, the secret to rice cooking is that the darker or wilder the rice the longer it needs to cook and the longer something needs to cook, the more water evaporates during the process.
This leads us to the conclusion, that different kinds of rice do not necessarily need different kinds of amounts of water to “cook” but rather more water to evaporate.
Since the Instant Pot gives a tight seal and high pressure, no water evaporates at all.
So yes, brown rice and even wild rice need the exact same amount of water as white rice in an evaporation-proof environment. *mind-blown*
What If My Rice Is Too Hard With a 1:1 Ratio?
If your rice is hard or uncooked that doesn’t mean next time it needs more water, that means, next time it needs more TIME. Did you wait for FULL natural pressure release?
Unfortunately, you cannot “save” undercooked rice in the Instant Pot as putting the lid back on and turning the pot back on just leads to the dreaded burn warning. I recommend adding the undercooked rice to a soup or stew maybe 5 minutes before it’s done simmering.
What If My Rice Is Too Mushy?
You most likely used too much water. 1:1 water to rice ratio is essential for all rice types.
Use the exact same container to measure both rice and water. Some cups are standard American (236ml), others are metric (250ml) and the little plastic cup that comes with the Instant Pot is neither (160ml). So do not use different measuring cups to measure rice and water.
Does 1:1 Apply For 1 Cup Just As It Does For 4 Cups?
YES! When making Instant Pot Rice you need 1 cup of water for every cup of rice, regardless of if you cook just 1 cup or 4 cups.
This is different when you cook rice on the stovetop where evaporation happens. The more rice you cook the less water you need when using a regular pot on the stove.
How Many Cups Of Rice Can You Cook In An Instant Pot?
In theory: 2.5 cups in a 3-quart Instant Pot. 5 cups in a 6 quart Instant Pot. 6.5 cups in an 8-quart Instant Pot.
This is US standard measuring cups and raw dry rice.
So the mathematical thought for the theory is the following:
- 1 cup of raw white rice gives on average 3 cups cooked rice.
- Instant Pots should not be filled more than 2/3 of its full capacity at any time. So we have to take the expanded rice into consideration.
- A 6-quart Instant Pot’s capacity is 24 cups and two-thirds of that are 16 cups.
- There should not be more than 16 cups cooked rice in the Instant Pot and since 1 cup raw makes 3 cups cooked we have to divide the 16 by 3. That makes 5.3 cups.
The calculation is only theory though. I have not tried that many cups in my own 6-quart. 4 cups raw dry rice are the maximum I have cooked myself without any issues and with perfect results.
Natural Pressure Release (NPR) vs. Quick Pressure Release (QR)
What’s better? Hands down, no doubt >> natural pressure release. If you cook rice longer so you can do quick pressure release, with the hope to have the rice cooked faster overall, it gets sticky and mushy.
If you want fluffy rice, I encourage you to be patient and wait for natural pressure release. I timed all rice and there doesn’t seem to be any rhyme or reason to the timing. Even the same kind of rice in the same amount has had different natural pressure release times.
What Is The Rice Button For?
The rice button was designed only for white rice (regular long-grain, Jasmine, or Basmati rice). It works fine with those types of rice. The shorter high-pressure cooking times with natural pressure release work better though in my opinion.
Also, the Rice Button does not work for any other type of rice but white rice.
Do I Have To Rinse Rice Before Cooking?
Opinions vary widely and there seems to be no right or wrong answer. It’s all up to personal preference. However, thankfully it is irrelevant for the cooking times presented.
Both rinsed and dry rice work with my cooking times and method. Nothing has to be adjusted or changed either way. Just make sure you drain your rice well in a fine mesh strainer if you rinse it. Then use 1:1 ratio.
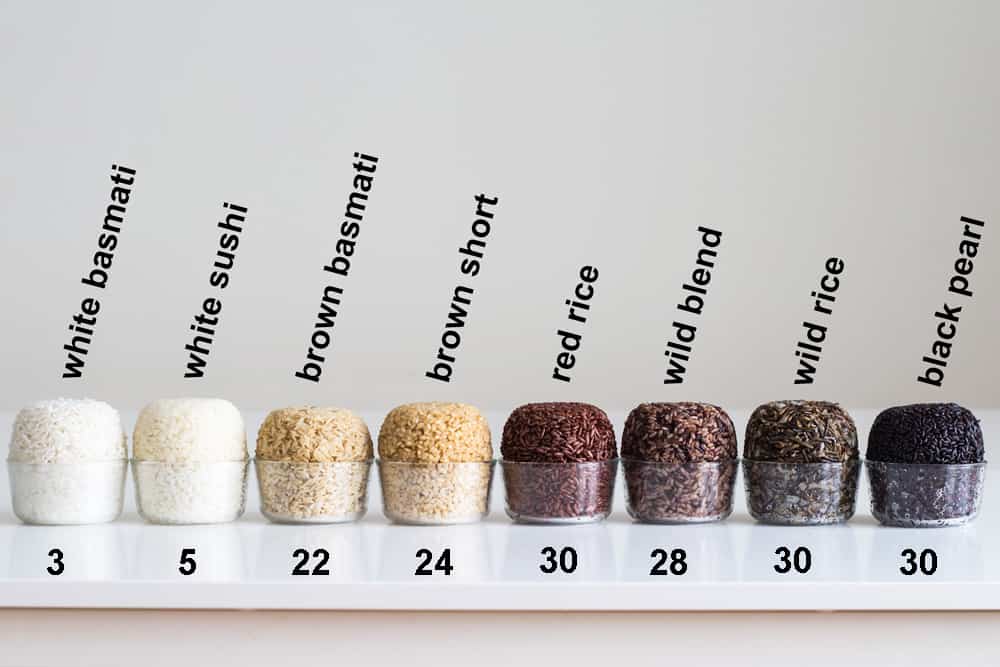
Instant Pot Rice Cooking Times
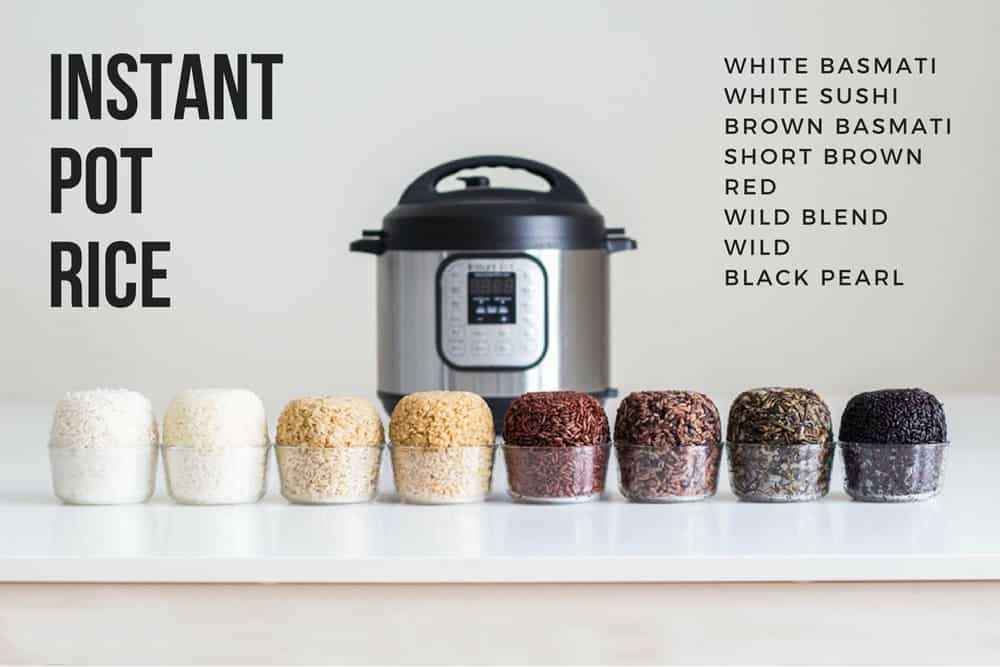
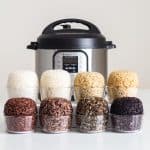
Now let’s get to the individual kinds of rice:
White Rice
I’ve tried both Basmati and Jasmin and both cook in the exact same time, 3 minutes high pressure + NPR. The thicker regular long-grain white rice cooks better with 4 minutes high pressure + NPR.
Brown Rice
I’ve experimented with Basmati brown rice and with short grain brown rice and the Basmati cooked faster than the short grain. From all my experiments it seems like the thicker the individual grains, the longer they need. With the exception of wild rice, that one needs long regardless of being a skinny dude. 22 minutes high pressure + NPR for the thin Basmati and 24 minutes for the thick short grain.
Wild Rice
Some people swear the grain HAS to burst open, others swear, it’s best when “just about to burst” and others like it completely unburst. Guess what, you can achieve any consistency you like when you cook Instant Pot Wild Rice. Here are the times for whole unbroken wild rice: 28 minutes (unburst), 30 minutes (some burst some unburst), 32 minutes (burst).
Red Rice and Black Rice
Red rice and black rice is pretty thick and needs quite some time to break down so give it tiiime. It’s round and thick and it takes quite a bit for it to absorb all the water. It’s like a new towel that needs time to get soaking wet ;) 30 minutes high pressure + NPR.
Sushi Rice
I was actually pretty sure this would take just as long as regular white rice but surprise surprise. It’s not as sticky if you cook it or only 3 minutes and this is the only rice you really want to be sticky, right? So increasing the cooking time actually made it stickier and better to work with for sushi. Cooke it 5 minutes on high pressure + NPR.
Wild Rice Blend
Soooo, this one is the trickiest because it has several different kinds of rice that individually cook in different times. I found it cooks best in an in-between time. The wild rice in the mix will be completely unburst but the brown rice won’t be all mushy. Usually, that’ll be 28 minutes high-pressure + NPR. Of course, it will depend widely on what grains exactly are in your blend.
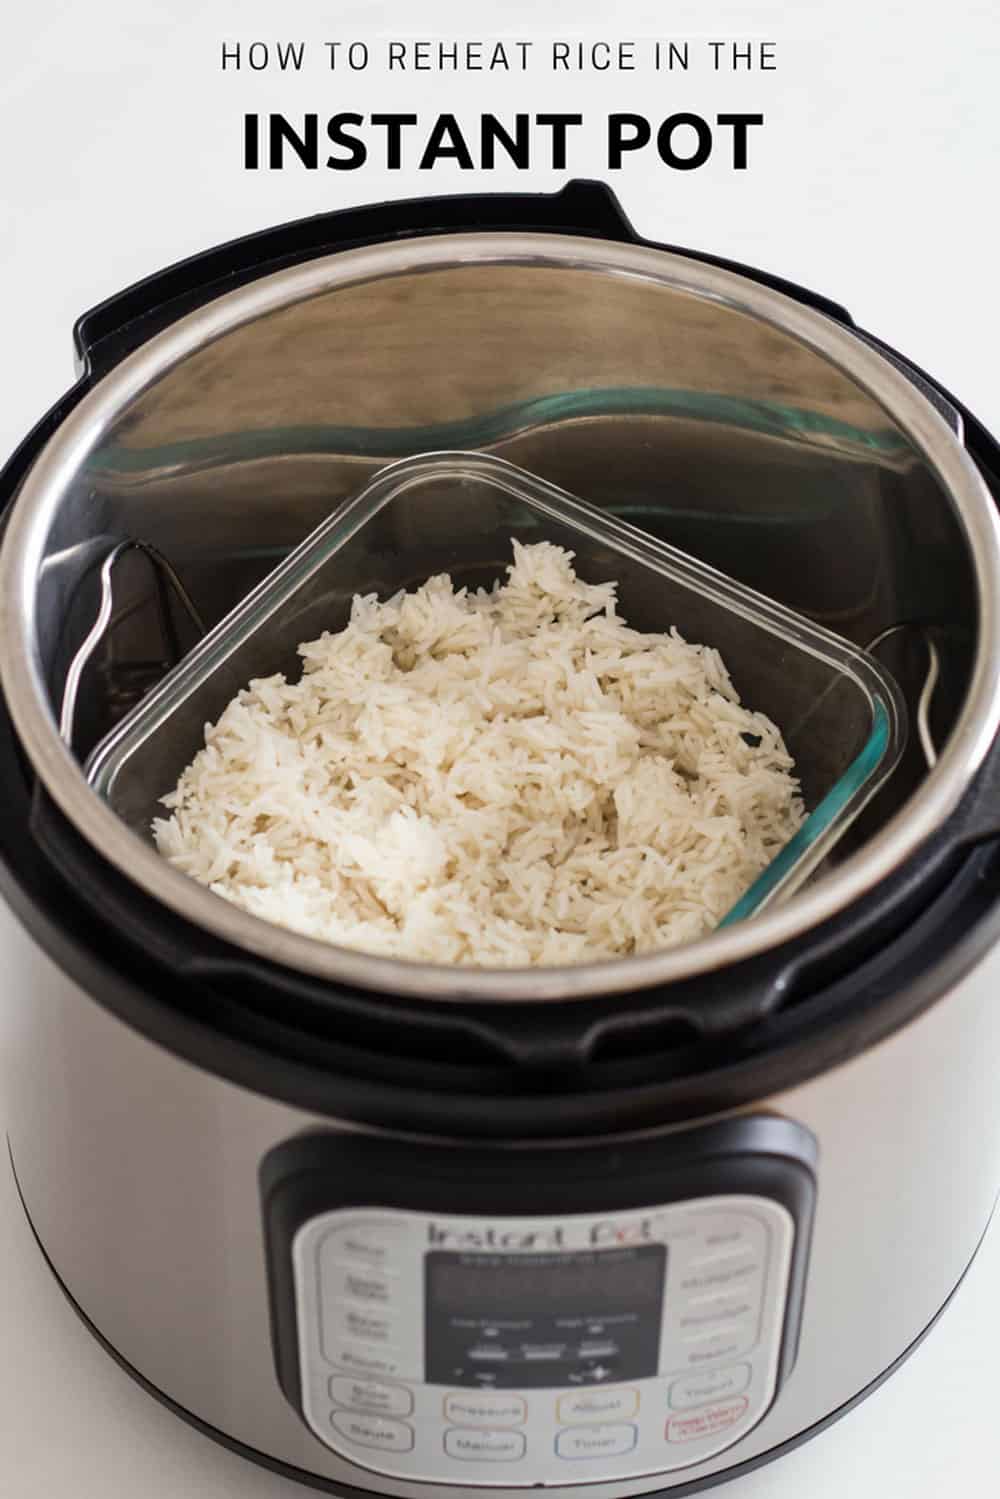
How to Reheat Rice in the Instant Pot
So, I’ve seen a couple of people recommend adding water or oil and stir it in the inner pot and pretty much making a mess, haha.
Um, not my favorite method.
I like things simple. I basically want the same convenience as a microwave but without the waves.
I store my leftover rice in a heat-proof glass container and then place the trivet in the Instant Pot, add a cup of water and place the rice uncovered on the trivet. Put the lid on, knob to sealing and press steam for 5 minutes. Quick pressure release, done!
So here you have it. The longest post in the history of Green Healthy Cooking.
Burn Warning Trouble Shooting
The wicked burn warning, it’s the Instant Pot user’s nemesis! For starters, some Instant Pots are a lot more temperamental than others. You most likely did nothing wrong, however, you are dealing with what we could compare with a toddler with a temper tantrum.
If your Instant Pot is generally one to scream “burn” easily and quickly I recommend you stay close in the beginning phase while it gets the water boiling and trying to get to pressure. When the pot is trying to push up the safety pin but seems to not be able to, that’s the critical moment. Push down on the handle of the lid a little to help it get to pressure.
If the pot tries and tries to get to pressure but can’t too much water evaporates through the valve and thus leaves too little inside the pot and the rice starts to burn.
If even with a little push on the lid, it cannot get to pressure, the sealing ring might not be positioned properly inside the lid. You will have to abort the mission and start over, making sure the sealing ring is still in great condition and placed correctly.
If the Instant Pot was able to pressure cook for most of the time and only showed the burn warning at the end of the cooking time, then just unplug it and wait for natural pressure release. Often times it still manages to cook the rice and just a tiny corner got burnt.
Instant Pot Rice
Equipment
- Pressure Cooker
Ingredients
- 1 cup rice - (Basmati white, Jasmin white, Basmati brown, short-grain brown, red, black, wild, wild blend, sushi)
- 1 cup water
- 1/2 tsp sea salt
Instructions
- Add all ingredients into the Instant Pot. You can double, triple or quadruple all ingredients in same amounts.
- Make sure sealing ring is placed properly in lid, add lid, turn shut and turn knob to sealing position.
- Cook on high pressure for the number of minutes instructed below depending on the type of rice:White Rice (Basmati or Jasmin): 3 minutesWhite Sushi Rice: 5 minutesBrown Rice (Basmati): 22 minutesShort Grain Brown Rice: 24 minutesRed Rice: 30 minutesWild Rice Blend: 28 minutesWild Rice: 30 minutesBlack Pearl Rice: 30 minutes
- Natural Pressure Release until pin drops. Takes on average 9-12 minutes (max. 18 minutes for 1 cup and max 30 mins for 4 cups).
- Remove all rice from pot immediately to avoid it sticking to the bottom. If needing to keep warm, leave rice in pot after natural pressure release without opening the lid to avoid steam being released and drying out the rice > making it stick to the bottom.
Notes
- I use a US standard cup. 236ml in volume.
- I, personally, do NOT rinse or wash my rice.
- Cooking time stays the same no matter how many cups you cook.
 Pollo a la Brasa (Peruvian Style)
 Peanut Sauce
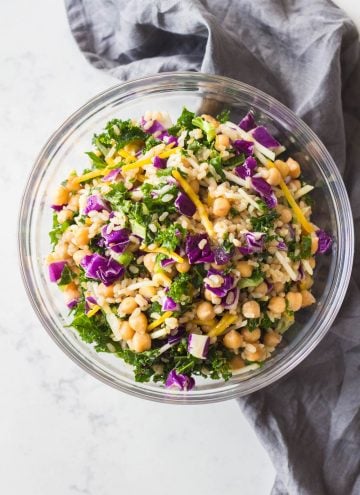 Brown Rice Salad
Estelle says
I follow a recipe that says soak the brown rice for 15mins and then drain. Then you only need 4 min in the instant pot. Seems to work well. Have you tried that?
Lorena Grater says
I have not tried that. I like the simplicity of just adding to the pot, setting it and then not worry about anything else.
Sandy says
Thank you so much. You have helped this Foodie newbie out quite a lot!
sharon says
Thank you SO MUCH for clearing up this mystery! This is the first time I’ve ever seen anyone mention different times for different types of rice, plus the reason for that. People always say everywhere this ratio or that ratio, so my rice in the instant pot never came out right and I couldn’t figure out why. But everybody kept writing that their rice was perfect every time. I’m thrilled to finally have this solved!
Annie says
Thanks for this helpful info, what would be the recommended settings if I mixed white and brown rice together?
Lorena Grater says
I don’t recommend mixing white and brown as you will absolutely have to cook the timing of the brown rice (or else it’ll be raw) and during such a long cooking time the white rice will become complete mush. Instead, I recommend cooking white rice first, then brown rice. Then mix them together.
Annie says
I see, thank you so much!
Shirley says
Any advice on using the instant pot for buckwheat?
Lorena Grater says
Unfortunately, I’ve never tried so I don’t know.
Marilin says
This is the only way I have been able to cook rice after moving to an elevation of 6400. I’ve a question please, my rice is always a bit sticky. It definitely is not fluffy. I use the 1/1 ratio and 3 min pressure. Could it be the elevation? It’s not bad just not fluffy, more clumpy.
Thanks for any help you can provide. And thanks for all the different rice recipes.
Lorena Grater says
Do you rinse your rice? If you do you could try reducing the cup of water by 2 Tablespoons maybe and try that. Unfortunately, I don’t know if it’s the elevation I haven’t been able to do tests in elevation because Montreal is pretty low and I haven’t travelled with my Instant Pot (yet).
Kilroy says
I don’t live at high altitude, but my understanding is that higher altitudes should slightly decrease the temp for a given pressure level when cooking, so you should normally increase cooking times a corresponding amount – it’s basically the same reason as why water boils at a lower temperature but with a valve in the way.
That said, if you’re getting mushy rice, that usually means the rice is overcooked, so the above reasoning would go the wrong direction. Like Lorena said, a little too much water is a likely culprit. Alternatively, if it’s not really “mushy”, just too sticky, maybe try a longer-grain rice? Short-grain rice (like sushi rice) tends to be pretty sticky, so maybe try a medium-grain (like jasmine rice) or long-grain (like basmati rice). If you can figure out how to dial in the recipe, it’s totally worth it: I love making rice this way, it feels both easy and fool-proof but I didn’t have to buy a dedicated rice cooker!
Terry says
Thanks. For this detailed information on cooking different kinds of rice. I’m trying jasmine brown for the first time. I’ll do a test run before our gathering.
Terry says
Follow up- cooked the brown jasmine rice for 20 min. after sauteing some chopped onions. It was very good,
Terry
E Griffin says
Would the cooking times and ratios change for pot in pot cooking for rose?
Lorena Grater says
I haven’t tested pot in pot cooking myself but others have reported it worked fine and they used the same ratio and time as my guide suggests.
Cyndy says
I noticed that the two wild rice recipes above are reversed compared to the video. in the video you say the wild rice blend cooks for 30 minutes and the wild rice cooks for 28 but in the recipe above it shows wild rice 30 minutes and wild rice blend 28 minutes. I happen to love wild rice and cooked a blend a while back so leave it to me to notice. I think I am going to try your chicken and rice recipe but for that dish I am a white rice and thighs kinda girl. My grand mother passed a recipe down for a chicken n rice recipe that I have always baked in the oven over the years…
Lorena Grater says
You are right! That’s a mistake. WOW! This post and video have been up for years now and nobody ever noticed. Good catch! The good thing is wild rice does cook through in 28 minutes and just doesn’t all burst and rice blends are still fine after 30 minutes. Phew. Always, always go by my written recipes. When I film my videos I’m running around like a headless chicken trying to move the camera position and getting all in focus and then tired like that I film the voiceover and try not to forget anything. When I write my recipes I can take my time and triple check. It’s usually the one that you can trust a lot more.
Wade Baker says
Are the times the same if you are cooking chicken with your rice in an insta pot?
Lorena Grater says
Depends on the piece of chicken. I have another post about individual pieces of chicken and I have a recipe post for a Chicken and Rice recipe. You basically always have to choose the cooking time for the ingredient that takes the longest.
Annie Quest says
This worked beautifully! I made sushi rice to go into a rice/black bean/chicken casserole. I sautéed onions and peppers in the pot, added 2 cups of rice and let it sauté with the softened onions and added 2 1/2 cups of broth (I added the extra 1/2 cup because of the volume of onions) and cooked as stated in the recipe for 5 minutes. Released the steam for about 8 minutes. It was perfect!
Koteswar Kareti says
Are the times for cooking the rice same even if I do not add salt to it?
Lorena Grater says
Yes. Salt or no salt makes no difference.
Aaron Hynds says
So is the time adjusted or does it stay the same when you go up in amount of rice?
Lorena Grater says
As I already answered in the blog post, the time stays the same.
Aaron says
Maybe if it was clearly stated “Time stays the same for 1:1,2:2 &so on.” I didn’t know needed to read this, watch a video then go to the blog. I reread the instructions and it doesn’t clearly state that. Sorry to have bothered you. “Does 1:1 Apply For 1 Cup Just As It Does For 4 Cups?
YES! When making Instant Pot Rice you need 1 cup of water for every cup of rice, regardless of if you cook just 1 cup or 4 cups.
This is different when you cook rice on the stovetop where evaporation happens. The more rice you cook the less water you need when using a regular pot on the stove.”
No mention of time….
Lorena Grater says
Thank you for pointing this out. I didn’t realize it was so unclear. I just added a line to the notes section of the recipe card to make it extra clear.
Thea says
I’ve been using this as a regular reference guide for over a year now and my rice comes out perfect every time, no matter what kind of rice I’ve tried. Thank you!!
Nandhini Prakash says
Thank you very much. It came out just right.
Dawn says
Would I need to adjust the cooking time if I use boiling water?
Lorena Grater says
I don’t recommend using boiling water because you risk the rice releasing too much starch too fast and sticking to the bottom of the pot. It’s best to use cold or room-temperature water.