The most detailed step by step instructions on how to make Artisan Bread. Add whatever nuts and dried fruit you like to give it a personal spin. I made mine a Walnut Fig Artisan Bread. Spread some goat cheese on a piece and fly to HEAVEN!
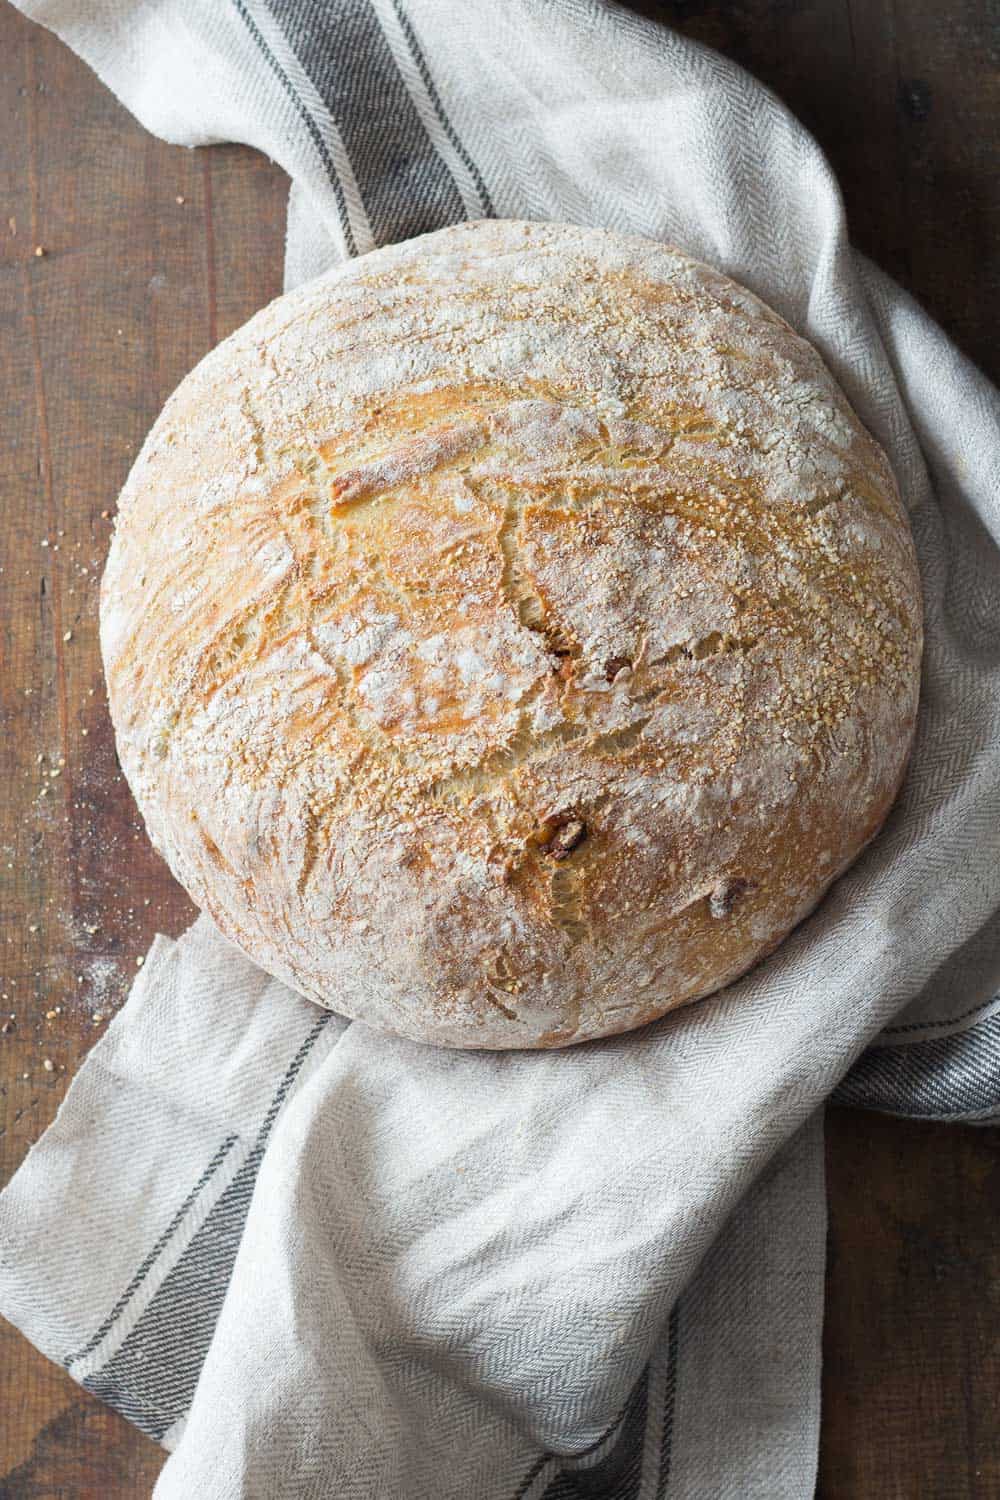
This is not a quick bread, this is a real artisan bread. 12-hour starter, knead, rise, (fold in extra flavorful extras), rise again, bake, give it a bite and book a flight to Montreal to come hug and kiss me ;)
Ok, so, is it easy to make artisan bread? Ummmm, let’s say it’s not difficult. There are several steps that need extra attention but in this post I will walk you through ALLLLL the steps one step at a time so you end up with the best bread you’ve tried in your life, pinky finger promise. Are you ready?
How to activate yeast and ensure artisan bread dough rises
Proof your yeast
I cannot stress this more. I just wasted 1.5 kg of flour over the weekend trying to succeed in the bread-making business. If you proof your yeast first you don’t risk waisting flour. If your dough doesn’t rise it’s because your yeast was not properly activated or worse, you killed it. Awww, poor yeast :(
How to proof yeast
Add yeast to a bowl and then add warm water. Now here is the first tricky part. The water has to be “warm”. What does “warm” mean? About 100F (38 C).
Use a thermometer, if you don’t have one for food, use your body temperature thermometer. If you don’t have that either, use your elbow.
It should be warm like water you would bathe a baby in, milk you would give a baby in a bottle. If you have nothing to do with babies and don’t know what kind of warm is meant by that, well, warm like your own pee ;)
The end result after about 10 minutes is foamy, bubbly, yeast-smelling water. If it doesn’t foam and bubble, toss it. Your bread won’t rise. I will come out dense and heavy and maybe even uncooked in the end. Do not waste your flour. Start over again. Remember it’s just 10 minutes.
Now, how come yeast doesn’t foam or bubble sometimes? There are 3 reasons for things going wrong.
- the yeast expired -> buy another one.
- the water was too hot or too cold -> use a thermometer to make sure the temperature is right.
- your tap water is no bueno (too much chlorine or bacteria can kill your yeast) -> Use bottled water.
Prepare a starter
Breads made with starters taste so so so so so so (that’s not enough ‘so’s but you get the point) much more delicious than other breads. AND, the bread dough rises beautifully with a starter.
Prepare a starter. Just do it, will you?
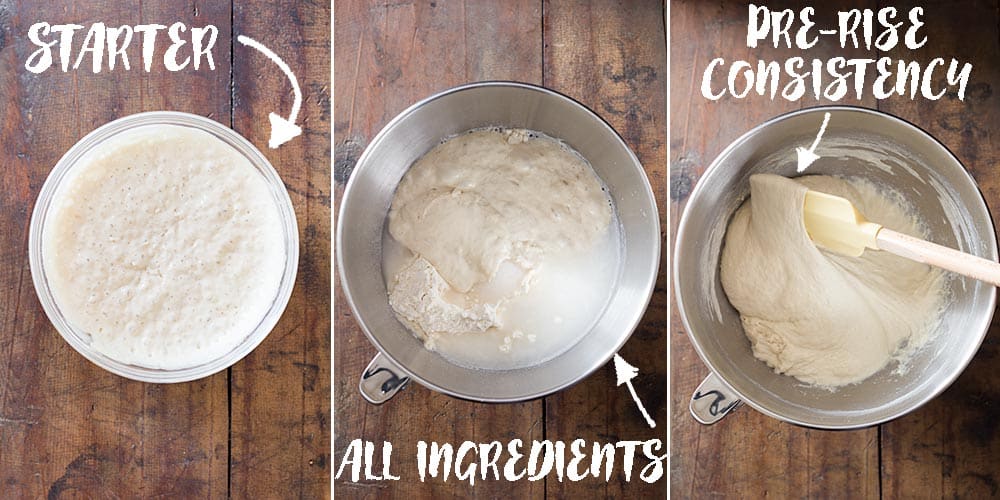
Mix that foamy, bubbly, yeasty water (a.k.a. proofed yeast) with the flour required by the recipe, cover and leave at room temperature for at least 12 hours, max 18 hours.
The next day you will start your bread-making process like you would any bread without a starter. Making a starter takes 12-ish minutes. Make that starter the day before. You will get the most perfect result.
How to achieve dense but airy Artisan Bread
Artisan bread requires several rises. The quicker a bread is to make the lighter and cakier (is that a word?) it will be. Basically, less time and less rises equal less deliciousness in my opinion.
This real artisan bread calls for a 12-hour rise of the starter and then another two 45-minute rises. Remember, you don’t have to do absolutely anything while the bread is rising. Making bread is a long process BUT requires only minutes of actual work in between rising/resting time. In total it will take maybe 10 minutes of you actively doing something.
Knead the starter and remaining flour the recipe calls for in the stand mixer with dough hook attached for a good 20 minutes on low. You can do this part by hand but it will be VERY messy and tiring. I don’t recommend doing this by hand but rather borrow a stand mixer if you don’t have one.
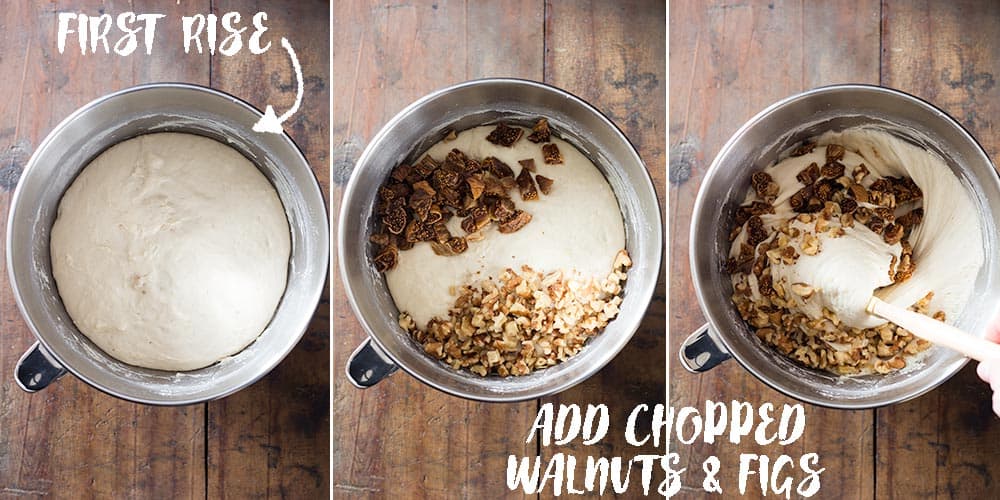
The dough should be very sticky and elastic (see right photo above). Cover it with a clean kitchen towel and let rise at room temperature for 45 minutes or until the dough has doubled in size (see left photo below).
When and how to add extras to artisan bread dough
After the first rise it’s time to fold in whatever extras you want to fold into your artisan bread. If you don’t want anything extra in your bread just omit this step.
Add extras and fold and fold until well combined. By then the dough reduced in size again. (see middle and right photo above).
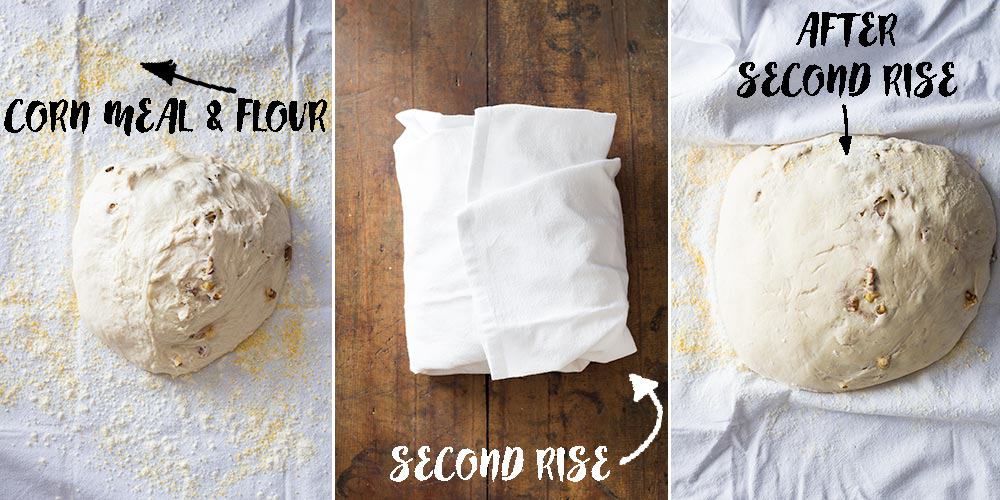
Once all the extras are mixed into the dough it’s time for the second rise. Cover a clean dish towel with abundant flour and corn meal. Dump the dough onto the dishtowel and fold the towel over it.
Emphasis on “abundant” so no dough at all stays stuck to the dish towel. You should be able to shake it out in the kitchen sink, throw it in the wash that’s it once you removed the dough after the second rise.
Dutch oven vs. no dutch oven when making artisan bread
There are two reasons artisan bread will form a dome. One, the bread dough is given enough opportunities to rise. Two, the bread dough is baked in strong heat coming from all directions.
Most of us have regular ovens. Heat from the top and heat from the bottom. That’s it. Regular home ovens do not emit heat from all around.
Bakeries have special ovens. Many of their ovens are stone ovens where the stone retains all the heat and radiates it back to the whole surface of the bread.
The only way to “imitate” this is by using a dutch oven. I’ve tried with a oven-proof stainless steel pot with oven-proof glass lid and … it doesn’t work. Stainless steel doesn’t “store” heat. It becomes hot, yes, but as soon as you take it out of the oven to dump in the bread dough, it immediately starts cooling down.
A cast-iron pot keeps the heat for muuuuch longer. Enough time for you to dump in the dough, put the lid back on and transfer back in the oven without it cooling down even 1 degree.
If you don’t have a dutch oven here are my 3 suggestions.
- BUY ONE! It’s worth it! There is one for all budgets. This $50 dutch oven does the trick perfectly well. And this $300 dutch oven is not only a life-time investment but also a pot to hand down a couple generations if you take care of it properly.
- Borrow one! If you can’t afford one right now or you first want to test it before buying, ask around who can borrow you one. I did that before, too. I was sold after the first use but still borrowed it again until I had the money to buy one for myself.
- Don’t make this bread. Sorry, but I tried making artisan bread without a dutch oven and I REALLY wanted it to work but it just doesn’t. :(
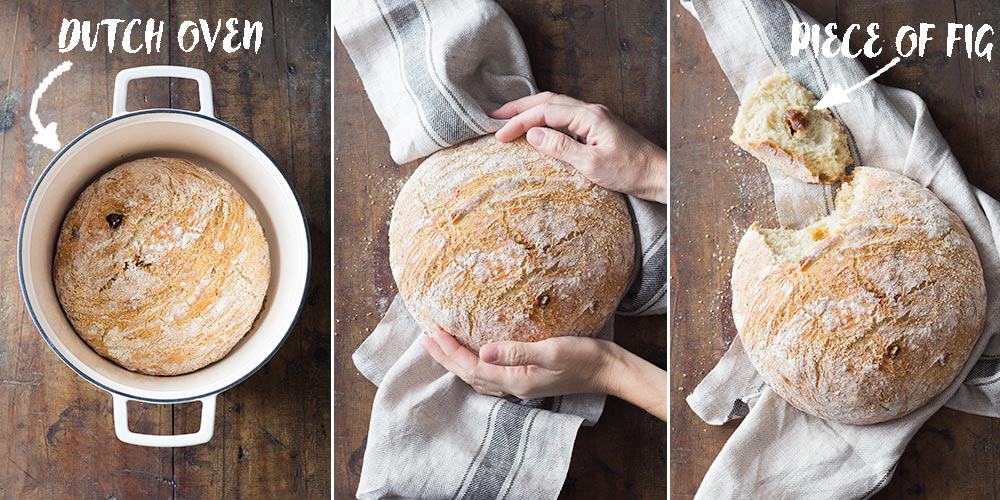
One important tip: be really, really, really, really, really, really careful when taking the dutch oven out of the oven. It will be BURNING HOT! Use very thick silicone oven gloves or double up your regular cloth gloves. The burns you get from a hot dutch oven are unbelievably painful. All concentration is required here. Don’t multitask at this point. Do only ONE thing. Keep your eyes only on the oven and your body parts.
Artisan Bread cooling instructions
This point is also very important. Once the bread is baked you have to remove it from the dutch oven (carefully, remember it’s hot!). Since the dutch oven retains a lot of heat for an extended amount of time it’s crucial to remove the bread so it doesn’t continue baking. Otherwise it will become very hard.
Turn the dutch oven over so the artisan bread falls out. It will immediately and easily fall out. There is no way bread dough will stick to a burning hot cast iron pot or pan. If it sticks, you didn’t heat it up enough time (as I suggested further up) naughty you ;)
Place the freshly baked artisan bread on a cooling rack and wait for it to COMPLETELY cool down before cutting into it. If you cut into hot bread all the steam escapes and the center stays “doughy”. The bread needs to cool down slowly for the steam to do it’s work on the inside of the artisan bread.
How do I know my bread is really baked through without cutting into it? Knock on the bottom of the bread. If it sounds hollow it’s done. If it doesn’t return to the oven.
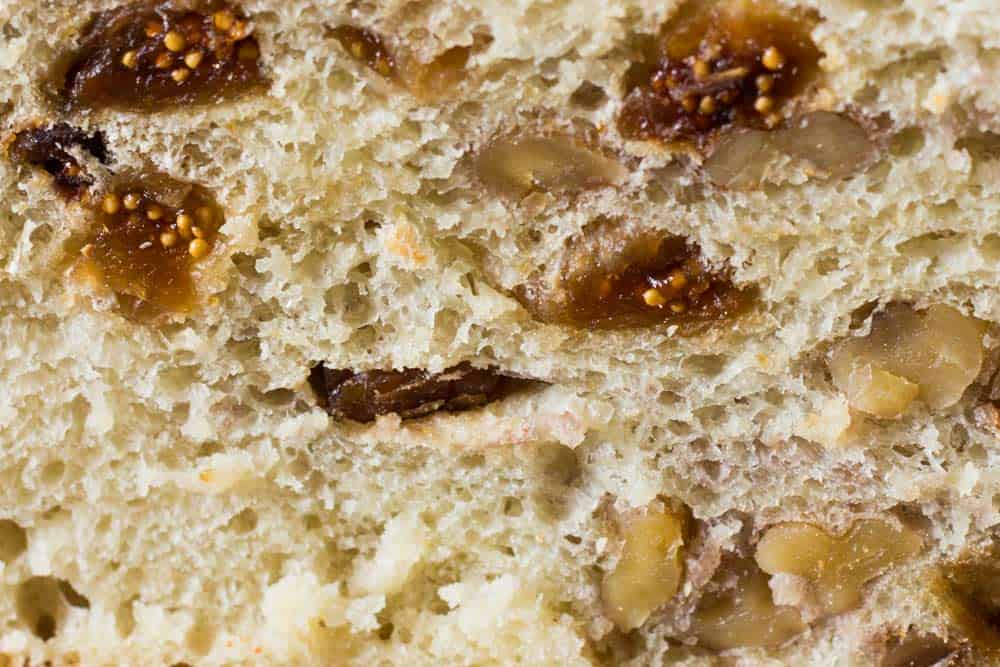
And this is what it looks like from the inside once it’s finished cooling down:
How to store Artisan Bread
I can’t believe you’ve made it this far reading. Congratulations. Now it’s time to finally, finally break apart a piece of this masterpiece of a healthy artisan bread.
Don’t use a knife. Use your hands. Eat an uneven piece. It tastes so much better that way. Eat your first piece just like that. You can eat the second with goat cheese or butter or dunked into butternut squash soup. Eat the first piece just plain.
Once you ate all you could eat it’s time to store it. If you think you will finish the bread the next day I recommend storing it in a paper bag on the kitchen counter. That way it stays crispy.
However, bread dries out by the end of day two. If you know you won’t be able to finish it by day two I recommend storing it in a paper bag and then plastic bag on top and tie a tight knot and leave it on the counter if you’ve added only nuts and dried fruit but in the fridge if you’ve added fresh fruit.
Phew. Are you ready to make bread now? Check the shorter version of all instructions further down in the recipe card.
Artisan Bread
Ingredients
- 110 ml warm water - (100°F / 38°C!!)
- 3.5 g active dry yeast
- 110 g all purpose flour
- 400 g all purpose flour
- 3.5 g active dry yeast
- 240 ml water
- 10 ml cow's milk
- 12 g sea salt
- 1 pinch sugar
- 2-3 Tbsp all purpose flour
- 2-3 Tbsp corn meal - (not corn flour! corn MEAL!)
- 1/2 cup chopped nuts - (I used walnuts)
- 1/2 cups dried fruit - (I used figs)
Instructions
- *Proof the yeast and prepare starter* In a medium bowl mix 110ml 100°F-warm water (use a thermometer!) and 3.5g active dry yeast and let sit for 8-10 minutes until all bubbly (<- this is called "proofing the yeast"). Then add in 110g flour and mix with a spatula. Cover with a clean kitchen towel and let rise at room temperature for 12 hours (overnight).
- *Prepare the bread dough* Add 400g flour, another 3.5g yeast, salt, sugar and 240ml water and 10ml milk to the starter and knead on low for at least 20 minutes until the dough is sticky and elastic.
- *First rise* Cover the bowl in which the dough was kneaded with a clean kitchen towel and let rise for 45 minutes at room temperature.
- *Add extras* Chop walnuts and dried figs or any other nut and dried fruit and fold into the dough. Omit this step if you want your artisan bread plain.
- *Second rice* Spread out a dish towel on the counter, sprinkle with abundant flour and corn meal and dump dough onto towel, then fold dish towel over bread and let rise a second time for 45 minutes.
- *Preheat oven and dutch oven* 15 minutes into the second rise preheat the oven to 450F with the dutch oven with lid inside the oven. The oven and dutch oven have to heat up at least 30 minutes.
- *Bake the bread* Take the dutch oven out of the oven carefully, turn the dish towel and dump the dough into the burning hot dutch oven (be carful with the hot dutch oven!!!!). Place the lid on top and return into the oven. Bake 25 minutes with lid on and a further 5-10 minutes with lid off. Until golden.
- *Cool Bread* Take dutch oven out of oven, remove bread from dutch oven, place bread on a cooling rack and let cool down completely before cutting into it.


 Healthy Pumpkin Granola
 Herb Quark Dip
 Yellow Rice Two Ways
Meg says
How do I transfer the bread dough from the dish towel to the dutch oven?
Lorena Grater says
Step 7 explains it: Take the dutch oven out of the oven carefully, turn the dish towel and dump the dough into the burning hot dutch oven (be carful with the hot dutch oven!!!!)
You basically slide your hand under the towel, under the bread and flip it over and into the dutch oven. The corn meal and flour we laid out before made the towel non-stick. It should fall right into the pot. Lots of flour and corn meal will fall over the counter. That’s unavoidable unfortunately.
Meg says
Can you convert this recipe to measure in cups, and measuring spoons?
Lorena Grater says
As I mention in the blog post, bread requires exact measurements. Volume measurements are and will never be exact enough. A digital scale can cost as little as $10 and is easily available everywhere in the world.
Reyaan says
I don’t read, bake or cook but started to make my own artisan bread and this was such a good read (can’t believe I made it all the way till the end). Going to give this method a try and hopefully finally find a failsafe way of making really good bread
Linda Teders says
Hi, just to let you know that you can use a Römertopf as a baking vessel as well. Might not be a common thing in Canada of the US, bit is here in the Netherlands. Or rather; was. Which is why I could pick them up cheaply in thriftstores :-)
Been baking my own sourdough bread and milling my own flours for about 6 years now. Loving it, and am happy to see this joy of baking your own bread spreading.
Lorena Grater says
Hi Linda, yes absolutely! A Römertopf will work perfectly. Preheat it, too, like I did with the cast iron and be careful not to place it on a cold surface when taking out so it doesn’t crack.