Step by step instructions on how to make Bolillos including a video tutorial. These Mexican rolls are the number 1 sold bread in Mexico City. Bolillos are probably the second favorite carbohydrate after tortillas for any Mexican. The delicious, freshly baked rolls are an absolute must-try!
My Mexican Baking Credentials
I should probably start by quickly explaining why I consider myself an expert at making these Mexican rolls despite not being Mexican.
- My husband is Mexican and grew up eating bolillos DAILY!
- I lived in Mexico City for 4 years and joined the tradition of having one for breakfast every day.
- We became ex-pats in 2011 and haven’t had access to Mexican bakeries other than when visiting family over Christmas.
Needless to say, I had no choice but learn how to make my own Bolillos and other Mexican dishes like Huevo Ranchero or Salsa Verde and become an expert at it to satisfy our cravings :)
How to Make a Bolillo from Scratch?
It’s very easy to make these Mexican rolls from scratch but there are a couple of pitfalls you want to avoid.
- Use a digital kitchen scale!!! I cannot stress this enough. You can find inexpensive ones for as little as $10. No matter how exact you follow imperial cup flour-measuring techniques you always end up with different amounts of flour. You cannot successfully bake bread with inexact measurements. This is my favorite kitchen scale.
- You have to make sure you’re working with active dry yeast. If you bought your yeast packets recently it will most definitely work but if you’ve had them in the pantry for a long time it might be a good idea to first proof your yeast to ensure it can still come to life. More info about proofing yeast below.
- Assuming your active dry yeast is in perfect condition you want to simply mix flour, yeast, salt and a pinch of sugar (to activate the yeast only, the bread is not sweet) in the bowl of a stand mixer to ensure everything is well combined and evenly distributed.
- Then add 110℉ warm water. The temperature is crucial! See the explanation below about proofing yeast. These rolls will not turn out if you try to make dough with water that is too hot or too cold. This will give a 70% water-content sticky dough at first.
- Let rise in a warm but not hot environment until doubled in size. No matter how long this may take. Don’t try to short cut this process by putting the dough on the radiator or in the oven. You risk killing the yeast and then you have to restart.
- It’s time to hand fold. You want to achieve a very elastic dough. Take your time!
- Form your bolillos as shown in the video and then spray or brush them with water so they don’t dry out while they do their second rise. Do not omit this step. Two full rises are essential!
- Make an incision with a sharp knife in the middle or else they will break open weirdly. And also spray with water again just before adding to the oven.
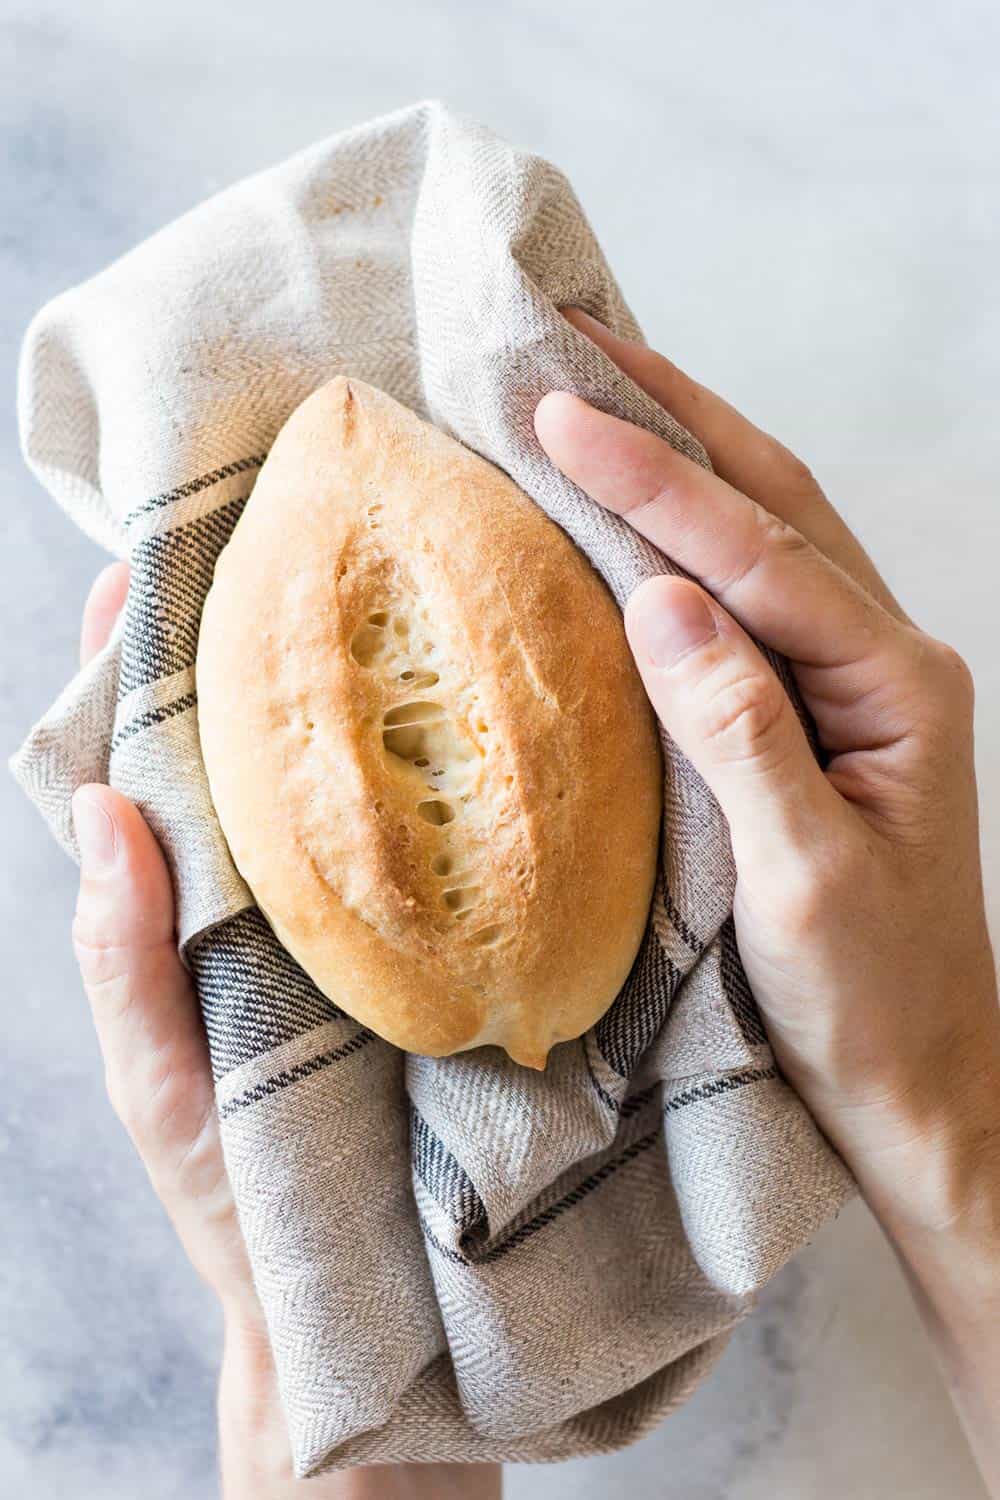
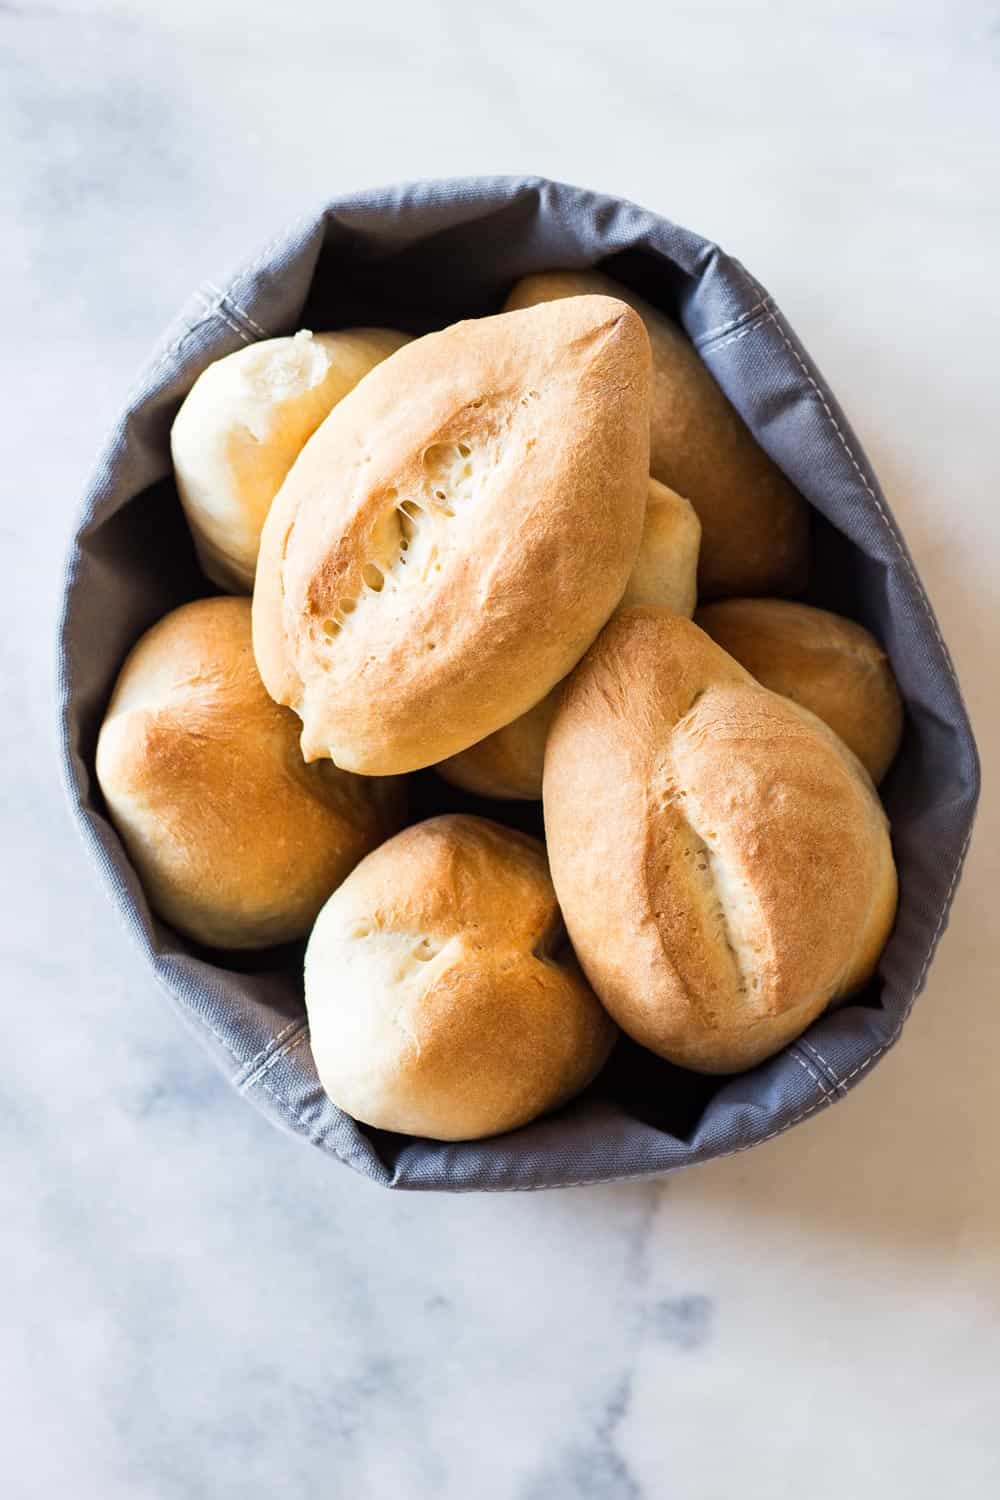
- Keep an eye on them so they don’t overbake. The exact baking time will depend on how big or small you formed the rolls and how high they are in the center. As soon as they are lightly brown as shown in the photos they are done. They should sound hollow when you tap their bottoms of you can also take internal temperature and aim for 195-200℉ in the center of the roll for perfect rolls right out of the oven.
- Let rest for at least 10 minutes before eating so the steam inside can redistribute instead of immediately evaporate completely.
How to proof yeast
Add yeast to a bowl and then add warm water (half a cup is enough and reduce that amount of water later in the bread-making process if you have to proof your yeast first). Now here is the first tricky part. The water has to be “warm”. What does “warm” mean? Anywhere from 100-110℉ (38-43℃).
Use a thermometer, if you don’t have one for food, use your body temperature thermometer. If you don’t have that either, use your elbow.
It should be warm like the water you would bathe a baby in, the milk you would give a baby in a bottle. If you have nothing to do with babies and don’t know what kind of warm is meant by that, well, warm like your own pee ;)
The end result after about 10 minutes is foamy, bubbly, yeast-smelling water. If it doesn’t foam and bubble, toss it. Your bolillos won’t rise. They will come out dense and heavy and maybe even uncooked in the end. Do not waste your flour. Start over again. Remember it’s just 10 minutes.
Reasons For Yeast To Not Activate or Dough To Not Rise
Now, how come yeast doesn’t foam or bubble sometimes? There are 3 reasons for things going wrong.
- the yeast expired -> buy another one.
- the water was too hot or too cold -> use a thermometer to make sure the temperature is right.
- your tap water is no bueno (too much chlorine or bacteria can kill your yeast) -> Use filtered or bottled water.
Do I Have to Proof Yeast To Make Bolillos?
If you are certain your yeast is perfectly fine because you literally just bought it, there is no need to proof it and you can proceed as instructed in the recipe card below.
If you are unsure most definitely proof it but be aware that the “total” amount of water necessary for the recipe is 350 ml. So whatever amount of water you use to proof the yeast, you have to deduct that from the total amount.
And, be aware that the water temperature has to be 100-110℉ for both, proofing the yeast and when you add the rest to the dough as well.
How Long Do These Mexican Rolls Last And How To Store Them
They are best eaten right away all at once.
Bolillos tend to be bought at least twice a day in Mexico City. They taste so good right out of the oven and every bakery keeps baking them all day long.
Only a couple hours later they become stale because they don’t contain any emulsifiers or other ingredients to make bread last. This is quick to prepare clean ingredient bread. Airy with a crunchy crust and a soft center.
If however, you can’t finish them in one sitting you don’t have to throw them out of course. You can still eat them the next day. I recommend storing them (completely cooled) in a plastic bag on the kitchen counter.
To make them crunchier and less stale brush or spray them with water and put them in the oven for 3 minutes at 400F.
Mexican Dinner Rolls (Bolillos)
Ingredients
- 500 g unbleached all-purpose white flour - about 4 imperial cups
- 8 g dry active yeast - about 2 teaspoons
- 8 g Salt - about 1.5 teaspoons
- 8 g sugar - about 1 3/4 teaspoons
- 350 ml 110℉ hot water - (43℃) 1.5 cups
Instructions
- Add dry ingredients to the bowl of your stand mixer and whisk on low until well combined.
- Add 110℉ hot water. The temperature is crucial! Add colder water and your dough won't rise, add hotter water and you will kill the yeast. Use a meat thermometor to be certain of the temperature.
- Attach the dough hook to the stand mixer and knead the dough for at least 20 minutes on low. Longer is even better. You want a very elastic dough (see video).
- Cover the bowl with a clean kitchen towel and let the dough rise to double its size. Depending on the room temperature this will take anywhere between 25-50 minutes.
- Once the dough doubled in size, remove it from the bowl and place on a clean floured working surface, sprinkle flour on top as well and then fold from the bottom up and over and from the top up and over, then let rest for 10 minutes, fold again, and let rest another 10 minutes, until the dough becomes smooth and elastic. (See video).
- In the meantime, line a baking sheet with parchment paper.
- Now cut the dough into 8 equal pieces and roll into "bolillo form". (See video). Then place on the lined baking sheet.
- Once all bolillos are formed,make about a 1/2" deep incision in the middle with a sharp knife and spray or brush all bolillos with water.
- Cover the bolillos with a clean kitchen towel and let the dough rise a second time until doubled in size.
- Preheat oven to 450 F (230C) at least 20 minutes before the rolls have to go in the oven. Leave a baking sheet in the oven under the middle rack to fill with water later to create steam.
- Remove the kitchen towel, spray the bolillos again with a little bit of water, add 1 cup of water to your baking sheet already in the oven, and put the bolillos on the rack on top in the oven for approximately 15 minutes.
- Let cool for at least 10 minutes and enjoy warm.


 Strawberry Smoothie Without Yogurt
 Easy Healthy Coleslaw
 Avocado Spinach Smoothie
Maria says
Both the recipe and the video were easy to follow. The bolillos turned out delicious with a great texture.
Alan says
Can I use instant yeast instead? Will this change the fact that you use hot water? Maybe I can use water at room temperature?
Lorena Grater says
Hi Alan, unfortunately, I’m not familiar with baking with instant yeast. I have never used it before. I hope you can make it work with your yeast.
Laurie LG says
I don’t have a stand mixer. Is a hand mixer ok?
Lorena Grater says
If you have dough hooks for it I would assume it “could” work. It will be quite a workout for your arms though. I would think it’s easier to knead by hand than it is to knead with a hand mixer. You’ll have to test it.
Stephanie says
Can I replace the dry yeast for starter?
Lorena Grater says
I’m sorry, I haven’t tested this so I don’t know.
Dana says
Hello could you make the teaspoon quantity cleared would I use a whole package of yeast isn’t 10g 3 teaspoon I don’t get what1.5 teaspoon means
Lorena Grater says
Hi Dana, in bread-baking exact amounts are crucial for success which is why I strongly recommend getting a digital scale. I remember getting a ton of questions about imperial measurements for this recipe and then used an automatic calculator which clearly got it all wrong. I just measured and weighed yeast 3 times and got a different measurement each time because it’s impossible to get exact measurements with spoons and cups. 10 g is anywhere from 2.5 to 3 tsp. A digital scale can be purchased for as little as $10 so I really really recommend getting one for best bread-baking results. I removed the imperial measurement now. Thank you for pointing it out. I will retest the recipe next week though and I will try make it with 7g so it’s the typical American packet size. If it works I will report back.
Cori says
Can the dough be prepared ahead of time and bake only 2-3 a day so each day is freshly baked. This way I can quickly bake before I go to work ?
Abby Howell says
Just made these. Easy. Fantastic. Really clear instructions!
Lorena Grater says
I’m so happy!!!
Jahaera Navarro says
Any tip on why my dough isn’t rising? Or what to do. It’s been resting for like an hour and I see no rise.
Lorena Grater says
I just completely updated the blog post with aaaaall the tips and tricks to be successful. I answered your comment on YouTube. I’m sorry it wasn’t 100% comprehensive. I hope one of my tips help you determine what went wrong. Please let me know if not so we can continue troubleshooting.
Gema says
Would the 10g be 1Tbsp instead of 1tps ?
Lorena Grater says
I’m sorry but to be successful with bread recipes you HAVE to invest in a digital scale. Volume measurements are never exact enough. You can find digital scales for as little as $15.
Renee says
Would bread flour be okay to use instead of AP flour?
Lorena Grater says
I haven’t tried myself and I would assume the taste and texture would be a little different due to higher protein content in bread flour but not different enough to avoid making them all together :)
Bruce says
How about a sourdough version?
Lorena says
Just enter “bread” in the search bar and you’ll get to plenty of bread recipes, many with starters :)
Esther says
I was wondering if you have any suggestions on how to stuff them with cheese and jalapenos. Thank you
Lorena says
Oh gosh, no I’m sorry. Do you mean before putting in the oven or once baked and then cut open and stuffed?
Joyce Siegel says
Wondering if I can make the dough in the bread machine?
Joyce
Lorena says
Unfortunately, I’ve never owned a bread machine myself so I don’t have any advice on it. I’m sorry :(
Michel says
I love the simplicity of this recipe…I have it memorized. Of course you can make it in a bread machine, a stand mixer or a food processor…the amount of time will depend…so experiment. I like to mix in a food processor for a few minutes, lay it out on the table and let it rest a few minutes then fold and press a few times. Afterward I roll it up into a ball and place it in a plastic bag and put it in the refrigerator for a few hours up to overnight to retard the rise. when you take it out and form the loaves just let them rise to double, spray and pop in the oven. Have fun trying variations.
Lorena says
Amazing! I’m so happy to read you even have it memorized. You are awesome!
Nigel says
Hi Lorena…made these and they were great..my wife said use that yeast in a normal loaf and what a treat…crustiest best bread I have made…I love them so versatile
Lorena says
I’m so happy you liked them Nigel :D
Alejandra says
Thank you very much for the recipe for bolillos, I made them yesterday, the only thing is that I found my dough to be a little dry after the first raise, maybe next time I have to put more water than 1 1/4 cup??, they looked pretty good and the taste was delicious, but they didn’t raise as much as yours, I followed your recipe, I will try to make the again. Have a wonderful day!!!
Lorena says
Hi Alejandra, I’m so happy you liked them. Flours around the world and throughout brands are different because they are ground differently so you might need a little more or a little less water. I don’t think you need more or less than 1 Tbsp though. The most important is to get an elastic dough so make sure you are kneading long enough so it’s elastic. If you knead by hand this can take up to half an hour of constant kneading. Then the rising process is a whole other science. Your dough HAS to rise to at least double its size. If it didn’t rise as much leave it on the counter for longer. If your kitchen is cold it will take longer to rise. In a warm kitchen, it usually takes about half an hour to an hour. In a very cold kitchen, it can take much much longer. So in country where there is no heating in winter but it’s fairly cold it can take quite a while.
Cecilia says
I set my oven to warm and leave covered bowl on stove when making homemade bread. The heat helps it rise faster.😉
Lorena says
that’s brilliant!