
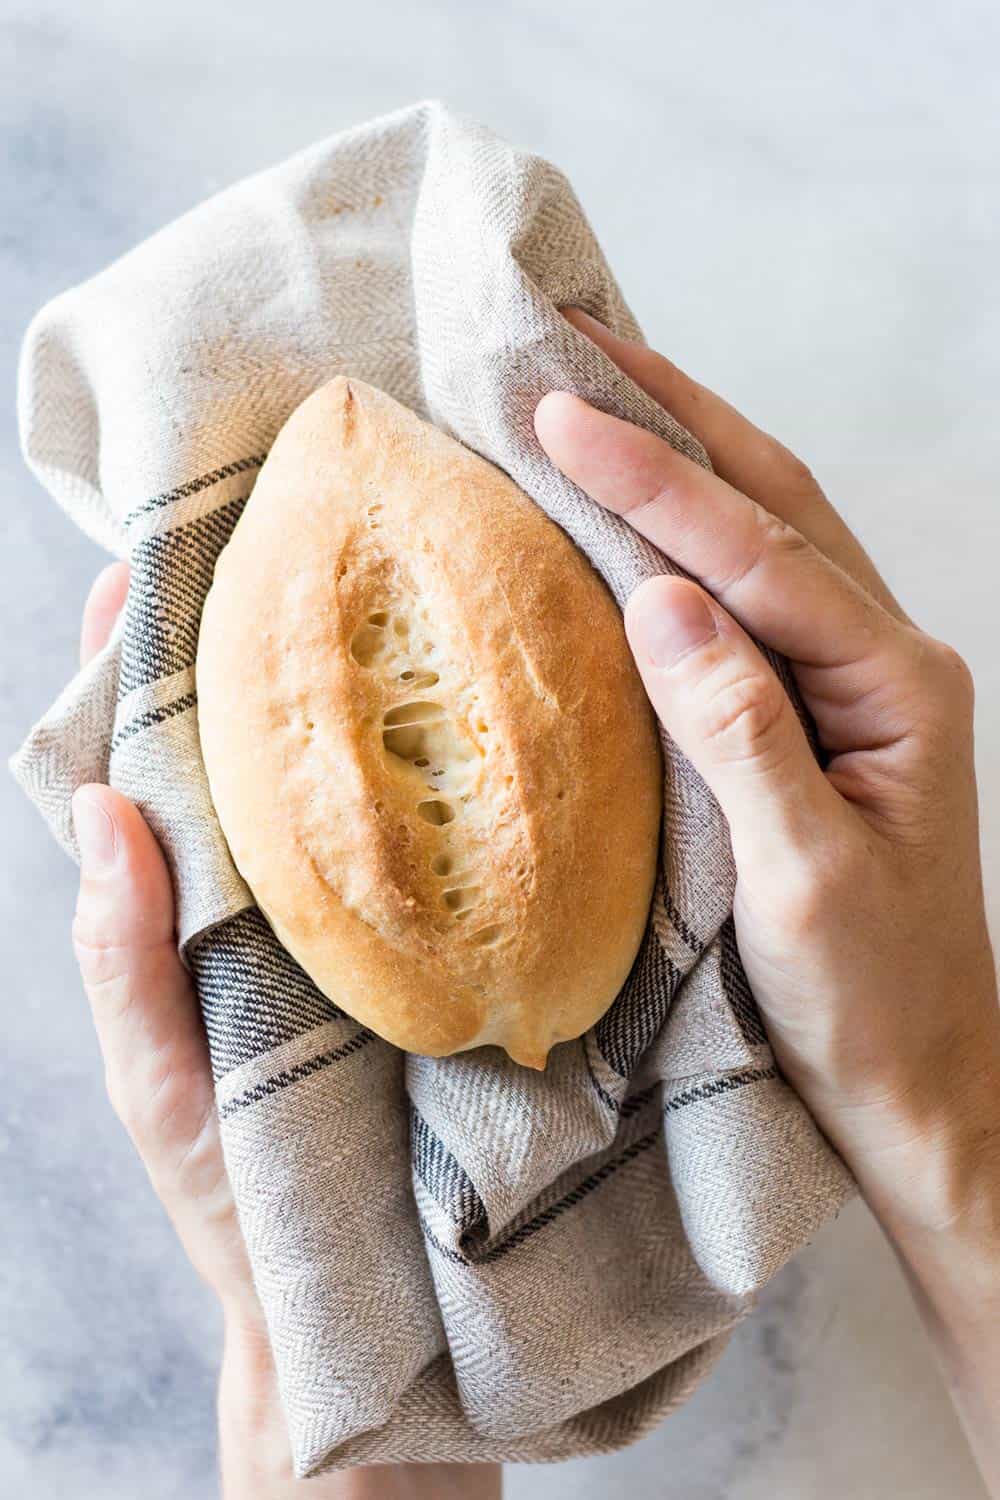
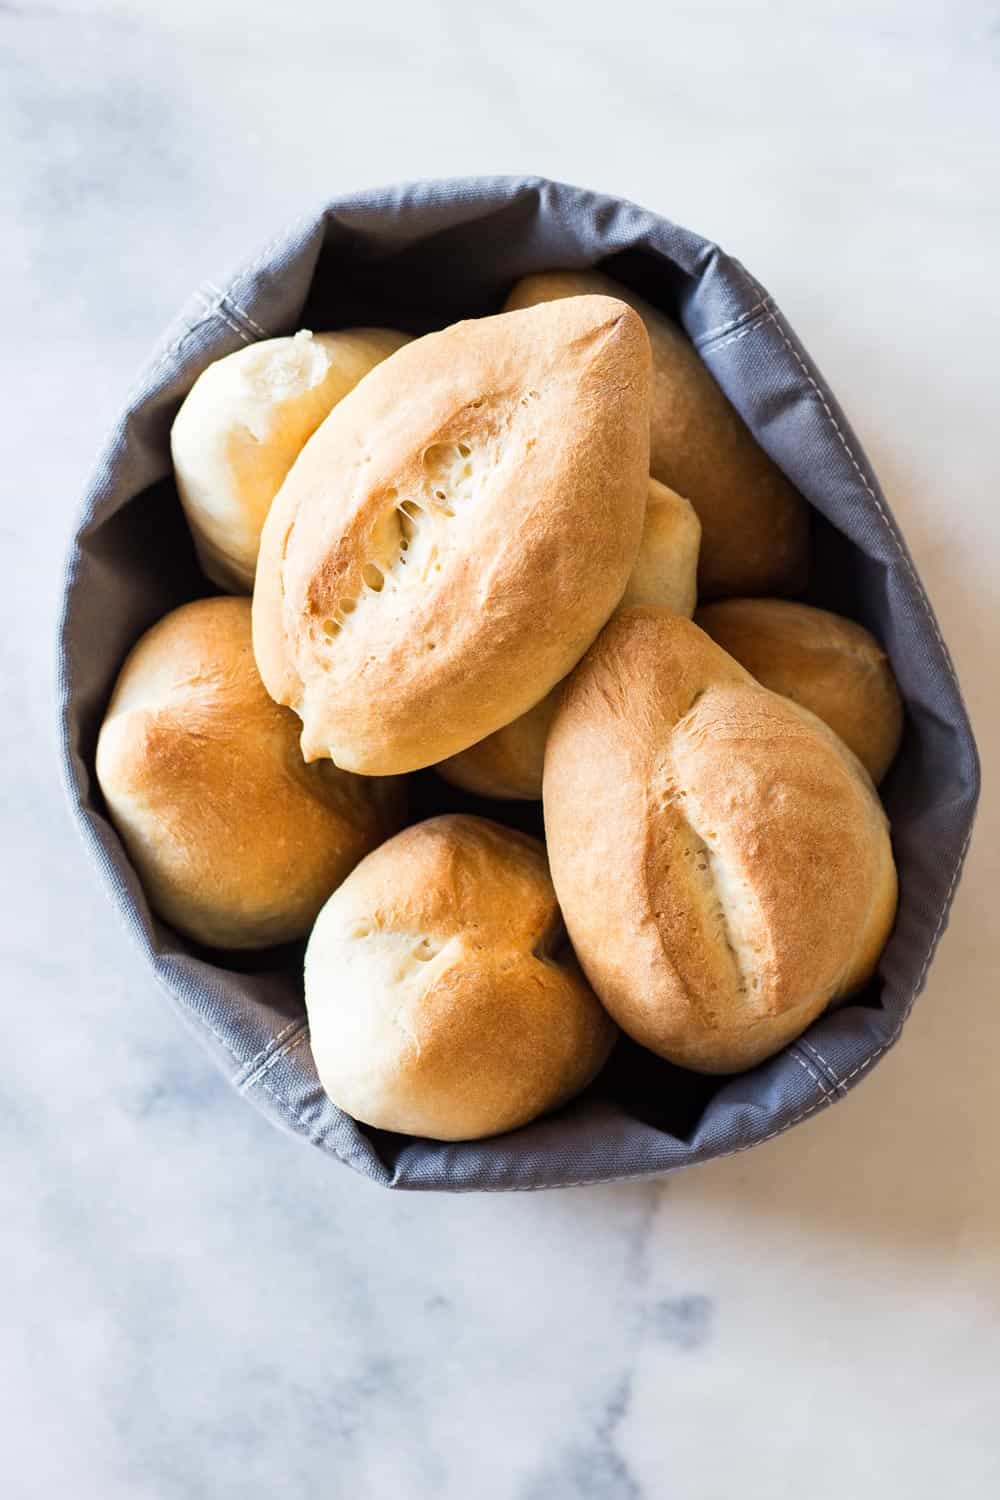
Step by step instructions on how to make Bolillos including a video tutorial. These Mexican rolls are the number 1 sold bread in Mexico City. Bolillos are probably the second favorite carbohydrate after tortillas for any Mexican. The delicious, freshly baked rolls are an absolute must-try!
My Mexican Baking Credentials
I should probably start by quickly explaining why I consider myself an expert at making these Mexican rolls despite not being Mexican.
- My husband is Mexican and grew up eating bolillos DAILY!
- I lived in Mexico City for 4 years and joined the tradition of having one for breakfast every day.
- We became ex-pats in 2011 and haven’t had access to Mexican bakeries other than when visiting family over Christmas.
Needless to say, I had no choice but learn how to make my own Bolillos and other Mexican dishes like Huevo Ranchero or Salsa Verde and become an expert at it to satisfy our cravings :)
How to Make a Bolillo from Scratch?
It’s very easy to make these Mexican rolls from scratch but there are a couple of pitfalls you want to avoid.
- Use a digital kitchen scale!!! I cannot stress this enough. You can find inexpensive ones for as little as $10. No matter how exact you follow imperial cup flour-measuring techniques you always end up with different amounts of flour. You cannot successfully bake bread with inexact measurements. This is my favorite kitchen scale.
- You have to make sure you’re working with active dry yeast. If you bought your yeast packets recently it will most definitely work but if you’ve had them in the pantry for a long time it might be a good idea to first proof your yeast to ensure it can still come to life. More info about proofing yeast below.
- Assuming your active dry yeast is in perfect condition you want to simply mix flour, yeast, salt and a pinch of sugar (to activate the yeast only, the bread is not sweet) in the bowl of a stand mixer to ensure everything is well combined and evenly distributed.
- Then add 110℉ warm water. The temperature is crucial! See the explanation below about proofing yeast. These rolls will not turn out if you try to make dough with water that is too hot or too cold. This will give a 70% water-content sticky dough at first.
- Let rise in a warm but not hot environment until doubled in size. No matter how long this may take. Don’t try to short cut this process by putting the dough on the radiator or in the oven. You risk killing the yeast and then you have to restart.
- It’s time to hand fold. You want to achieve a very elastic dough. Take your time!
- Form your bolillos as shown in the video and then spray or brush them with water so they don’t dry out while they do their second rise. Do not omit this step. Two full rises are essential!
- Make an incision with a sharp knife in the middle or else they will break open weirdly. And also spray with water again just before adding to the oven.
- Keep an eye on them so they don’t overbake. The exact baking time will depend on how big or small you formed the rolls and how high they are in the center. As soon as they are lightly brown as shown in the photos they are done. They should sound hollow when you tap their bottoms of you can also take internal temperature and aim for 195-200℉ in the center of the roll for perfect rolls right out of the oven.
- Let rest for at least 10 minutes before eating so the steam inside can redistribute instead of immediately evaporate completely.
How to proof yeast
Add yeast to a bowl and then add warm water (half a cup is enough and reduce that amount of water later in the bread-making process if you have to proof your yeast first). Now here is the first tricky part. The water has to be “warm”. What does “warm” mean? Anywhere from 100-110℉ (38-43℃).
Use a thermometer, if you don’t have one for food, use your body temperature thermometer. If you don’t have that either, use your elbow.
It should be warm like the water you would bathe a baby in, the milk you would give a baby in a bottle. If you have nothing to do with babies and don’t know what kind of warm is meant by that, well, warm like your own pee ;)
The end result after about 10 minutes is foamy, bubbly, yeast-smelling water. If it doesn’t foam and bubble, toss it. Your bolillos won’t rise. They will come out dense and heavy and maybe even uncooked in the end. Do not waste your flour. Start over again. Remember it’s just 10 minutes.
Reasons For Yeast To Not Activate or Dough To Not Rise
Now, how come yeast doesn’t foam or bubble sometimes? There are 3 reasons for things going wrong.
- the yeast expired -> buy another one.
- the water was too hot or too cold -> use a thermometer to make sure the temperature is right.
- your tap water is no bueno (too much chlorine or bacteria can kill your yeast) -> Use filtered or bottled water.
Do I Have to Proof Yeast To Make Bolillos?
If you are certain your yeast is perfectly fine because you literally just bought it, there is no need to proof it and you can proceed as instructed in the recipe card below.
If you are unsure most definitely proof it but be aware that the “total” amount of water necessary for the recipe is 350 ml. So whatever amount of water you use to proof the yeast, you have to deduct that from the total amount.
And, be aware that the water temperature has to be 100-110℉ for both, proofing the yeast and when you add the rest to the dough as well.
How Long Do These Mexican Rolls Last And How To Store Them
They are best eaten right away all at once.
Bolillos tend to be bought at least twice a day in Mexico City. They taste so good right out of the oven and every bakery keeps baking them all day long.
Only a couple hours later they become stale because they don’t contain any emulsifiers or other ingredients to make bread last. This is quick to prepare clean ingredient bread. Airy with a crunchy crust and a soft center.
If however, you can’t finish them in one sitting you don’t have to throw them out of course. You can still eat them the next day. I recommend storing them (completely cooled) in a plastic bag on the kitchen counter.
To make them crunchier and less stale brush or spray them with water and put them in the oven for 3 minutes at 400F.

Mexican Dinner Rolls (Bolillos)
Ingredients
- 500 g unbleached all-purpose white flour - about 4 imperial cups
- 8 g dry active yeast - about 2 teaspoons
- 8 g Salt - about 1.5 teaspoons
- 8 g sugar - about 1 3/4 teaspoons
- 350 ml 110℉ hot water - (43℃) 1.5 cups
Instructions
- Add dry ingredients to the bowl of your stand mixer and whisk on low until well combined.
- Add 110℉ hot water. The temperature is crucial! Add colder water and your dough won't rise, add hotter water and you will kill the yeast. Use a meat thermometor to be certain of the temperature.
- Attach the dough hook to the stand mixer and knead the dough for at least 20 minutes on low. Longer is even better. You want a very elastic dough (see video).
- Cover the bowl with a clean kitchen towel and let the dough rise to double its size. Depending on the room temperature this will take anywhere between 25-50 minutes.
- Once the dough doubled in size, remove it from the bowl and place on a clean floured working surface, sprinkle flour on top as well and then fold from the bottom up and over and from the top up and over, then let rest for 10 minutes, fold again, and let rest another 10 minutes, until the dough becomes smooth and elastic. (See video).
- In the meantime, line a baking sheet with parchment paper.
- Now cut the dough into 8 equal pieces and roll into "bolillo form". (See video). Then place on the lined baking sheet.
- Once all bolillos are formed,make about a 1/2" deep incision in the middle with a sharp knife and spray or brush all bolillos with water.
- Cover the bolillos with a clean kitchen towel and let the dough rise a second time until doubled in size.
- Preheat oven to 450 F (230C) at least 20 minutes before the rolls have to go in the oven. Leave a baking sheet in the oven under the middle rack to fill with water later to create steam.
- Remove the kitchen towel, spray the bolillos again with a little bit of water, add 1 cup of water to your baking sheet already in the oven, and put the bolillos on the rack on top in the oven for approximately 15 minutes.
- Let cool for at least 10 minutes and enjoy warm.
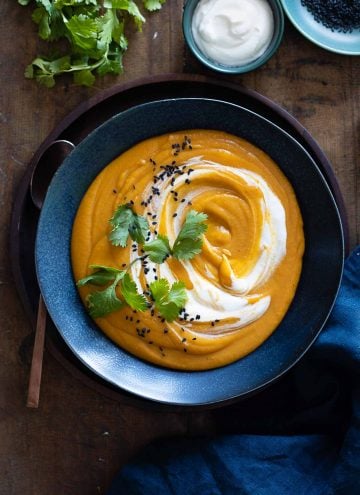 Red Lentil Sweet Potato Soup
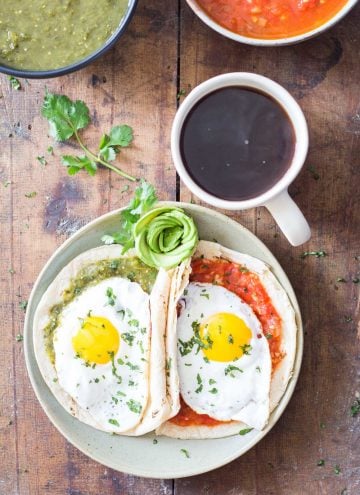 Huevos Divorciados
 My Mum’s Crepe Cake
Al says
Great recipe, easy to make. Will be making them again and again. Great for sandwiches stuffed with pulled pork and BBQ sauce or basicly anything you can think of.
Lorena says
Thank you so much for coming back and commenting and rating the recipe :)
Cassandra says
I made them on Sunday and will make them again tonight but will lower the oven temp to 375 and prime the yeast as this should make for a fluffier bolillos.
Lorena says
I’m happy you liked them and will now be able to adjust to your liking. Please post a picture and tag me on Instagram if you have it. I’d loooove to see your bolillos :)
Dave says
I am going to try them, they sound delicious. But with only two of us in the house, we would never eat them all before they dry out. Can they be frozen, then warmed up before dinner or what ever?
Lorena says
Yes!!! They freeze perfectly! To defrost just brush them with a little water and stick in the oven for a couple minutes.
Steve says
Same here. I make a half recipe and only rise and bake what’s needed each day. Most yeast doughs can handle this and also pick up some flavor as they age in the fridge
Lorena says
Yes!!! I’ve noticed that pizza dough is the most delicious and becomes the crispiest when I let it in the fridge for 3 days.
Lynn Gardner says
I made these last night and the dough was very stiff and the rolls were very dense. I think that next time I will add less flour.
Lorena says
Oh, I’m so sorry to hear that. Usually density is related to not enough rising time. Did you let the dough rest often enough and long enough at room temperature? If the room temperature is very low you have to extend rising time, too.
Willow says
Calories?
Lorena says
http://www.calculator.net/calorie-calculator.html
Vanessa says
Hi! Can I leave the dough sitting out to rise longer than 45 minutes. I’m thinking about prepping it for lunch and baked at dinner time.
Lorena says
Hi Vanessa, you can leave them out for maybe an hour but I don’t recommend letting them rise much longer. What you can always do is prepare the dough and then put in the fridge so it does NOT rise and then you take it out in time for 2 rises.
Tonie says
Can I make it by hand
Lorena says
Hi Tonie, yes you can. You’ll build up quite some muscle ;)
Patrícia Barbosa says
Thanks for recipe. Made easy and great taste.
Lorena says
Thank you Patrícia :)
Sheri says
I just made these. I followed the directions & the only problem I had was baking time. I had to leave them in for almost an hour to get brown. They were a little more dense, I had hoped for more airy. Do you think that I needed to allow more time for the dough to rise. Otherwise, taste & shape were great. They were a mini bolillo in size (8 of them). Thanks for sharing. I will keep trying to get them better.
Lorena says
Hi Sheri, hmm, did you wait for the dough to double in size at the first rise? And then again almost double in size when already formed? The only other thing I can think of is that maybe your flour is different and thus needs a little less water? I’m glad they tasted great at least. 1 hour in the oven doesn’t sound right at all though. Do you have an oven thermometer to verify if your oven heats up well? They need to be baked at 450F. In 1 hour at that temperature they would burn completely.
Tianna Workman says
These are so good! They take me back to Mexico, when we bought sandwiches to go out on the fishing boat. I remember eating them thinking “this is the best bread, I wonder how they make it”. When I came across this recipe I had to try it, and it is exactly the same. I can’t get enough! I am making them again for the 5th time to take out on our fishing boat. Thank you!!!!!
Lorena says
Tianna, thank you so much for coming back and commenting. It’s comments like this that keep me going and creating more and more recipes. I love to make people happy with food. You are the best!
Virginia Loeza Castro says
As a Mexican very busy mom that loves to cook and bake! I’ve always wanted to make my own bolillos, I miss tortas so much! 😋 and I will try your recipe on the weekend, just one question, I notice that you let rise the dough only once and I’m used to see two rises when it come to bread making why is that? Does it make any difference on the crumb and crust? And besides that thumbs up for photos, great video and the beautiful way you wrote your article. I will still the phrase Mexican tummy when I refer to my kids Mexican cravings. ;)
Virginia Loeza Castro says
Steal* :p
Lorena says
Hi Virgina, I’m glad you like my blog post and recipe :) Can’t wait to hear how your bolillos turned out. I did let the dough rise twice. Once as a whole and once in bolillo form. The second rise is when you’ formed your bolillos and placed on a baking sheet. You spray them with water to avoid from drying out, cover with a kitchen towel and let rise. Allowing dough to rise twice results in a finer gluten structure. The reason I let it rise the second time in the ready to be baked form is because otherwise you push all the air out when you form rolls and if you don’t let rerise they become very dense instead of “airy”
Flavia says
Hola! I made them last night. They taste very good. Only thing that I didn’t like was the form of my bolillos jaja… I have to practice a lot!! Thanks so much for sharing with us the recipe and the video. ;-)
From a mexican bolillos lover… they are named birotes and torcidos as well.
Lorena says
Hola Flavia! I’m glad you liked them :) It took me a bit of practice, too until I got the form right. Keep practicing :)
Flavia says
I made them again last night and they look much better… thanks again and have a good one ?
Lorena says
Wheeeeeee!!!! :D
Patrick @ Mexican Please says
Wow great post, luv the video! Pinned!
Lorena says
Thank you Patrick! :D
Justin @ SaltPepperSkillet says
Your photography is so stunning! Great work!
Lorena says
Thank you so much Justin :D You made my day!
Karen @ Seasonal Cravings says
These look so delicious and easy to put together. I am looking forward to seeing the video. Good for you for learning to make videos! It’s on my to-do list but will have to tackle it when the kids are back to school in the fall.
Lorena says
Thank you Karen. I’m lucky I learned how to edit way back when my son was born because I started making like little video collages of this cuteness to show family. Actually kids screaming in the background while making video isn’t that much of a problem because you can simply mute out all the noise and put in some lovely music instead :P