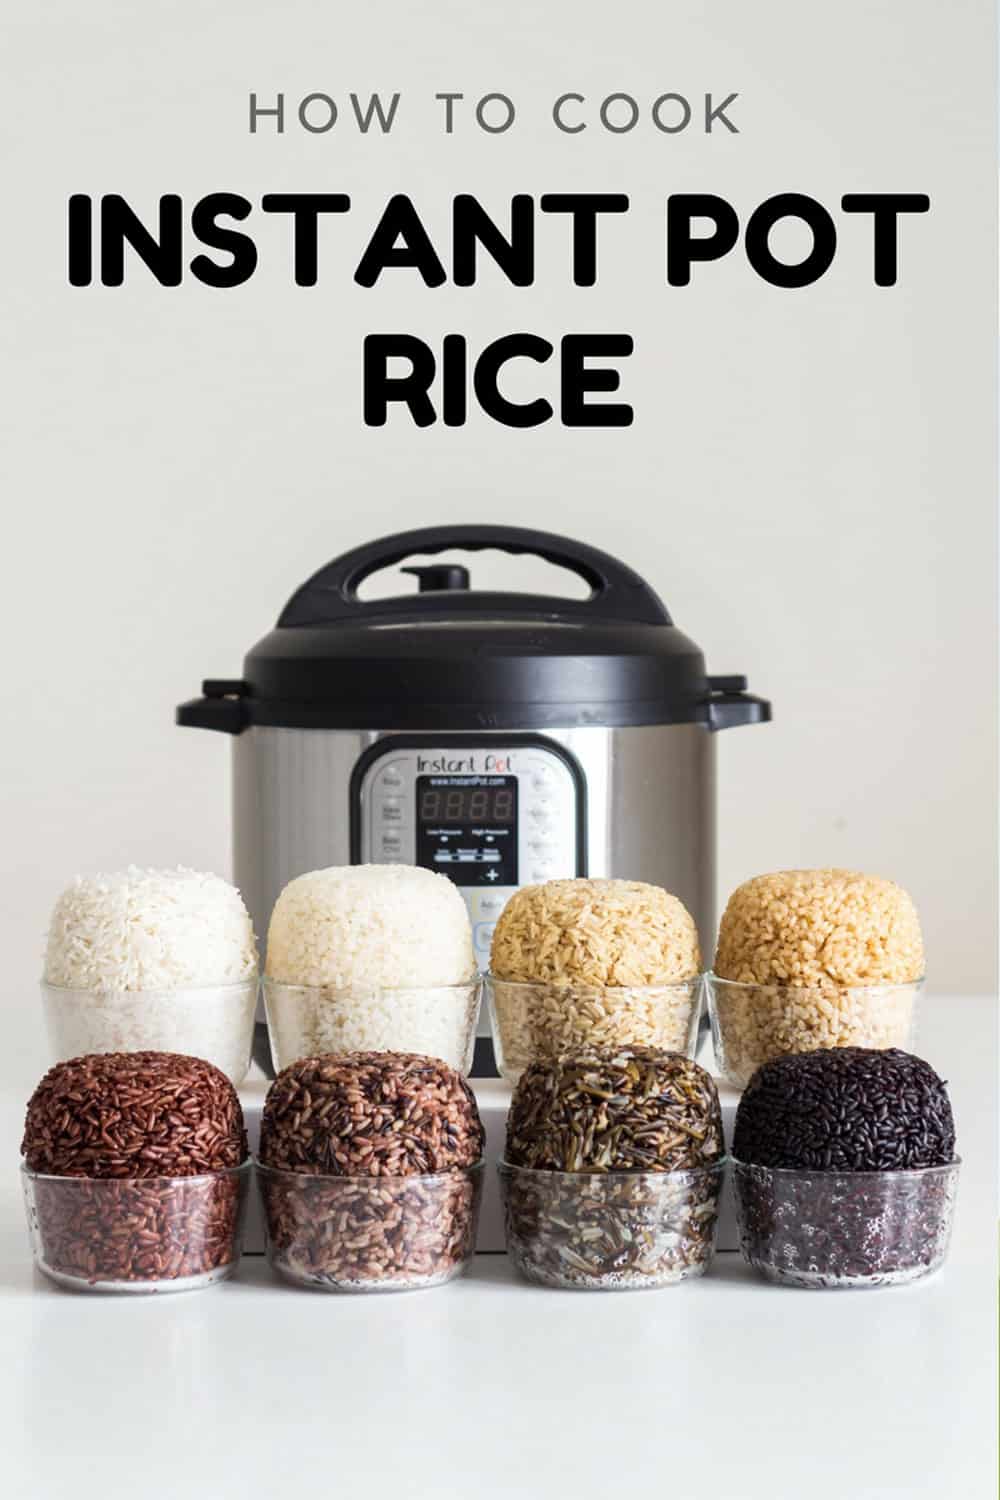
After weeks of experimenting, I got it right. Here is your fail-proof guide for Instant Pot Rice. White rice, brown rice, wild rice, and many more, basically an encyclopedia about cooking rice in a pressure cooker.
If you’ve followed along for a while, you know I’m a huuuuge fan of pressure cooking. My Instant Pot Chicken and Rice recipe is not only a hit at my house but thousands of others now, too. YAY!
What Is The Best Rice To Water Ratio?
You’ll be surprised but it is always and for ALL sorts 1:1. Yes, you read that right.
Instant Pot Rice calls for a 1:1 rice to water ratio
You wonder why on the stove different ratios are called for. Well, the secret to rice cooking is that the darker or wilder the rice the longer it needs to cook and the longer something needs to cook, the more water evaporates during the process.
This leads us to the conclusion, that different kinds of rice do not necessarily need different kinds of amounts of water to “cook” but rather more water to evaporate.
Since the Instant Pot gives a tight seal and high pressure, no water evaporates at all.
So yes, brown rice and even wild rice need the exact same amount of water as white rice in an evaporation-proof environment. *mind-blown*
What If My Rice Is Too Hard With a 1:1 Ratio?
If your rice is hard or uncooked that doesn’t mean next time it needs more water, that means, next time it needs more TIME. Did you wait for FULL natural pressure release?
Unfortunately, you cannot “save” undercooked rice in the Instant Pot as putting the lid back on and turning the pot back on just leads to the dreaded burn warning. I recommend adding the undercooked rice to a soup or stew maybe 5 minutes before it’s done simmering.
What If My Rice Is Too Mushy?
You most likely used too much water. 1:1 water to rice ratio is essential for all rice types.
Use the exact same container to measure both rice and water. Some cups are standard American (236ml), others are metric (250ml) and the little plastic cup that comes with the Instant Pot is neither (160ml). So do not use different measuring cups to measure rice and water.
Does 1:1 Apply For 1 Cup Just As It Does For 4 Cups?
YES! When making Instant Pot Rice you need 1 cup of water for every cup of rice, regardless of if you cook just 1 cup or 4 cups.
This is different when you cook rice on the stovetop where evaporation happens. The more rice you cook the less water you need when using a regular pot on the stove.
How Many Cups Of Rice Can You Cook In An Instant Pot?
In theory: 2.5 cups in a 3-quart Instant Pot. 5 cups in a 6 quart Instant Pot. 6.5 cups in an 8-quart Instant Pot.
This is US standard measuring cups and raw dry rice.
So the mathematical thought for the theory is the following:
- 1 cup of raw white rice gives on average 3 cups cooked rice.
- Instant Pots should not be filled more than 2/3 of its full capacity at any time. So we have to take the expanded rice into consideration.
- A 6-quart Instant Pot’s capacity is 24 cups and two-thirds of that are 16 cups.
- There should not be more than 16 cups cooked rice in the Instant Pot and since 1 cup raw makes 3 cups cooked we have to divide the 16 by 3. That makes 5.3 cups.
The calculation is only theory though. I have not tried that many cups in my own 6-quart. 4 cups raw dry rice are the maximum I have cooked myself without any issues and with perfect results.
Natural Pressure Release (NPR) vs. Quick Pressure Release (QR)
What’s better? Hands down, no doubt >> natural pressure release. If you cook rice longer so you can do quick pressure release, with the hope to have the rice cooked faster overall, it gets sticky and mushy.
If you want fluffy rice, I encourage you to be patient and wait for natural pressure release. I timed all rice and there doesn’t seem to be any rhyme or reason to the timing. Even the same kind of rice in the same amount has had different natural pressure release times.
What Is The Rice Button For?
The rice button was designed only for white rice (regular long-grain, Jasmine, or Basmati rice). It works fine with those types of rice. The shorter high-pressure cooking times with natural pressure release work better though in my opinion.
Also, the Rice Button does not work for any other type of rice but white rice.
Do I Have To Rinse Rice Before Cooking?
Opinions vary widely and there seems to be no right or wrong answer. It’s all up to personal preference. However, thankfully it is irrelevant for the cooking times presented.
Both rinsed and dry rice work with my cooking times and method. Nothing has to be adjusted or changed either way. Just make sure you drain your rice well in a fine mesh strainer if you rinse it. Then use 1:1 ratio.
Instant Pot Rice Cooking Times
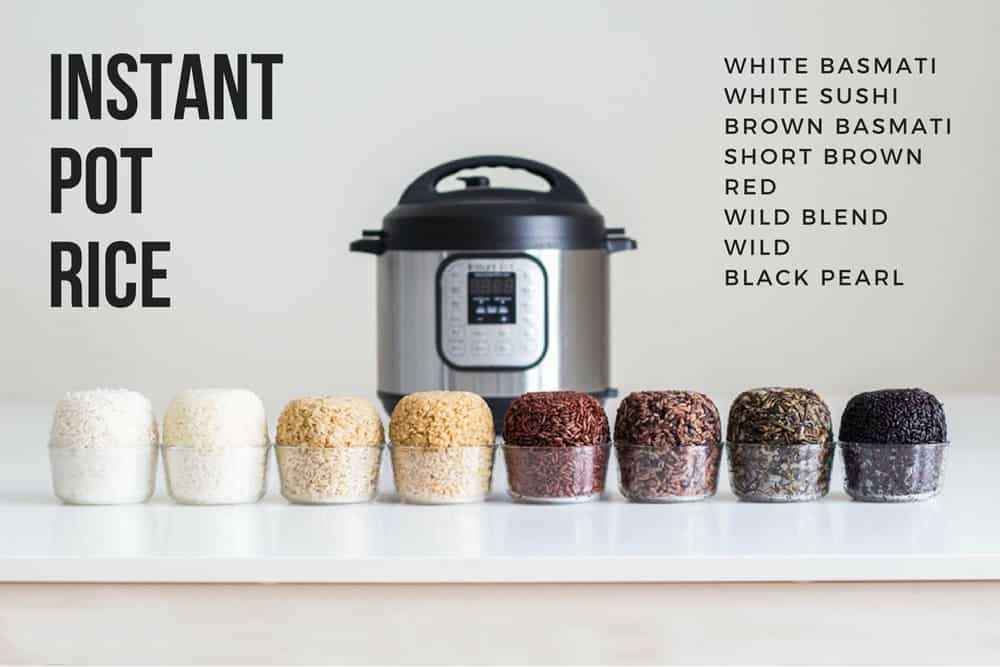
Now let’s get to the individual kinds of rice:
White Rice
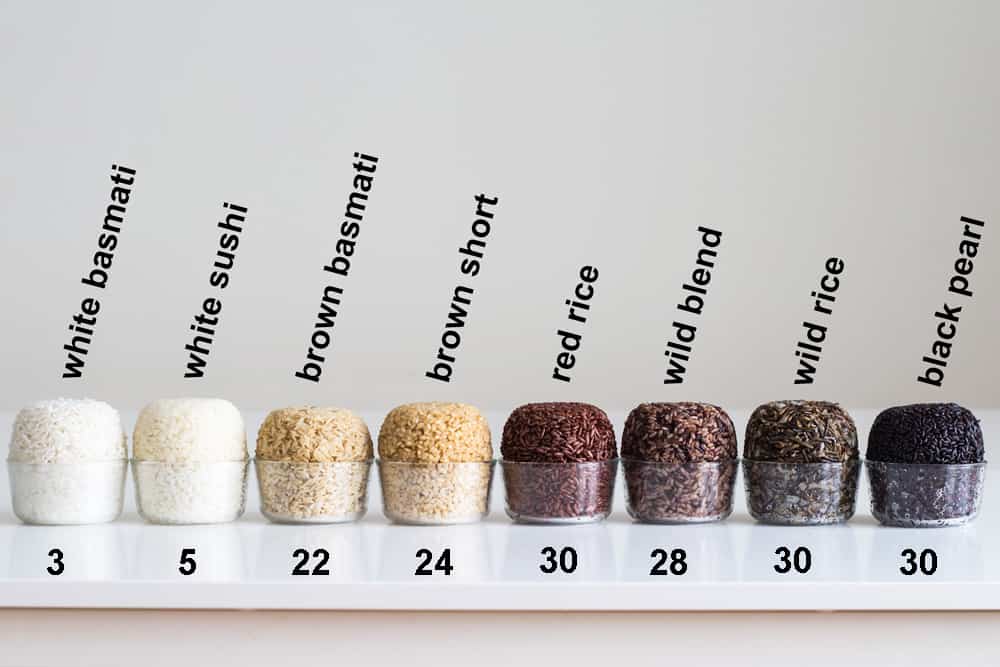
I’ve tried both Basmati and Jasmin and both cook in the exact same time, 3 minutes high pressure + NPR. The thicker regular long-grain white rice cooks better with 4 minutes high pressure + NPR.
Brown Rice
I’ve experimented with Basmati brown rice and with short grain brown rice and the Basmati cooked faster than the short grain. From all my experiments it seems like the thicker the individual grains, the longer they need. With the exception of wild rice, that one needs long regardless of being a skinny dude. 22 minutes high pressure + NPR for the thin Basmati and 24 minutes for the thick short grain.
Wild Rice
Some people swear the grain HAS to burst open, others swear, it’s best when “just about to burst” and others like it completely unburst. Guess what, you can achieve any consistency you like when you cook Instant Pot Wild Rice. Here are the times for whole unbroken wild rice: 28 minutes (unburst), 30 minutes (some burst some unburst), 32 minutes (burst).
Red Rice and Black Rice
Red rice and black rice is pretty thick and needs quite some time to break down so give it tiiime. It’s round and thick and it takes quite a bit for it to absorb all the water. It’s like a new towel that needs time to get soaking wet ;) 30 minutes high pressure + NPR.
Sushi Rice
I was actually pretty sure this would take just as long as regular white rice but surprise surprise. It’s not as sticky if you cook it or only 3 minutes and this is the only rice you really want to be sticky, right? So increasing the cooking time actually made it stickier and better to work with for sushi. Cooke it 5 minutes on high pressure + NPR.
Wild Rice Blend
Soooo, this one is the trickiest because it has several different kinds of rice that individually cook in different times. I found it cooks best in an in-between time. The wild rice in the mix will be completely unburst but the brown rice won’t be all mushy. Usually, that’ll be 28 minutes high-pressure + NPR. Of course, it will depend widely on what grains exactly are in your blend.
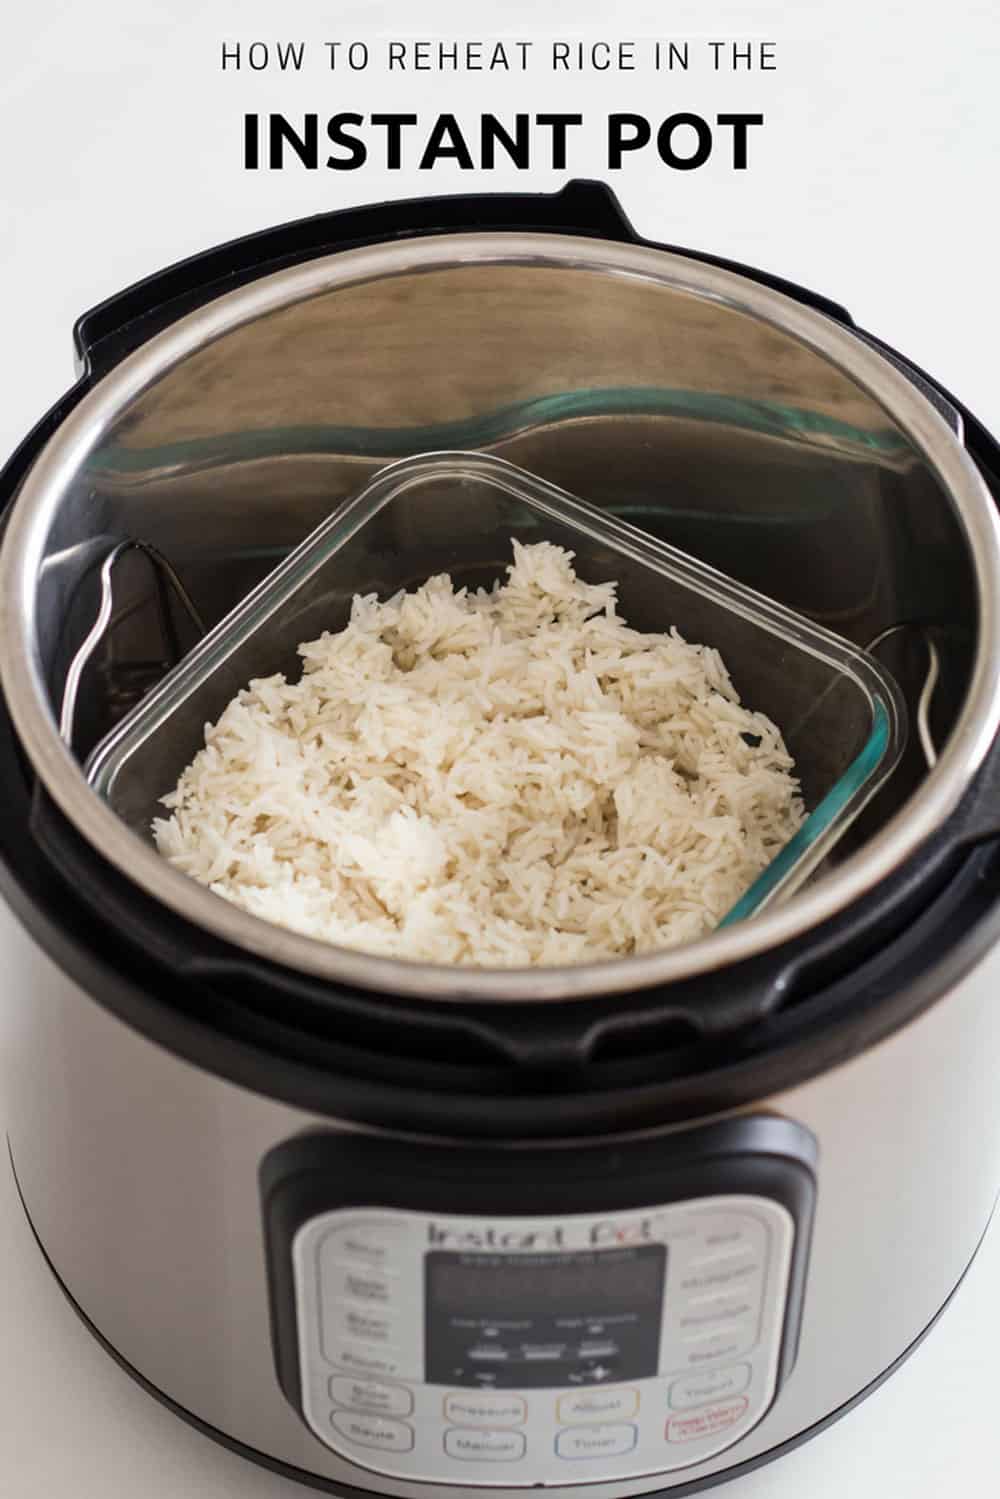
How to Reheat Rice in the Instant Pot
So, I’ve seen a couple of people recommend adding water or oil and stir it in the inner pot and pretty much making a mess, haha.
Um, not my favorite method.
I like things simple. I basically want the same convenience as a microwave but without the waves.
I store my leftover rice in a heat-proof glass container and then place the trivet in the Instant Pot, add a cup of water and place the rice uncovered on the trivet. Put the lid on, knob to sealing and press steam for 5 minutes. Quick pressure release, done!
So here you have it. The longest post in the history of Green Healthy Cooking.
Burn Warning Trouble Shooting
The wicked burn warning, it’s the Instant Pot user’s nemesis! For starters, some Instant Pots are a lot more temperamental than others. You most likely did nothing wrong, however, you are dealing with what we could compare with a toddler with a temper tantrum.
If your Instant Pot is generally one to scream “burn” easily and quickly I recommend you stay close in the beginning phase while it gets the water boiling and trying to get to pressure. When the pot is trying to push up the safety pin but seems to not be able to, that’s the critical moment. Push down on the handle of the lid a little to help it get to pressure.
If the pot tries and tries to get to pressure but can’t too much water evaporates through the valve and thus leaves too little inside the pot and the rice starts to burn.
If even with a little push on the lid, it cannot get to pressure, the sealing ring might not be positioned properly inside the lid. You will have to abort the mission and start over, making sure the sealing ring is still in great condition and placed correctly.
If the Instant Pot was able to pressure cook for most of the time and only showed the burn warning at the end of the cooking time, then just unplug it and wait for natural pressure release. Often times it still manages to cook the rice and just a tiny corner got burnt.
Instant Pot Rice
Equipment
- Pressure Cooker
Ingredients
- 1 cup rice - (Basmati white, Jasmin white, Basmati brown, short-grain brown, red, black, wild, wild blend, sushi)
- 1 cup water
- 1/2 tsp sea salt
Instructions
- Add all ingredients into the Instant Pot. You can double, triple or quadruple all ingredients in same amounts.
- Make sure sealing ring is placed properly in lid, add lid, turn shut and turn knob to sealing position.
- Cook on high pressure for the number of minutes instructed below depending on the type of rice:White Rice (Basmati or Jasmin): 3 minutesWhite Sushi Rice: 5 minutesBrown Rice (Basmati): 22 minutesShort Grain Brown Rice: 24 minutesRed Rice: 30 minutesWild Rice Blend: 28 minutesWild Rice: 30 minutesBlack Pearl Rice: 30 minutes
- Natural Pressure Release until pin drops. Takes on average 9-12 minutes (max. 18 minutes for 1 cup and max 30 mins for 4 cups).
- Remove all rice from pot immediately to avoid it sticking to the bottom. If needing to keep warm, leave rice in pot after natural pressure release without opening the lid to avoid steam being released and drying out the rice > making it stick to the bottom.
Notes
- I use a US standard cup. 236ml in volume.
- I, personally, do NOT rinse or wash my rice.
- Cooking time stays the same no matter how many cups you cook.
 Decorating Easter Eggs
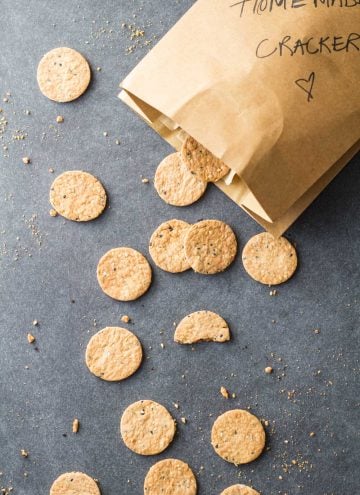 15-Minute Prep Homemade Crackers
 Grilled Asparagus
Jess says
Hi! Thanks for the great recipes for ALL the different types of rice in one spot! Love it.
I’ve been trying the brown long-grain rice and still tweaking to make it just right for us. We are at an elevation of around 7000ft so I’ve tried 25min this time and will bump up if needed.
My main questions:
-it takes more like 25 min for natural release, is that ok?
-do I need to turn off the instant pot once cooking time is done, or leave it in the “keep warm” setting until its done with natural release?
Thanks in advance! ! :)
Lorena says
Yes, natural pressure release times depend on volume inside. If you’re cooking like 6 cups of rice you might even get over the 30-minute mark. Nothing happens to the rice though. I’ve often completely forgotten the rice and after an hour NPR it’s still perfect and warm actually. I always leave the warm setting on. I don’t turn it off. After 30 minutes with tons of rice inside I’d say it’s safe to assume all pressure is out and the safety pin was simply stuck. Turn the valve to the venting position to assure there is no pressure inside and then shake the lid gently. The pin should drop immediately. DO NOT shake the lid with the valve on sealing. First make sure all pressure is out.
Ward says
If you double the rice do you double the cooking time? 😳
Lorena says
No, the time always stays the same and the ratio also always stays the same.
Pam says
And to think I was considering buying an expensive rice cooker because of such inconsistent results on stove top and mini rice cooker. Mad the brown rice and it was PERFECT!!! Husband didn’t even know it was brown rice it was so fluffy. I am a bit of a novice to the IP but have has great success with making stocks, poaching poultry and now rice!
Thank you
Elizabeth says
My husband bought a box of purple rice. I assume I could treat that like red or black rice? (I never knew rice could be purple.)
Lorena says
I never knew rice could be purple either. I’ve never seen that before. What does the package suggest in terms of cooking time?
Regie says
Purple or Forbidden rice are other names for black rice.
Jennifer Hanks says
This is THE BEST resource for Instant Pot rice! I bought a Mini-Instant Pot for the sole purpose of cooking grains (and hard-boiled eggs, of course). Even the two legit IP cookbooks I purchased get the rice instructions wrong. I repeatedly reference your page for any type of rice I cook, with perfect results every time. Thanks so much for taking the time to figure this all out.
Lorena says
Thank you so so so much for your lovely comment Jennifer! I’m so happy you find my guide useful :D
Cindy says
Hi, I just made jasmine rice in my 8-quart instant pot exactly the way it states on here the rice was cooked to my liking but it was sticky im not sure what to do to change that because I dont want undercooked rice or mushy do you have any suggestions
Lorena says
Hi Cindy, I recommend, once you open the lid, to immediately remove the rice from the Instant Pot. The hot plate below is still warm so water keeps evaporating and that makes it sticky. What I do is, once the safety pin drops, I open the lid, immediately stir to fluff up and then transfer to a bowl out of the hot pot.
Sarah says
I have a blend of Bob’s Red Mill Wild and Whole Grain Brown Rice. Would I use the time for Wild or Brown? Or is that considered a Wild Blend?
Lorena says
That’s considered a wild blend.
Joy says
My entire life I’ve used a rice cooker. My mom is full Taiwanese and I’m half Taiwanese/half Caucasian. We ate rice everyday.
I thought I’d try your method of cooking rice in the IP and my husband and I LOVE it so much better!!!
Thanks for making my rice ‘step up a level’ – woo hoo!! Thanks also for your months of trials to perfect rice – it’s a game changer in my house!
Nicolina says
I tried this tonight and was skeptical because I have an off-brand instant pot, the Simply Ming pressure cooker. I did short grain brown rice and it came out perfectly! The rice is always chewy or hard even in my rice cooker, but this worked perfectly! I’m at about 2200 feet and followed your instructions to a T with perfect results. Thank you for creating an encyclopedia for instant pot rice making!!
Lorena says
Thank you so much for coming back and commenting, especially mentioning what brand of pressure cooker you used, that will help others who have the same one.
Jennie says
Lorena thanks so much for this excellent IP rice resource! I love it – You’ve taken the “scary” out of rice in my fave new-ish kitchen appliance.
When you mentioned reheating your rice in the IP, you said you did so in glass heat-resistant storage containers. Could you share the type/brand your containers are? I want to be sure to use ones that are safe in the pressure cooker.
Lorena says
Hi Jennie, I’m so happy you found my guide useful :) I used a container from the brand Snapware. You can get them on Amazon, I used the 6.5cup one. Just make sure that in the Amazon description it says “Microwave, Oven, Refrigerator, Freezer And Dishwasher Safe”
Banu Moore says
These ratios are the best!!! I have now made both basmati and jasmine white twice and they turned out perfect. I used chicken stock and made two cups rice each time. They came out just the way I like them. Today I made brown rice, and I have never been a brown rice fan. But I had basmati brown rice sitting in the pantry so I gave it a try… I am amazed how tasty it turned. I usually don’t leave comments but just wanted to say thank you… Looking forward to trying some other rice types…
Lorena says
Thank you so so much for taking the time to comment and rate Banu, I really appreciate it :)
Sarah B says
I am a horrible rice maker. I’ve been asked to bring white rice tonight for a group dinner at a friends house(10 people). I am TERRIFIED! I CAN’T mess this up!!
With that said, I have to transport the rice about 35 minutes away. How do I achieve this while having fluffy white rice upon arrival?
soleilnyc says
Cook the rice to time for when you have to leave. Allow the pressure to release on your drive over. Open it up when you get there to release some of the heat, then close it again so it stays warm! You can even turn the keep warm function on when you get there if you need to. Good luck!
Lorena says
Hi Sarah, considering white rice takes only about 20-30 minutes total to cook in the Instant Pot (for 10 people I would make 3 cups just in case, to have some left over and not be short) You could ask the host if you can get there 20 minutes earlier to plug in your device. Also, I don’t know what brand of white rice you are using and how thick the grains are so just in case set it to 4 minutes on HP as opposed to 3. Cooking it a minute longer will ensure even the thickest grains cook through (assuming you are at sea level?). Remember to not touch the pot once the pressure cooking time is over and leave it to release pressure naturally or else the rice won’t cook through.
Carrie says
Do you rinse or soak the rice before cooking?
Lorena says
I never do. I buy a brand that comes already clean and doesn’t require rinsing. However, this guide works for rinsed rice as well. You may want to reduce the water amount by about 2 Tablespoon to account for the water already in the rice. I don’t know if the guide works for soaked rice.
Micki says
Has anyone ever tried making risotto in the IP?
Bobbie says
That is my question too. I’m thinking no due to the need to stir it constantly or close to it seems.
Lorena says
There have been others commenting that they are successful with a 1:2 rice to water ratio and 7 minutes high pressure + full NPR
cat says
I like short grain brown at 27 minutes. I’m always trying to get it more tender, less chewy. No salt until after cooking. I am at sea level.
Paige Overton says
I cooked Lundberg short-grain brown rice – 1:1 ratio for 25 mins HP and natural release. The only reason I added an extra minute was because I took my rice directly from the freezer. It came out perfectly. I’ve been afraid to attempt the IP. On the stove-top, I had to constantly watch it and then it would be really nice on top and often mushier towards the bottom or it would burn on the bottom. The IP was hassle-free and perfect! Thank you so much!
Lorena says
I’m so happy you found the guide useful Paige :)
Nicola Marshall says
Hello,
Thanks for the guide. I have cooked rice in the IP three times. Every time there is a small layer at the bottom that is semi-burnt. How can I stop this from happening, please?
Lorena says
This is the weirdest thing to me. Some instant pots seem to heat so much stronger than others. It drives me nuts because the two I have are nothing like that. I’ve never ever had the burn warning come up so I’m at a loss with this. Do you give your rise/water a good stir before turning on the lid and turning on the pot?
Briant says
Hi Lorena I want to make white rice but I want to add black beans in it any suggestions
Lorena says
Hi Briant, even soaked black beans will take much longer to cook that white rice. You would have to use already cooked or canned beans to make it work. Add the white rice and water to the Instant pot, then put drained already cooked beans on top. Don’t mix the beans into the rice, just add them on top. Seal, pressure cook and then once the natural pressure release is over, give everything a mix. I’ve never tried this myself but that’s what I would do.
Sidra says
I make beans and rice combinations all the time in my IP. As well as lentils and peas and mung beans and rice. Don’t use canned beans. They do not have much life (prana) in them, therefore they aren’t as good for us. Make sure you soak the beans. Soak them at least overnight and then cook them until they are almost done (time depends upon beans). Use a combo of natural release and quick release and then add the rice and more water if needed. If using white rice, you should only need to cook for a few more minutes. Also, cooking together increases the digestibility and flavor of both.
Sidra says
Also, mix the rice in (it won’t cook evenly or properly if you just leave it on top).
Veni says
Please help! I have the IP-Duo. I am an IP newby. Which button do I use? “Pressure Cook?” “Rice?”
Lorena says
You have to press “pressure cook”, make sure it’s on “high pressure” and follow the instructions of the recipe card, in terms of timing, see the chart for the type of rice you have.
Hal says
Hi! It’s amazing that you read and respond to every comment!
I have a question – I cooked “long grain” white rice tonight, 1:1 ratio, 3 minutes manual high pressure and 18 minute natural release. Came out a bit too hard for my liking. Would you increase the time?
Also, why does the instant pot’s natural rice setting show 11 minutes on low? Should I try that?
Lorena says
Hi Hal :) I try my best to respond to absolutely everybody. Yes, increase the time, that’s all. I’ve seen long grain white rice is thicker than basmati or jasmin. That’s why it takes longer. Try 4 minutes or even 5 minutes. Everything else stays the same.