Step by step tutorial with photos for a fool-proof homemade apple yeast bread made with fresh apples. The best bread you’ll ever try!
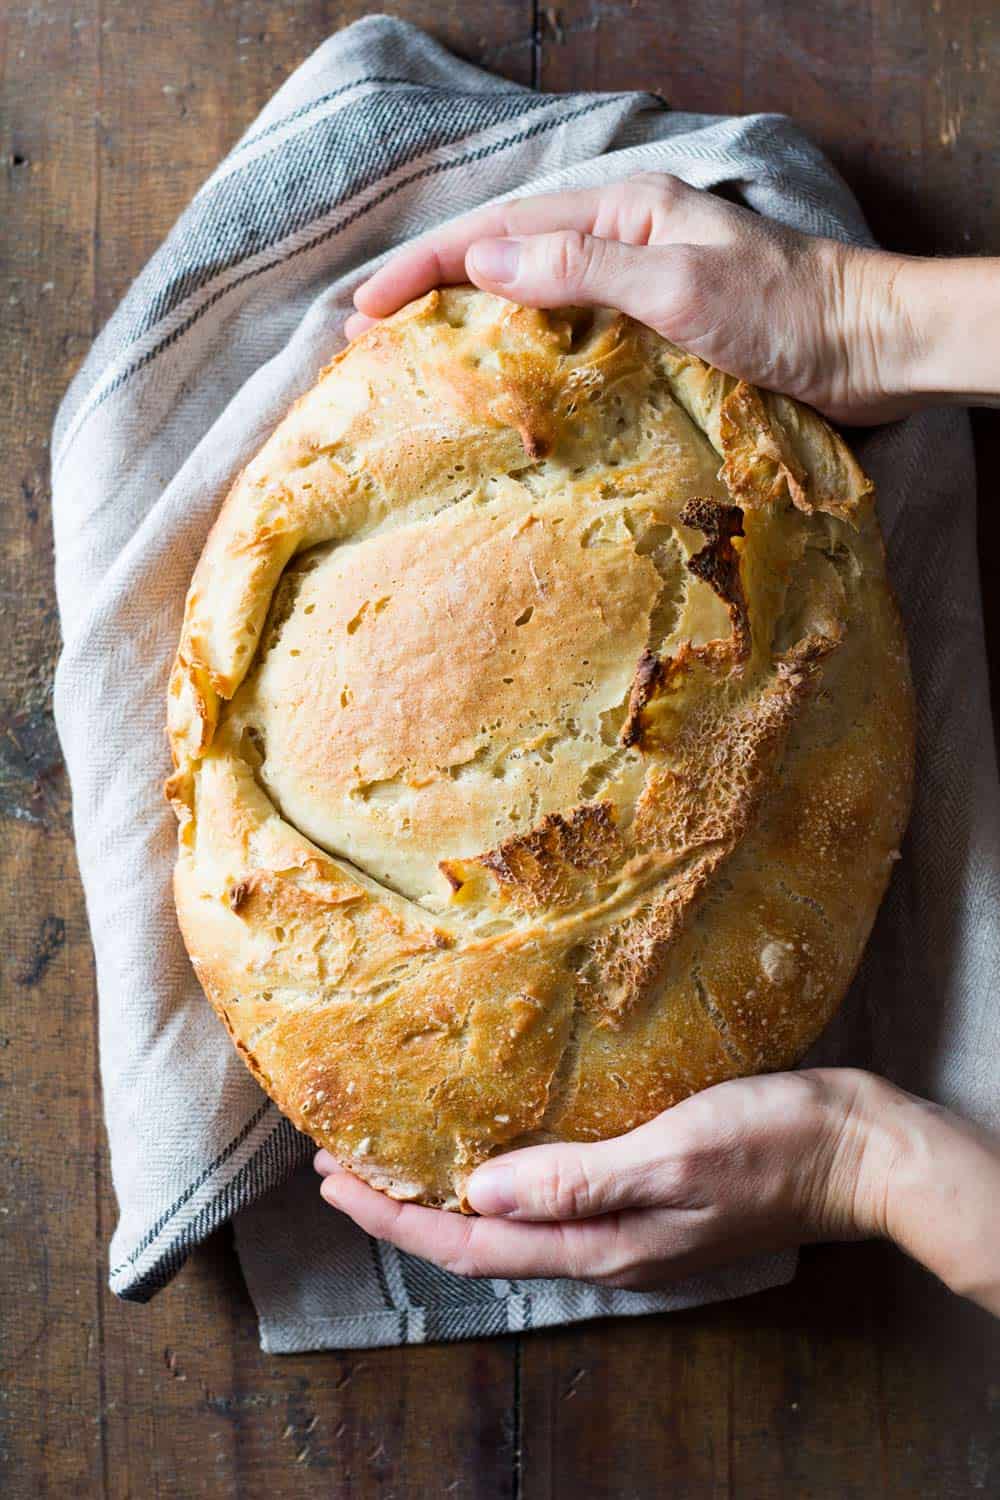
Most apple bread recipes are made with simply baking powder and the consistency is, um, no, just NO! It’s not like bread!! It’s like banana bread but not as good. Banana bread can be a dessert and “caky” (is that a word). Apple bread should be a “real” bread though in my opinion. A yeast bread!
Let’s get to the step-by-step instructions here:
Make a starter
Bread made with a starter is beyond delicious and so much superior to any other form of bread! The consistency of a bread made with a starter is completely different. Make a starter. Just do it!
Mix the necessary ingredients and leave at room temperature for at least 12 hours. Let the yeast do its magic.
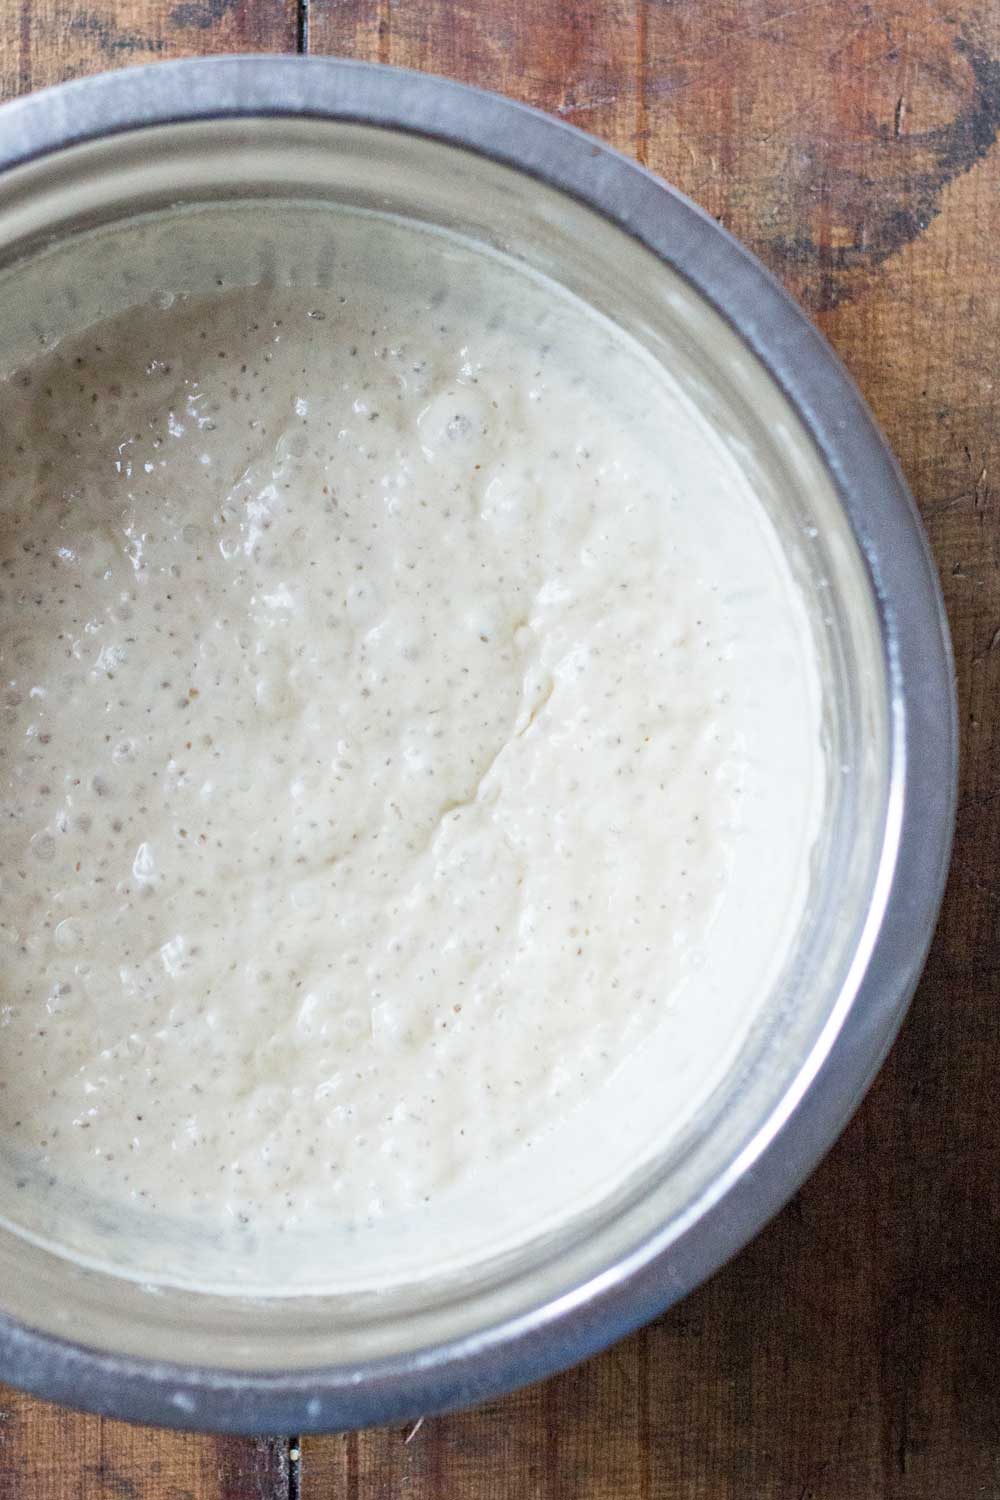
After 12 hours of leaving the flour and proofed yeast in a bowl covered with a kitchen towel at room temperature, it should look like this (if it doesn’t you didn’t proof your yeast, naughty you!).
Make it an “Artisan Bread”
Artisan yeast apple bread requires several rises. This specific bread calls for a 12-hour rise of the starter and then two 45-minute rises.
Remember, you don’t have to do anything at all while the bread is rising. Making bread is a long process BUT only requires a couple of minutes of actual work in between rising/resting time. In total, you put in maybe 10 minutes of active work here.
Use a stand mixer to knead the starter and rest of ingredients with a dough hook attached for a good 20 minutes on low. This is so the gluten is activated. You can’t do this by hand. The dough is too sticky and also, you’d need a bodybuilder’s muscle to make it through 20 minutes of kneading. If you don’t have a stand mixer ask around and borrow one from a friend.
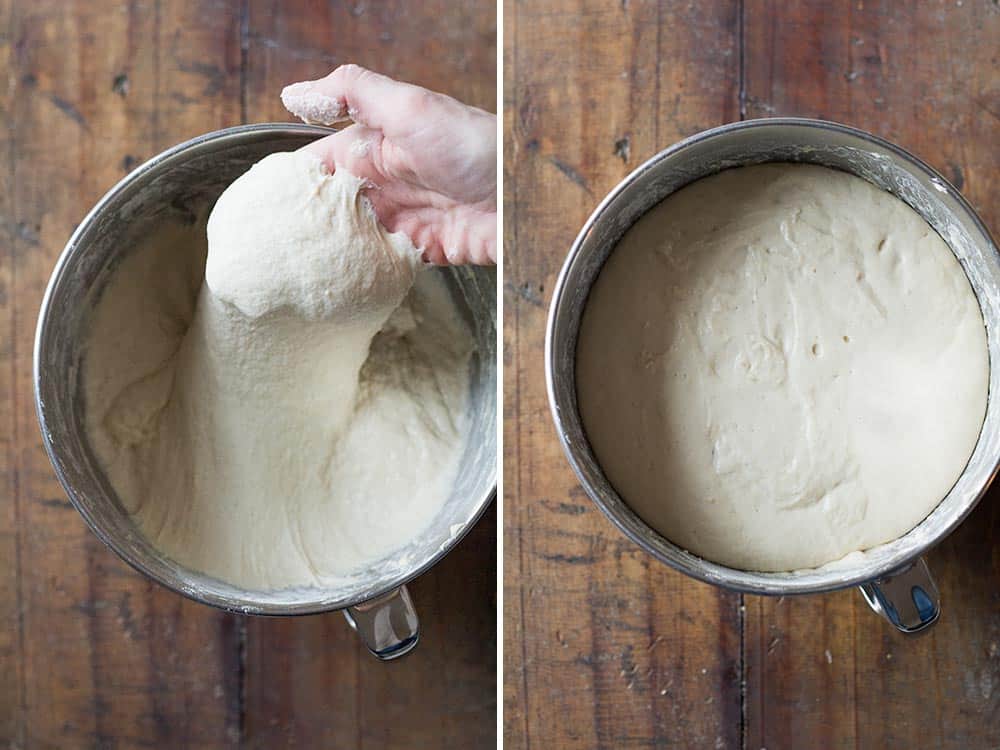
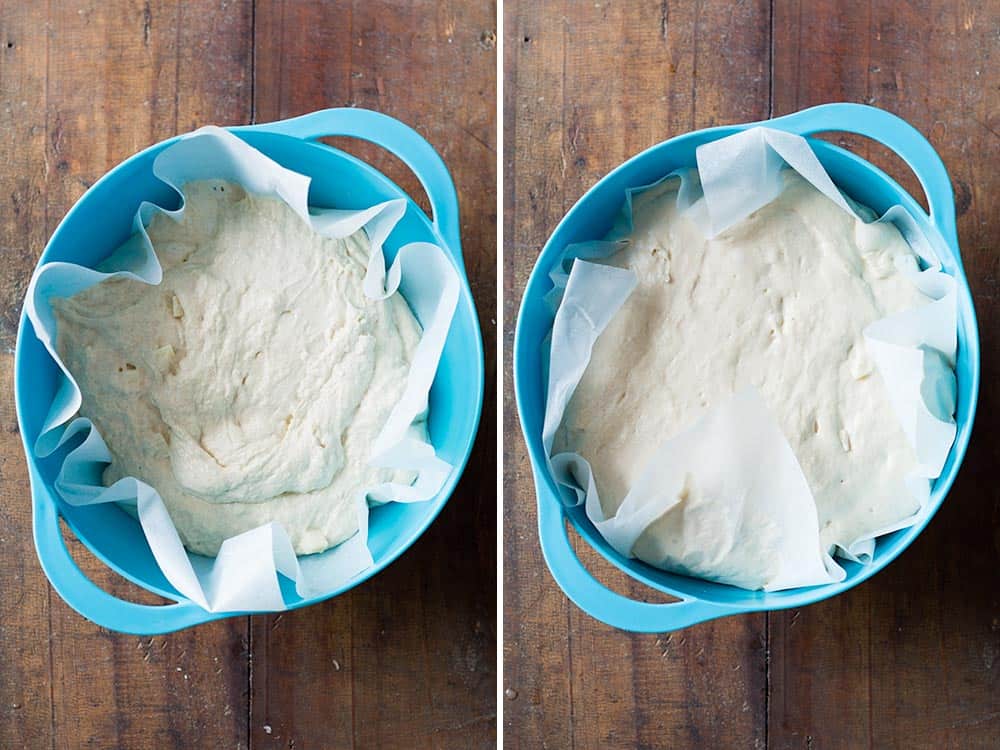
The dough should end up very sticky and elastic (left photo). Cover it with a clean kitchen towel and let rise at room temperature for 45 minutes or until the dough has doubled in size (right photo).
When and how to add fresh apples to the bread dough
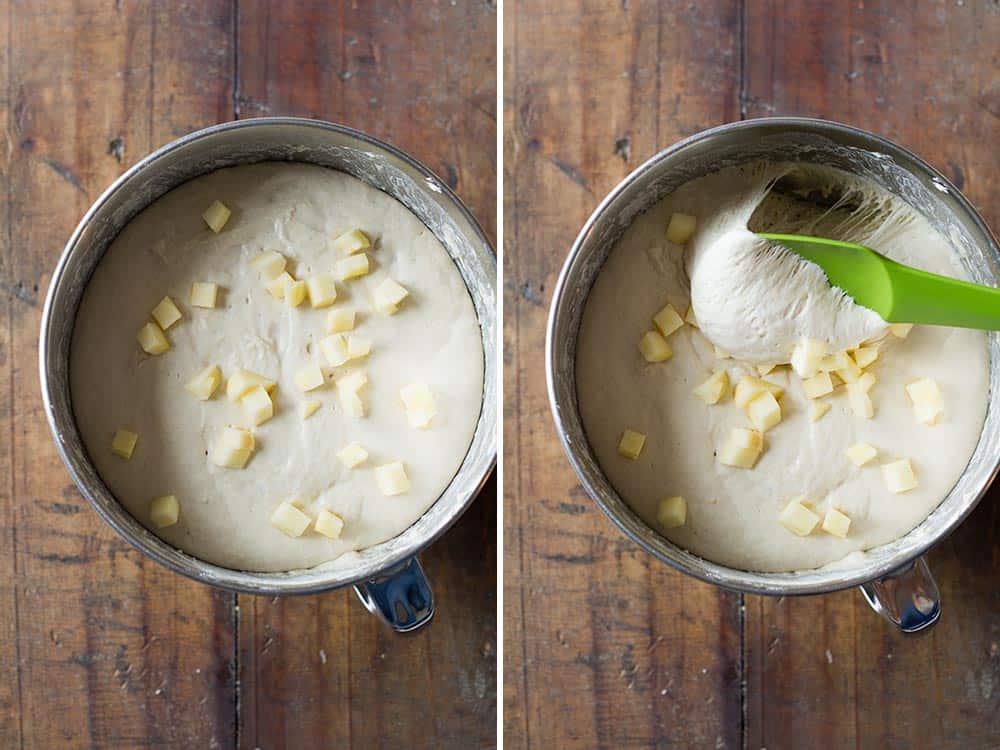
After the first rise, it’s time to fold in the fresh apples.
I recommend adding the apples this late in the process to avoid fermentation. If you add the apples in earlier it will ferment and make the dough pretty sour. I wonder also if the dough would even rise the first time due to the weight of the apples. It’s best to let the dough rise first, then add apples, then let it rise again.
Add apples and fold and fold until well combined. By then the dough reduced in size again. Tadaaa, the photos for how to add fresh apples to healthy apple bread:
You can leave the dough in the same bowl for the second rise but I prefer dumping it into another parchment paper-lined bowl for easier and risk-free transfer into the burning hot dutch oven later.
It’s so much easier to lift the dough out with the parchment paper and then turn around and dump in the dutch oven. I guess you could even dump it in just like that with the parchment paper at the bottom. I prefer to remove. Just in case. So it doesn’t stick?
Anyway. I dump it into a parchment paper-lined bowl, cover with the kitchen towel again and let it rise a second time for about 45 minutes. 15 minutes into the second rise I turn on the oven with the dutch oven inside for it to heat up properly.
Dutch oven vs. no dutch oven when making bread
There are two reasons apple yeast bread or any yeast bread really will form a dome. One, the bread dough is given enough opportunities to rise. Two, the bread dough is baked in strong heat coming from all directions. Most of us have regular ovens. Heat from the top and heat from the bottom. That’s it. Regular home ovens do not emit heat from all around. Bakeries have special ovens. Many of their ovens are stone ovens where the stone retains all the heat and radiates it back to the whole surface of the bread.
The only way to “imitate” this is by using a dutch oven. I’ve tried with a oven-proof stainless steel pot with oven-proof glass lid and … it doesn’t work. Stainless steel doesn’t “store” heat. It becomes hot, yes, but as soon as you take it out of the oven to dump in the bread dough, it immediately starts cooling down. A cast-iron pot keeps the heat for muuuuch longer. Enough time for you to dump in the dough, put the lid back on and transfer back in the oven without it cooling down even 1 degree.
Now, if you don’t have a dutch oven, don’t go run and buy one. They are quite pricey. Ask around if someone can borrow you theirs (<- that’s what I did by the way. Thank you Sophie! :) OR if nobody can borrow you one just use your cast iron pan (I’ve done that before with this No-Knead Bread). If you don’t have either, use a baking sheet. Your bread will not produce a beautiful dome. It will for sure still taste absolutely amazing though.
One important tip: be really, really, really, really, really, really careful when taking the dutch oven out of the oven. It will be BURNING HOT! Use very thick silicone oven gloves or double up your regular cloth gloves. The burns you get from a hot dutch oven are unbelievably painful. All concentration is required here. Don’t multitask at this point. Do only ONE thing. Keep your eyes only on the oven and your body parts.
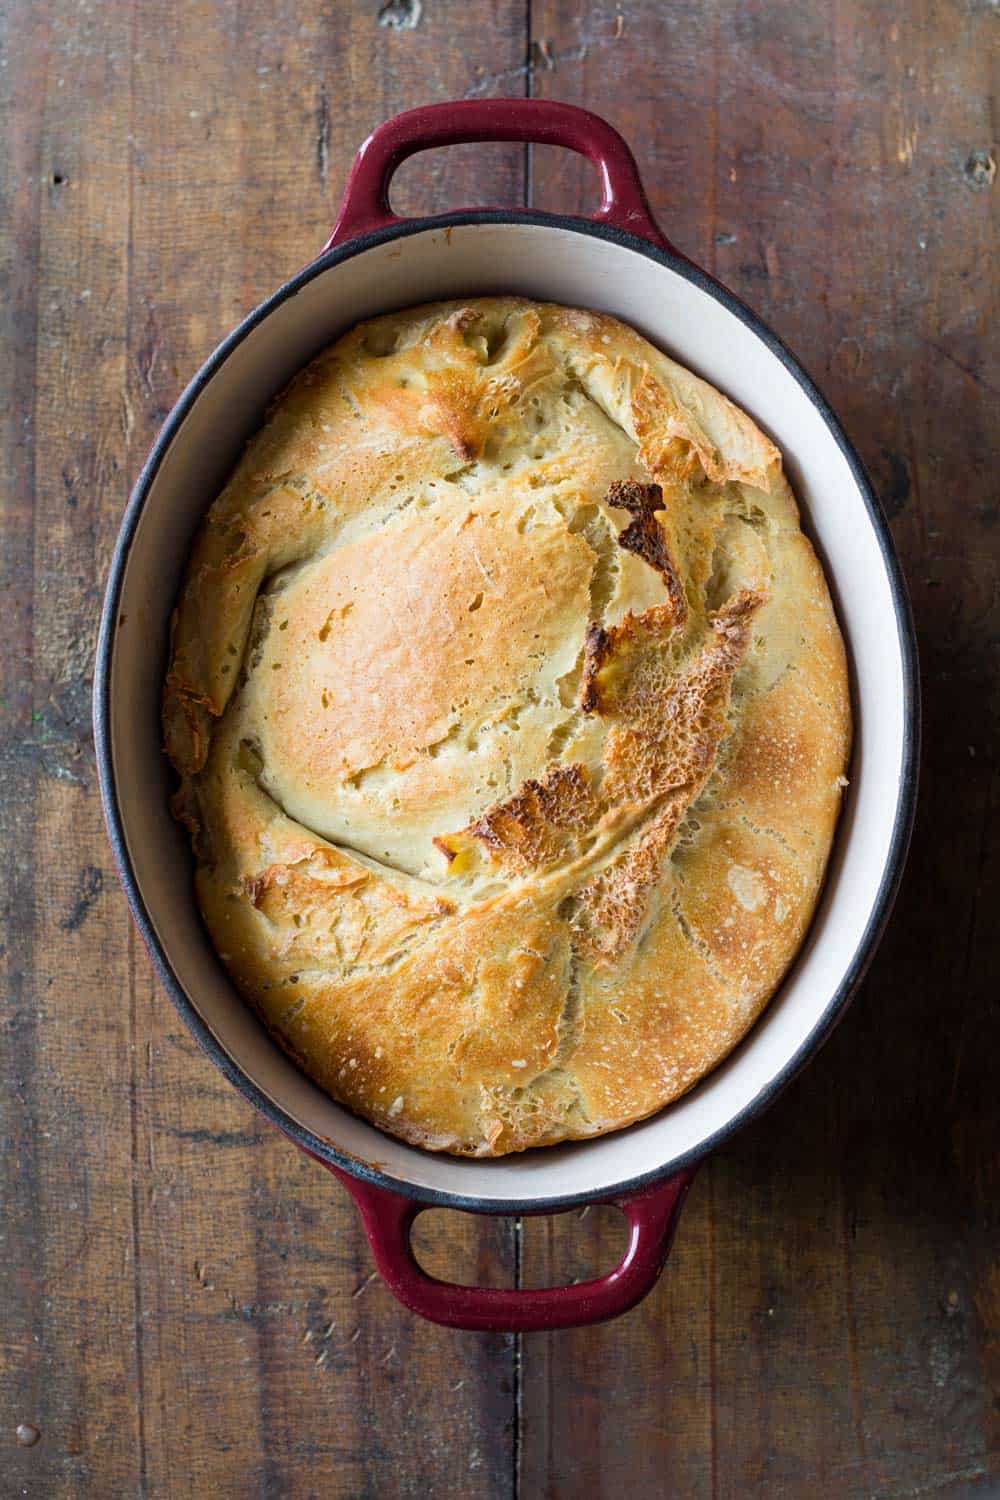
Apple Yeast Bread cooling instructions
This point is also very important. Once the apple yeast bread is baked you have to remove it from the dutch oven (carefully, remember it’s hot!). Since the dutch oven retains a lot of heat for an extended amount of time it’s crucial to remove the bread so it doesn’t continue baking. Otherwise it will become very hard. Turn the dutch oven over so the apple bread falls out. It will immediately and easily fall out. There is no way bread dough will stick to a burning hot cast iron pot or pan. If it sticks, you didn’t heat it up enough time (as I suggested further up) naughty you ;)
Place the freshly baked bread on a cooling rack and wait for it to COMPLETELY cool down before cutting into it. If you cut into hot bread all the steam escapes and the center stays “doughy”. The bread needs to cool down slowly for the steam to do it’s work on the inside of the apple yeast bread.
How to store Yeast Bread
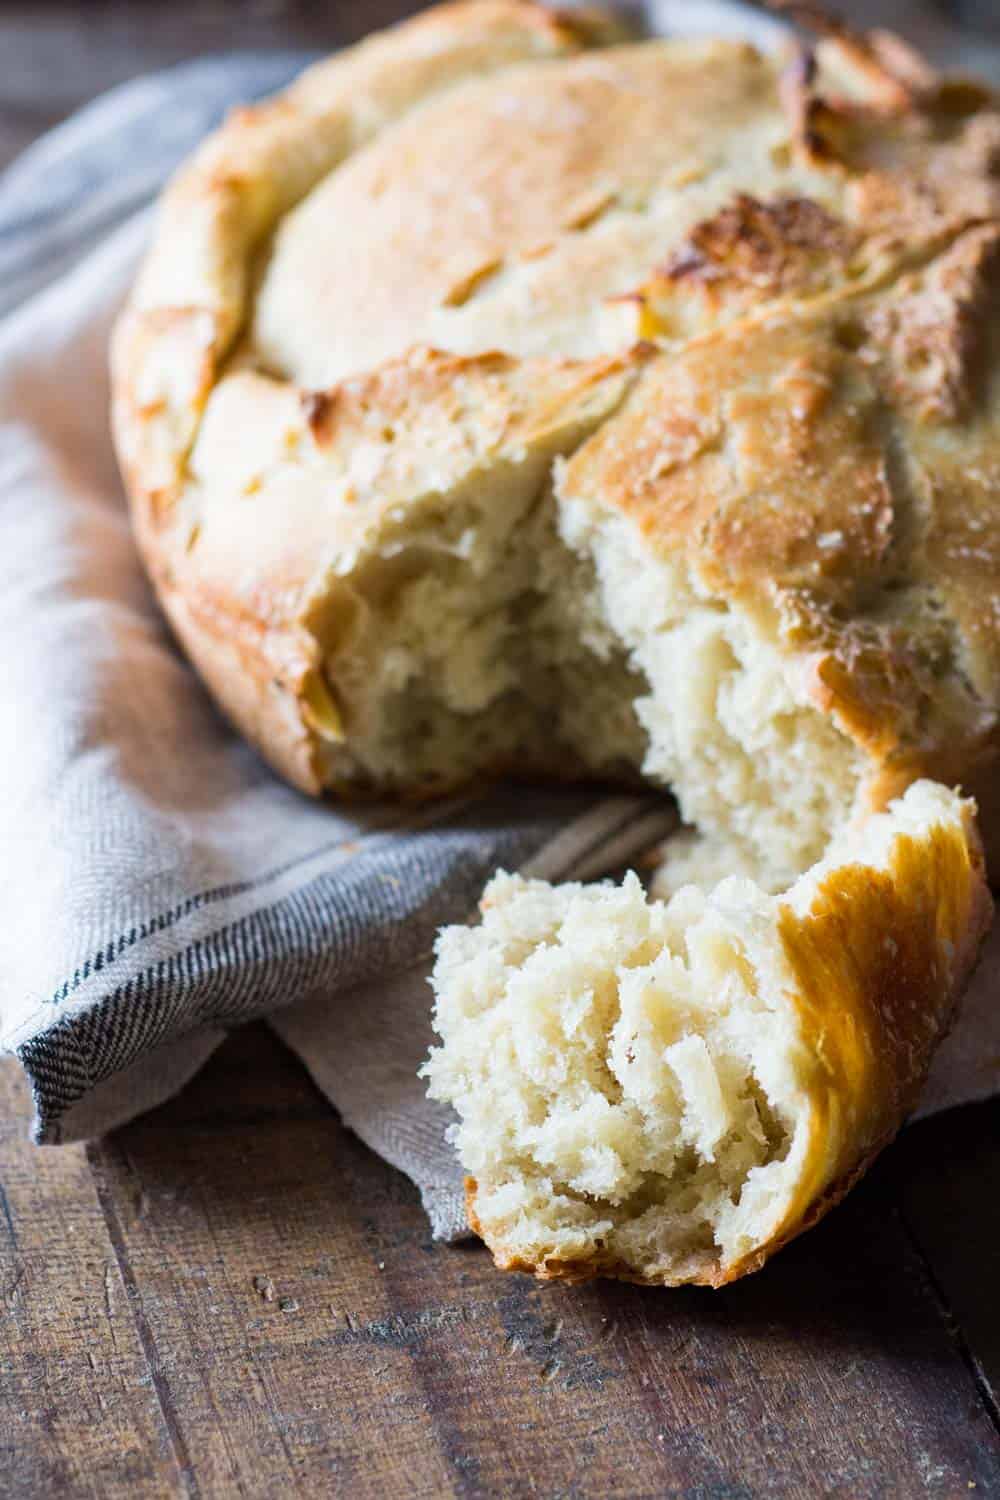
It’s time to finally, finally break apart a piece of this masterpiece of a healthy apple bread.
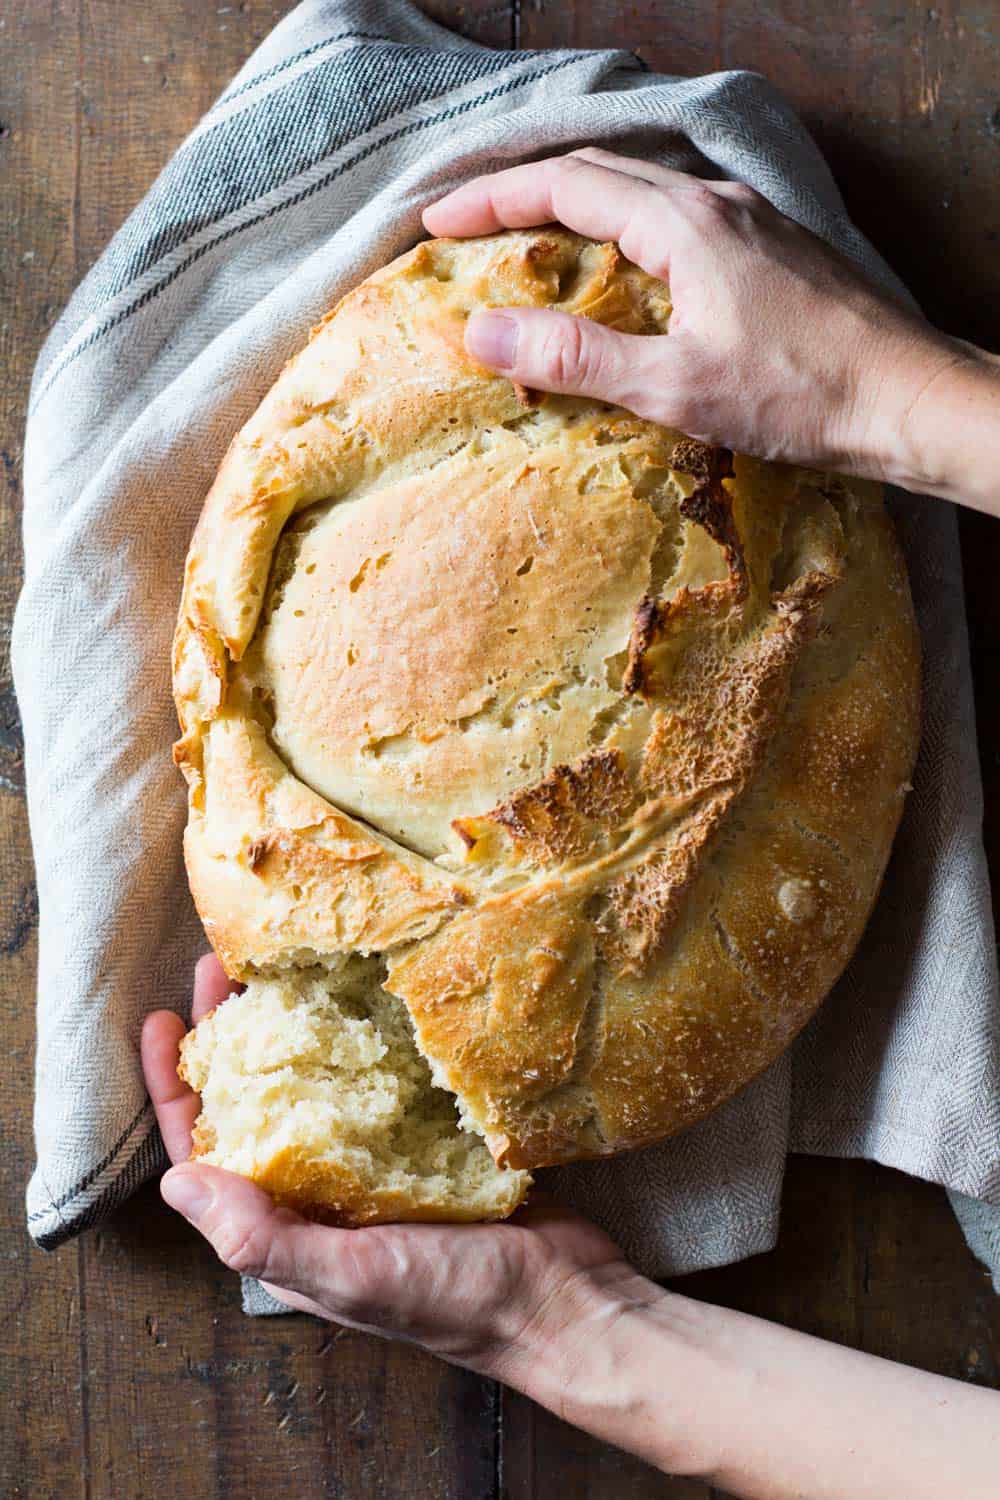
Don’t use a knife. Use your hands. Eat an uneven piece. It tastes so much better that way. Eat your first piece just like that. You can eat the second with butter or dunked into butternut squash soup. Eat the first piece just plain.
Once you ate all you could eat it’s time to store it. Put it in a paper bag and leave on the kitchen counter if you’ll finish it the same day. OR place in a paper bag and then plastic bag and place in the fridge. Since this Apple Yeast Bread contains fresh apples it shouldn’t be stored on the kitchen counter for too many days. Store it in the fridge from day 2 onward.
Phew. Are you ready to make bread now?
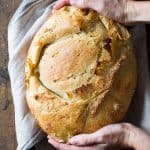
Apple Yeast Bread
Ingredients
- 220 ml (g) 100 F (38 C) warm water
- 7 g active dry yeast
- 220 g all-purpose unbleached white flour
- 800 g all-purpose unbleached white flour
- 7 g active dry yeast
- 480 ml (g) water
- 20 ml (g) milk
- 25 g sugar
- 1 pinch salt
- 1-2 large red apples
- extra flour
- cornmeal
Instructions
- Make starter In a medium bowl mix 220ml 100F-warm water (use a thermometer!) and 7g active dry yeast and let sit for 8-10 minutes until all bubbly. Then add in 220g flour and mix with a spatula. Cover with a clean kitchen towel and let rise at room temperature for 12 hours (overnight).
- Prepare the bread dough Add 800g flour, another 7g yeast salt, sugar and 480ml water and 20ml milk to the starter and knead on low for at least 20 minutes until the dough is sticky and elastic.
- First rise Cover the bowl in which the dough was kneaded with a clean kitchen towel and let rise for 45 minutes at room temperature.
- Add apples Peel and core apple, cut into small pieces and fold into the bread dough little by little.
- Second rise Transfer dough into a parchment paper lined bowl, cover with clean kitchen towel and let rise a second time for 45 minutes at room temperature. OR (preferred!): spread out a dish towel on the counter, sprinkle with abundant flour and corn meal and dump dough onto towel, then cover and let rise (see video for visual example).
- Preheat oven and dutch oven 15 minutes into the second rise preheat the oven to 450F with the dutch oven with lid inside the oven. The oven and dutch oven have to heat up at least 30 minutes.
- Bake the bread Take the dutch oven out of the oven carefully, lift the bread out of the bowl by holding the edges of the parchment paper up, turn around and dump into the burning hot dutch oven. OR take the turn the dish towel and dump the dough into the burning hot dutch oven. Place the lid on top and return into the oven. Bake 30 minutes with lid on and a further 10 minutes with lid off.
- Cool Bread Take dutch oven out of oven, remove bread from dutch oven, place on a cooling rack and let cool down completely before cutting into bread.


 Homemade Mayonnaise
 Breakfast Burrito Made Healthy
 Failproof Chia Seed Pudding
GP says
Made this today and divided into 2 loaves. Kept one and gave one to my brother. It was a big hit. My only issue with the recipe is the amount of salt. I used 10 grams of salt and it could probably do with a bit more. With only a pinch of salt, it would have been very bland,
Ania says
Love the recipe, but is it possible to skip the apples and sugar? To end up with a regular bread that’s more savoury and neutral?
Lorena Grater says
You can leave out the apple but you will need the pinch of sugar to feed the yeast. It won’t be sweet promise. It’s very very little sugar for such a big bread. You won’t taste it at all but you’ll end up with a much better texture thanks to it because it helps activate the yeast.
LoriDeLeon says
In your video is appears you add more than a pinch of salt. For me, a pinch left bread lacking that finishing note. The bread baked nicely but even the grandkids passed on their slices.
Denise says
I don’t have a Dutch oven can I use a large bread tin and aluminium foil
Denise says
Just re read recipe and got the answer
Darlene says
I made this & was very disappointed. It was doughy. I would like the US measurements.
Will not make again.
I have made Artisanal bread before that turned out great. .
Lorena Grater says
I’m sorry this recipe didn’t work out for you. Bread ingredients cannot be measured in cups and spoons. The measuring system is too inexact. A digital scale can be purchased for as little as $15. If your bread was too doughy you probably did not use the exact amounts stated in the recipe or didn’t wait for the full rises.
Gp says
Actually grams are much more accurate but if you prefer to convert to cups, the most accurate chart I have found is the one on the King Arthur flour website.
Betsy says
This sounds heavenly and I’m going to make it tomorrow. I’m curious if you could tell me how many grams of starter to use if I already have a well developed one waiting in my refrigerator or do you feel that it works best to begin with a new starter?
Many thanks!!!
Lorena Grater says
I haven’t tried with an older starter but 450g is what I would try because the 220ml water and 220g flour and 7g yeast are basically a pound.
Raeleen says
Please update the recipe to 1 pinch of salt and 25g of sugar….. someone may take this at face value and not realise the mistake
Lorena Grater says
OMG! Thank you so so much for pointing this out! I really appreciate it. Just corrected the mistake.
Raeleen says
Your welcome. It came out beautifully and now I am making more but I need to try a half batch as it is just me… what do you advise for cooking time?
Lorena Grater says
Reduce the baking time only by about 10 minutes and then check the bread. By knocking at the bottom you’ll know if it’s done or not. It should sound hollow.
Cathy says
Hello! What is the size of the Dutch oven that you use? Thank you!
Lorena Grater says
It’s a 7-quart.
Cathy says
Thank you! That helps. I have a 3 quart so will probably put half in there and make the other half in my cast iron pan.
Dawn says
My dutch oven is smaller(4 qt I believe), do you know if this affect the outcome or the cooking time?
Lorena Grater says
I haven’t tried Dawn. If the whole dought fits into your dutch oven then no. If you’ll have to half the recipe I would reduce the baking time by 10 minutes and check on it. If it sounds hollow it’s done. If not, you’ll have to return it into the oven.
Dawn says
I tried it and it still cooked great. I cut a piece to make toast for breakfast this morning and added my own mixed topping of applesugar(dehydrated and powder apples), cinnamon and sugar and it was delicious.
Lisa says
This bread is one of my favorite fall apple recipes. The recipe is spot on, makes a huge tender, sturdy loaf so filled with flavor. Thank you so much. Recipe is genius❤️
Lydia says
Just made this bread, and it’s delicious! Thank you!
mangomama says
Anyone try a mixture of whole wheat flour and all-purpose flour?
Lorena Grater says
I haven’t tried with my specific recipe but I have tried with other recipes and it works well. The bread doesn’t rise as much but a mix of both flours still gives for a nice rise and texture.
Judy Peterson says
how would I convert the measurements to US measurements ?
Lorena says
You have to buy a digital scale. Artisan bread recipes cannot be made with cup an spoon measurements, they are not exact enough. You can get a digital scale for under $15 at any kitchen store, target, or online.
Rosemary says
I made this amazing bread today, I love making bread. I added 1/2 cup of stevia to the flour mixture and after chopping the apples tossed them in cinnamon and stevia. Also mixed butter with cinnamon and stevia in case anyone wanted to butter it. Thanks for the tip on the apples since usually I mix everything together and let it sit for 12-18 hours before baking. This is my husband’s new favorite bread.
Rosemary says
Oh, I also added walnuts
Jennifer says
This looks amazing. I love your detailed post, video and recipe! Thank you so much. I was wondering if you know if it would be ok to sub the milk with unflavored/sweetened almond milk.
Lorena says
No, you can’t. The milk is needed for the milk bacteria. It’s only a little over a tablespoon. If you are intolerant, simply add 20ml water instead of the milk. Almond milk won’t have the same effect as cow’s milk so it’s not necessary at all, water will suffice.
Scott says
Milk bacteria? Only if you can get raw milk; pasteurized milk should be essentially sterile.
Andrea Poole says
I just made this and we all love it! I buttered the top when it came out of the oven and sprinkled cinnamon and sugar lightly over it. This will be a regular treat in our house and a great bread to bring to my family over the holidays. Thank you!
Lorena says
I’m so so happy to read this Andrea! Also, butter, cinnamon, and sugar on top sounds HEAVENLY!